 |
|
|
|
|
|
|
|
|
|
|
|
|
|
|
|
|
|
|
|
|
|
|
|
|
|
|
|
|
|
|
|
|
|
|
|
|
|
Aileron mounting brackets and gap seals for the flaps and ailerons |
|
|
 |
|
|
|
|
|
 |
|
|
|
|
|
|
 |
|
 |
|
|
|
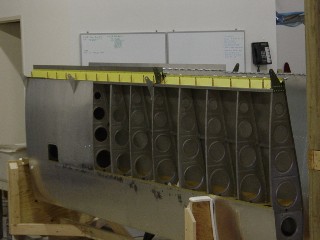
I worked on the aileron attach brackets and gap seals while the wings were still in the cradle. This seemed to be the easiest thing to do since I could do both wings at the same time. |
|
|
|
 |
|
|
|
 |
|
|
|
|
|
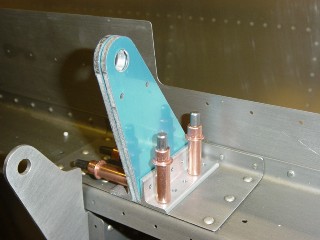
The brackets were primed and riveted together. There are still clecos on the outboard bracket as I took these pictures after I used the hand riveter, but before I got out the air rivet gun. The few on the side of the outboard brackets could not be done by hand because the yoke would not fit around the rib. |
|
|
|
 |
|
 |
|
|
|
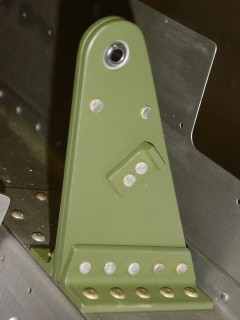
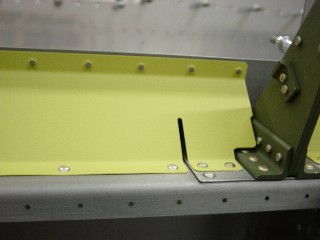
Here the gap seals for the ailerons and flaps are being riveted in after I primed them. The picture on the right is misleading due to a reflection in the picture. It looks like the gap seal has a crease in it half way up next to the bracket, but it is just a reflection. You can see I used a different primer on the gap seals than the brackets. I went through a lot of iterations of trying different primers, and have arrived at what I finally perfer. When I am only doing a few small parts like the brackets I use the Tempo rattle cans of Zinc Chromate. When I am doing larger pieces with an HVLP sprayer, I use Sherwin Williams Zinc Chromate. That is why you see two different colors above. In retrospect I should have gotten the same color in both primers, but it really doesn't matter since it will all be painted anyway. |
|
|
|
 |
|
|
|
 |
|
|
|
|
|
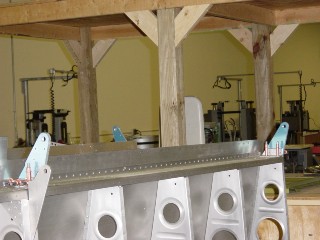
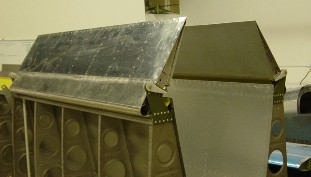
Here the ailerons are mounted on the wings. I have adjusted the pushrods for neutral position when I instaled each aileron individually. This picture was taken after the removed the jig. |
|
|
|
|
|
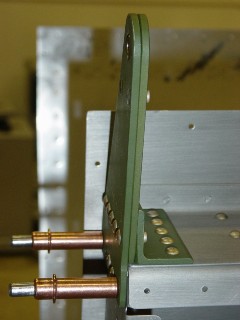
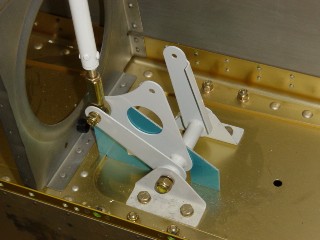
The bellcrank installed with the aileron pushrod and the neutral position alignment jig. Now ready to mount aileron. This is the right wing. |
|
|
|
 |
|
|
|
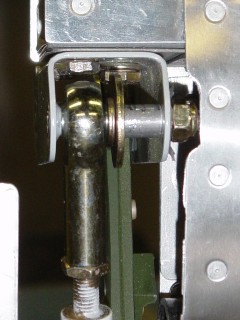
This was a tight fit. The bolt that goes through this pushrod has to be grinded down just enough so that there are still two threads past the bolt once it is torqued, but still will not extend to the aileron skin. The nut just fits in the space between the aileron skin and the bracket. You notice the bolt is actually a countersink screw head, this is a place where I was glad I hand the Snap-On torque screwdriver to torque this bolt. |
|
|
|