| Here is a similar install on a Helix ( also installed is a CD Changer ) |
| The following is an alteration done to one of my Reflexs. This is for informational purposes only. |
| Any modifications are done at your own risk. Check local laws for restrictions on some of these changes. |
| Reflex Radio Install |
| PROBLEM: |
| Gotta have tunes when I ride |
| SOLUTION: |
| Install stereo system |
| TOOLS AND EQUIPMENT NEEDED: |
| NOTE: ************************************************** |
| Some of the items posted below were ordered from Crutchfield Electronics |
| www.crutchfield.com if you order from them use the following referral code: p8pb9-ayc8p-hyx4d |
| using this will get me some credit PLUS if you've never ordered from them before it'll get you $20.00 off your first $200.00 order. |
| PARTS: |
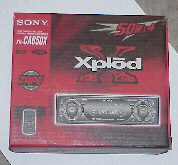
| SONY XR-CA650X ( RADIO) Item #158XRCA650 Cost $129.99 ( Picture RI01 ) |
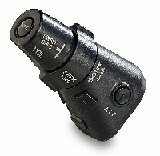
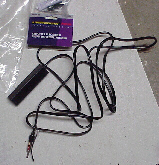
| SONY RM-X4S ( WIRED REMOTE ) Item # 158RMX4S Cost $34.99 ( Picture RI02 ) |
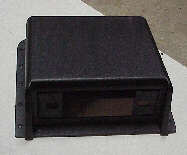
| UNIVERSAL UNDERDASH MOUNT HOUSING Item 12099000 Cost $15.00 ( FREE WITH RADIO PURCHASE ) ( Picture RI03 ) |
| SPEAKERS - I had speakers already but you may need to order some. Models would depend on your install location. |
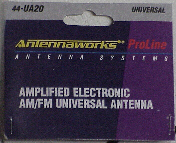
| ANTENNA ( I already had one ) |
| WIRE - I went to the local auto shop and bought a trailer wiring kit. These wires are big enough to handle the load. They are designed to be exposed to the weather and are oil resistant (coated ). They are joined together (group of 4 ) and are flat which make it easier to run thru tight spaces. |
| WIRE TIES |
| WIRE CONNECTORS ( For battery posts and connection of wires together if not soldered ) |
| WIRE CONNECTOR TOOL |
| ELECTRICAL TAPE |
| THESE WERE SPECIFIC TO MY SPEAKER INSTALL YOURS MAY DIFFER ( To mount my speakers I used 2- Radio Shack Project Enclosures (270-1802), 2 Radio Shack 3.5mm (1/8in) Phone Jacks (274-249), Mounting Tape, 2 hose clamps and 2 3.5mm (1/8in) Phone Plugs (already had, don't know part number) |
| KNIFE |
| SCREWDRIVER |
| DRILL |
| DRILL BITS |
| DIFFICULTY RATING: |
| MEDIUM |
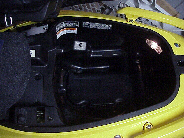
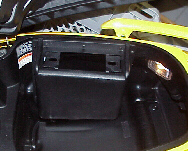
| 1. Open Seat and remove mat and tool kit ( Picture RI04 ) 2. Remove Universal Underdash Mounting piece from the box. 3. Find a location to mount the box (DO NOT MOUNT IT YET) The rear of the box maybe cut off if you so desire BUT remember if you remove it stuff bouncing around in the trunk may hit wires and etc. ( Picture RI05 ) 4. Since you are using a DIN radio you can cut the post holders out. 5. Remove radio from box. 6. Find square DIN mounting bracket and mount it in the hole in the mounting box 7. Now mount the box in your desired location. I would suggest making a small hole to make it easier to screw in the screws. Be careful with the drill ( Don't go too deep or drill where there is something on the other side of the plastic to hit ) ( Picture RI06 ) 8. Run your speaker wires to your desired location and mount speakers. Attach wires |
| Run speaker wire ( Picture RI07 ) |
| My speakers are inside pouches with velcro staps on them |
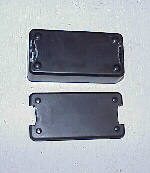
| Project boxes were used to mount the speakers Slots were cut into each side for mounting ( Picture RI08 ) |
| One side for velcro strap to go thru and the other for a hose clamp to hold it to the mirror stem. |
| Double sided tape holds the project box to the brake fluid holder |
| Wires run to the box then connected to Phone jacks ( could be hardwired but this allows removal ) ( Picture RI09 ) |
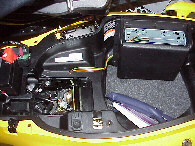
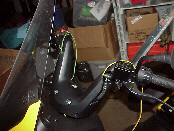
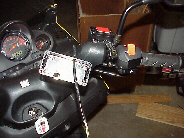
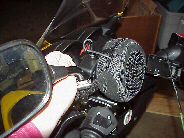
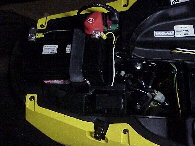
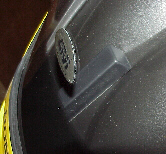
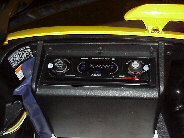
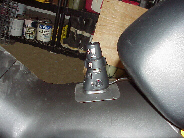
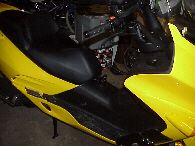
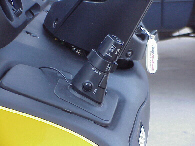
| 9. Mount box ( Picture RI10 ) ( Picture RI11 ) ( Picture RI12 ) 10. Run your power wires ( One to Battery + One to Battery - and one to a source that comes on when the key comes on ) There is a fuse box left of the battery that makes for an easy tie in. ( Picture RI13 ) ( Picture RI14 ) 11. Install Antenna ( your type and location may vary ) ( Picture RI15 ) ( Picture RI16 ) ( Picture RI17 ) 12. Mount remote and run wire ( Picture RI19, RI20 ) 13. Hook wires to back of radio and install in box. (Picture RI18) 14. TEST 15. You are Done |
| INSTRUCTIONS: |
| This is how my speakers were installed. I got them on eBay. I don't have any more of them. Other known mounting locations are in face of glovebox, surface mount speakers on dash or on running boards. |
| OTHER KNOWN RADIO INSTALLS: |
| If you have documented a radio install E-Mail the link to me and it will be posted here. |
| If you need a larger view of any of the pictures on these pages E-Mail me with the picture number and I will send it to you. |
 |
| Picture RI01 |
 |
| Picture RI02 |
 |
| Picture RI03 |
 |
| Picture RI04 |
 |
| Picture RI05 |
 |
| Picture RI06 |
 |
| Picture RI07 |
 |
| Picture RI08 |
 |
| Picture RI09 |
 |
| Picture RI10 |
 |
| Picture RI11 |
 |
| Picture RI12 |
| MORE PICTURES BELOW |
 |
| Picture RI13 |
 |
| Picture RI14 |
 |
| Picture RI15 |
 |
| Picture RI16 |
 |
| Picture RI17 |
 |
| Picture RI18 |
 |
| Picture RI19 |
 |
| Picture RI20 |
 |
| Picture RI21 |
| NOTE: The remote was moved beacause I kept bumping it. I had to get an extention for it ( 3 foot headphone cable from Radio Shack ) ( Picture RI21 ) |
 |
| Picture RI22 |