
|
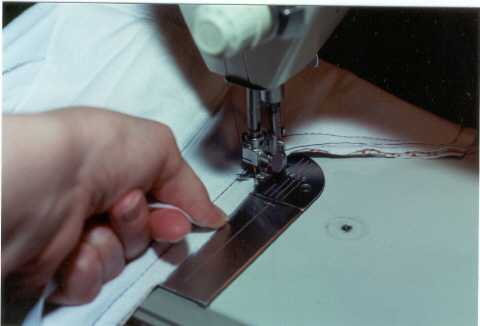 |
| Sewing the outside edges and putting elastic in the legs- Sew around the edges with a straight stitch and 5/8 inch seam allowance. Leave an opening at one end of 5-6 inches. Elastic- In the picture my left hand is stretching the elastc as I sew, my right hand is ussually holding the diaper guiding it through as I sew. But, someone had to take the picture. (Stretch it firmly as you sew, but don't overstretch it.) |
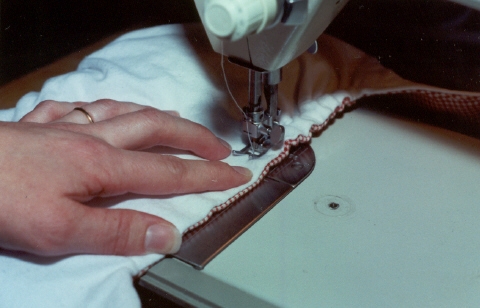
| Start the elastic at your marked dot. I use either 1/2 inch or 3/8 inch white woven elastic. Sew the elastic on with the broken zig zag stitch. (You'll be sewing the elastic to the seam allowance.) Be sure to firmly tack both ends of the elastic. When you reach your second dot cut the elastic after you tack it down. Do both legs. Clip and turn- Trim the corners of your diaper prior to turning it. Don't make the mistake of trimming too close to the stitch line. Turn the diaper and push your corners out neatly. Top stitching- (I prefer the broken zig zag around the elastic in the legs.) After you turn the diaper top stitch the opening closed and continue topstitching around the diaper. When you come to the elastic in the legs, be sure to stay well away from the elastic. If you stitch too close to the elastic you can kill your stretch. |
 |
| Click For the Sewn by you page! Do you have a cute picture of a diaper made from this pattern? I'd love to post it! More new pictures! |
| Note- I have gotten lots of emails from moms who want to make all in ones. This pattern is best suited for use with a pull on style cover and not as an AIO. I use Gerber covers and the like. This pattern is intended for Moms who are looking for something basic and easy. It is a spin on a prefold. |