Building My First Boat
If you would like me to let you know when I update this page click here
Thursday February 7 2002������
������� So far I have spent the past two days reading and looking at pictures of boats that people have built and different plans that are available. I came across Uncle Johns Classic Cajun Pirogue (pronounce pee ro) by searching www.google.com. There were allot of different boat plans available but I liked the look of Uncle Johns.
Friday��������
��������I started cutting down the 1/4 inch luan plywood Friday night even before I received the kit. I scarfed the joints and glued them together. At first I used Titebond Type II wood glue but I had trouble getting the very edges to stay down so I took them back apart and used 5 minute epoxy which worked like a charm.
Saturday�
������� I received Uncle Johns boat kit on Saturday and glued all the ribs together. I used epoxy to hold the joints together. After allowing the ribs to dry I began to attach the sideboards to the stems, this step is what makes the project begin to look like a boat. This is also where the people who are skeptical begin to believe.
Monday
I spent Monday night cleaning up all the seams where the ribs meet the sideboard. I didn't get as far as I thought I would by now. I plan on having the bottom cut and attached by tomorrow night.
Tuesday
The bottom is cut and I sanded down the bottom of the side rails to give the bottom piece a smooth surface to lay on. I attached the bottom to the sides with 5/8 inch brads using my nail gun and epoxy. I had some nails shoot out on the inside and outside it was difficult with such a thin piece not to have some nails go where there not suppose to. If anyone has a better techniques please share it.
Saturday
I glassed most of the bottom. I started by trying to use half of the fiberglass sheet on the bottom of the boat but I found that that was more difficult than I had planned, so for the rest of the bottom I cut the full sheet into 2 foot strips. I found the strips were much easier to handle. Now I have read a couple of descriptions on the proper way to apply the fiberglass and epoxy. There were 2 different views on how to do this, one (which is the one I used) is to coat the section of wood with epoxy and lay the fiberglass cloth down on top of that and squeegee on more epoxy on top of that. The second is to apply the epoxy to the wood and let it dry until tacky then lay the fiberglass down and pour more epoxy on top of that and squeegee out the wrinkles. This seems like it would be easier but I haven't tried it, not sure if the epoxy would soak through all the way.
Another tip that I did some research on is the price of epoxy....or what you may think is epoxy. Now for the record spend $100 from Raka or the West System and bye a gallon of epoxy and a quart or 2 of hardener and the fiberglass cloth. The stuff they sell at Home Depot or Lowes is Fiberglass Resin (polyester not epoxy). Now even though they sell this for repairing wood and fiberglass boats does not mean that it is waterproof.
I learned this the hard way and didn't take the advice of a wise man who told me to bye the stuff from Raka (that's right Chuck I should have listened). Chuck has built a beautiful pirogue to see it click here he has some really cool stories in his forum about some of the canoe trips he's taken (although I am not sure I would take my little wooden boat in the same water as gators :-) . Take it from people who have built this boat. If you are serious about building this boat and making it float and are looking to save money just spend the $120 with Larry at Raka's. You wont be able to save that much money unless you don't cover the entire bottom of the boat with fiberglass. The entire boat should cost no more than $200 which is really cheap compared to purchasing a canoe.
I am trying to point out all the do's and don'ts about building this boat and I think I have done most of the don'ts hopefully they will help you when you begin your process.
Now I enjoyed the wood working part of the boat building process much better than the fiberglassing. I haven't quite got the hang of that yet hopefully the next boat I build will be a bit easier.
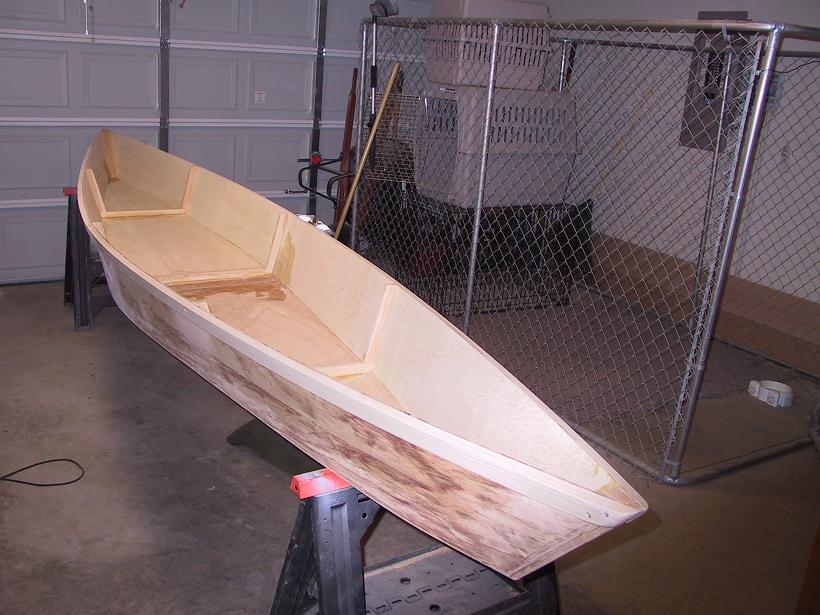
The picture below is the where I left off. To view pictures of the building process click here or click here for the parts list.
�Latest Picture-� Saturday night, after attaching begining to
fiberglass the seems inside the boat. She is coming
along.

�
�
�
�
�
�
�
�
�
�
�
�
�
�
�