(available for free download at:
Open Office Web Site
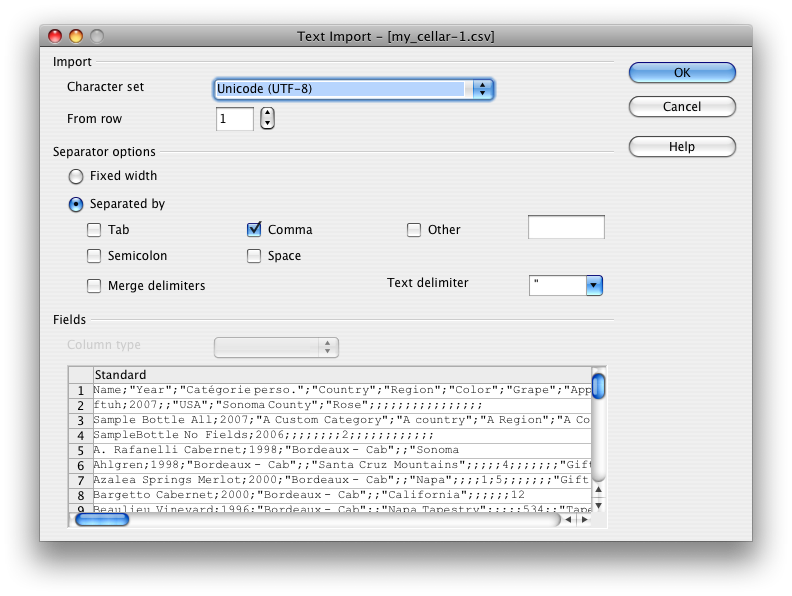
1.Double clicking on "my_cellar.csv" in your Finder, Open Office will present you with a screen that will look like this:
Original Open Office Screen when not modified
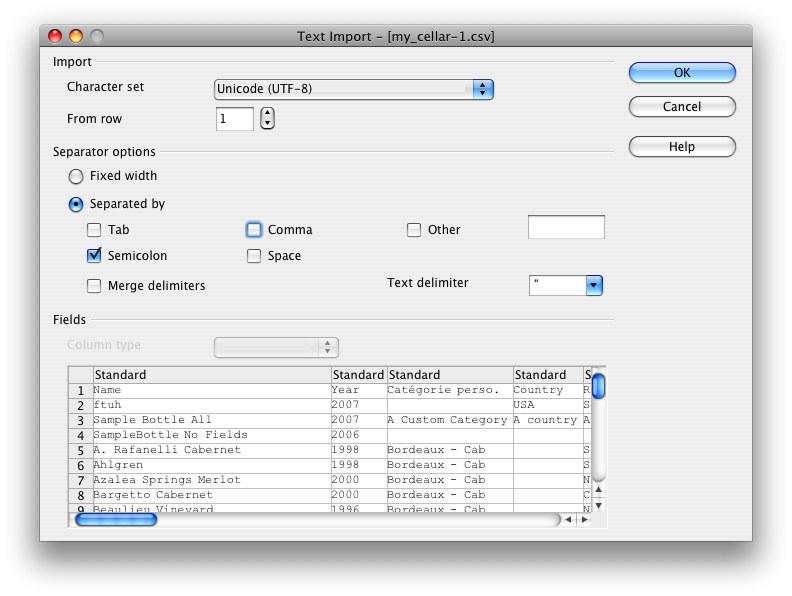
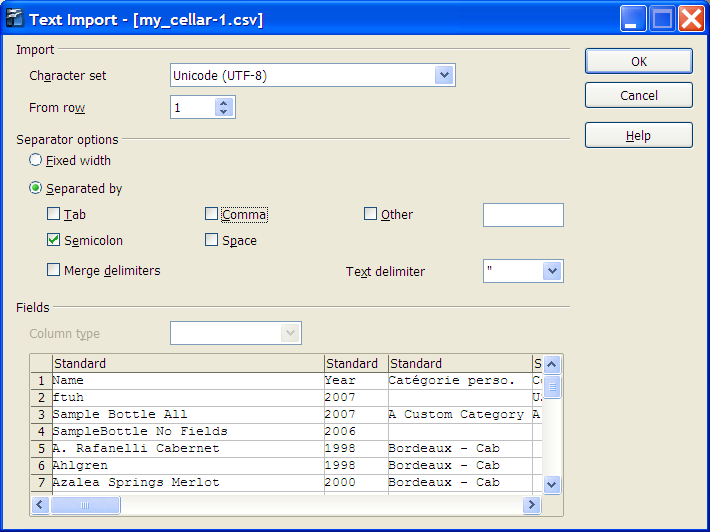
2.Change the settings to look like this and click OK
-uncheck the "Comma" checkbox
-check the "Semicolon" checkbox
Open Office Screen with settings for Wine Cellar
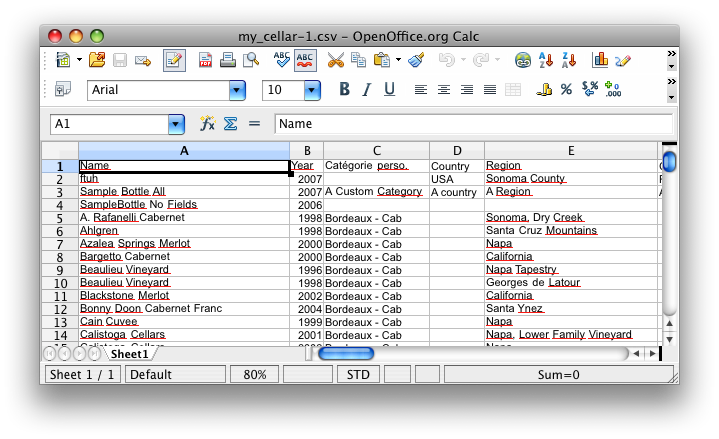
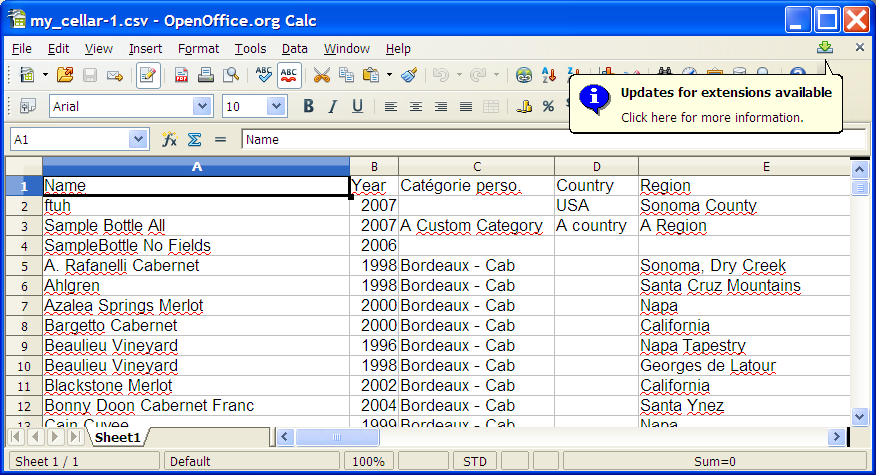
3.You can now work with your wine cellar exported from your iPhone. The result should look like this:
Final Results
(available for free download at:
Open Office Web Site
1.Double clicking on "my_cellar.csv" in your Finder, Open Office will present you with a screen that will look like this:
Original Open Office Screen when not modified
2.Change the settings to look like this and click OK
-uncheck the "Comma" checkbox
-check the "Semicolon" checkbox
Open Office Screen with settings for Wine Cellar
3.You can now work with your wine cellar exported from your iPhone. The result should look like this:
Final Results
Instruction for others like MS Excel
To open the file 'my_cellar.csv', please do the following:
Save the file to your hard drive
Launch Excel
Go to File > Open then select the file. The Import Wizard will start.
In the Original data type box, select "Delimited," click Next
In the Delimiters box, select "semi-colon," click Next
Select the columns that has Name, Category, Country, Region, Color, Grape, Winery, Denomination, Aromas, Comments, Storage Location by holding the shift key and clicking the columns. Once selected, in the top right hand box called Column Data Format, select "Text". The label above those three columns will change from General to Text. Click Finish.
Once the file has opened, save the file as an Excel Workbook
Importing Instructions
Instructions will be improved as user feedback is received, so feel free to ask questions if you are having problems or if you feel some instructions are unclear.
Click
here to send an email.
Important thing to know:
Do not use ; (semi-colon) in the names, description comments, etc. Use the . (dot) or a comma.
Do not use " (double quotes) in the names, description comments, etc. You can use the single quote instead
These are restriction due to the file format used.
You can download the file format template: Template.txt
Make sure you right click and save as "Template.csv"
This file contains an example of a bottle that will be successfully imported.
All you have to do is to insert more lines in the file
Or you could format an existing Excel spread sheet will all your bottles to follow the format of the template.
Make sure the order of the columns is exactly the same
If you have less information of what is presented in the template, leave the column empty
If you have more information of what is presented in the template, do not enter it in the file.
the CSV file format used is the following:
Separated by: ; (Semicolon)
Text Delimiter: " (double quote)
Columns to pay special attention:
Date purchased, Date Tasted
Make sure the date format ends up the same on your iPhone. Depending on your local region, it could be either YYYY-MM-DD or DD-MM-YYYY.
Favorites
Leave this columns empty if you don't want a bottle to show up in your favorite list.
Put 1 if you want the bottle to show up in your favorite list.
Percentage of alcool
Price
I suggest trying to import your list with only a few bottles in it and see the results on the iPhone before trying to import your whole cellar.
Once the results are satisfying and the columns that need more special attention are fine, you can import your whole cellar.
If a bottle is already on the iPhone (To be considered the same bottle, the 'Name' and 'Year' must be the same), the information about this will be updated. (The pictures will be kept)
All the new bottles in your file will be added to the list.
You cannot delete bottle when you are importing. You must manually delete them on your iPhone.
Bottles can only be added or updated using the import feature.
When the exporting of pictures will be supported, you will be able to put back all your pictures on your iPhone and assign them back to the bottles. This will be useful if you are upgrading from Wine Cellar. So don't delete Wine Cellar yet if you have upgraded and you want to keep your pictures.