

HOW DO I DO THOSE SCREEN SHOTS?
Ever
wondered how I made those screen shots in these pages? It's pretty easy! ![]() You don't need a camera and scanner (or a digital camera, if you have one) to do
it. What you need is already at your fingertips... literally! It's
called the [PRINT
SCREEN] key.
You don't need a camera and scanner (or a digital camera, if you have one) to do
it. What you need is already at your fingertips... literally! It's
called the [PRINT
SCREEN] key.
So, where is it? On regular keyboards, you will see a group of buttons -- three of them -- labeled like in the picture below.
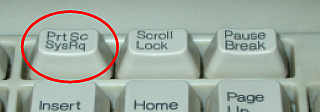
What you will use is the one labeled [PrtSc/SysRq].
CAPTURING THE ENTIRE SCREEN
To capture the contents of the entire screen, just follow these steps:
1. Hit the [PrtSc/SysRq] key. If you pay attention to the mouse cursor, it will blink momentarily. That signifies that the contents of the whole screen has been captured and placed in the "clipboard." What's a clipboard, you say? Simply put, it's a temporary place in memory where Windows store text, pictures, or any object when you hit the [Ctrl+C] key (or in this case, when you hit the [PrtSc/SysRq] key).
2. Click Start > Programs > Accessories > Paint. This will start the built-in Paint program that came with Windows.
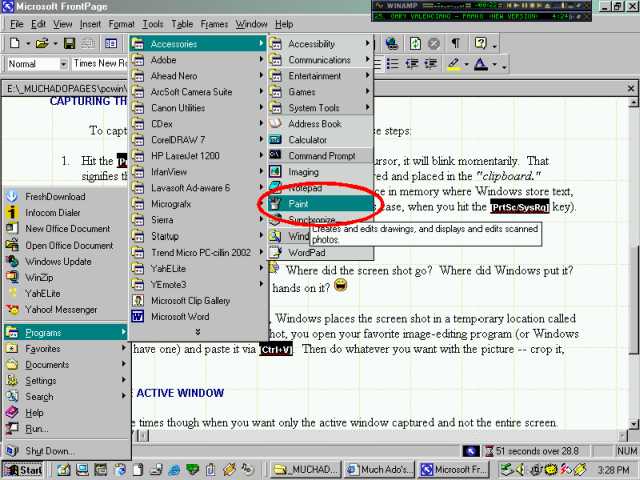
3. Click Edit > Paste or hit the [Ctrl+V] key. It is possible that you will get an alert message. Just click the [YES] button.
4. You can now do whatever you want with the picture -- print it, save it, etc.
CAPTURING THE ACTIVE WINDOW
There are times though when you want only the active window captured and not the entire screen. That one is simple too. Just follow these steps:
1. Put the window you want in focus by clicking it's title bar.
2. Then, instead of plainly hitting the [PrtSc/SysRq] key, press and hold the [Alt] key and then hit the [PrtSc/SysRq] key. This action will place the contents of the active window (as opposed to the entire screen) in the clipboard.
3. To see the captured window, open your image-editing program and paste from there (see steps 2 through 4 in the previous section "Capturing the Entire Screen").
I use this method a lot when I take screen shots of dialog boxes. It's clean and there is no need to further crop the image.
| Previous Page | Main Page |