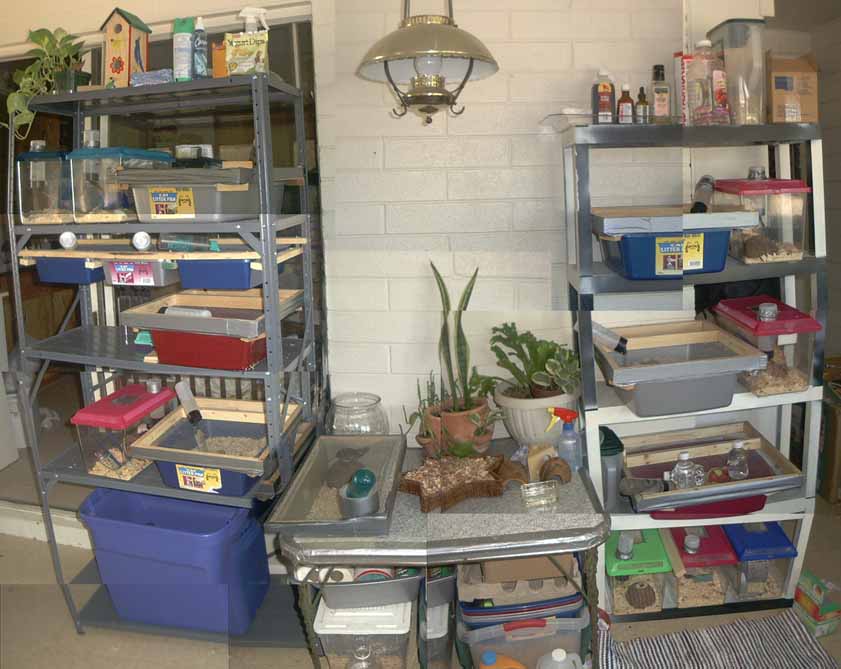
Once I purchased the cat litter pans, I had simply to purchase the materials for the lids and make them. When I went to the store, to make four cages, I purchased the following:
When you add in water bottles, 4 @ $2.99 each, the rough cost for the building of the cages is a little under $10.00 per cage. Later on, I plan on purchasing four more cat litter pans, so that when it comes time for cage cleaning, I can prepare four fresh cages, spend less than a minute transferring the mice, nests even, over to the clean cage, and then move on to the next cage. It will result in the minimal cage-cleaning disturbance from me, and minimize cage cleaning time for me, so I can just dump and clean four cages at once and they can air out for several days before having the mice in them again.
Once all the pieces are purchased, the actual construction can begin. Below is a picture of the dimensions of the cat litter pans:
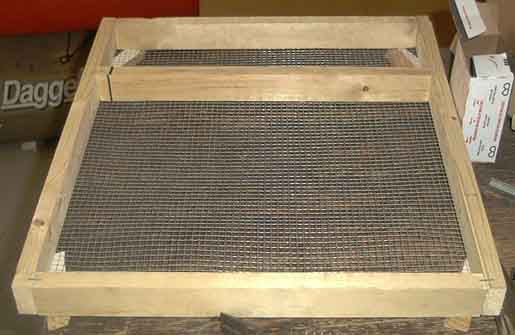
With these dimensions, I have to only allow an extra 1/4 inch in the side pieces that I cut. For one cage I cut three pieces which are 15.5 inches long, and two pieces which are 19 inches long. In this way I will have a lid, like the one below, to use on the cage:
To make the lid, I formed it in it's final shape and used a staple gun to hold it roughly to the proper shape. Afterwards I placed one corner of the hardware cloth to one corner of the lid, and stapled it down. Using some tin-snips (wire cutters will do) I cut the two sides which extended past the sides of lid. Next I took six nails, and nailed in the ends of the three cross bars. There are two reasons for the two crossbars. One of them is for stability, so that the lid isn't resting on the cat litter pan only on the hardware cloth itself. The second reason is that the three to four inch space created on top is a good food hopper and place for the water bottle. This can be filled up with lab blocks, or dog food, or whatever you feed your mice, and will reduce the amount of food the mice will spoil.
After nailing the structure together, I took four scrap pieces of wood and on the same side as the hardware cloth I nailed them to the corners, further increasing the stability of the entire lid, and reducing the chance that the lid will be pushed off by a careless person, or a determined mouse! As a final touch duct tape was spread all around the edges of the lid to soften the few protruding edges of hardware cloth and reduce the chance for splinters from the raw wood.
The result is a serviceable lid that gets the job done with little hassle. It isn't a beautiful lid, but it works.