 Butterfly Name Tags
Materials
Required:
o
Fine point permanent markers
o
Poly Shrink plastic (available from ‘Create’ at the Flagstaff shops)
o
Butterfly template (one per table)
o
Scissors
o
Safety pin (attached with glue gun)
Instructions:
1.
Mark
butterfly shape from template onto Poly Shrink plastic
2.
Cut
around butterfly shape
3.
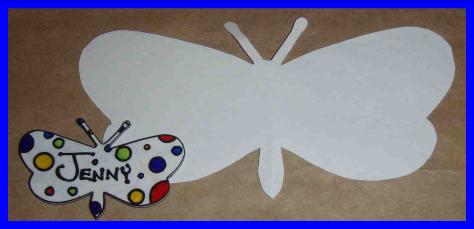
Decorate
your name tag using the permanent markers and your imagination! You could use dots, stars, stripes, flowers
or even make it look like a realistic butterfly - remembering to have your name
written nice and big! The Poly Shrink
plastic will shrink to 40% of original when baked making even the roughest
design look like an intricate master piece!
4.
Once
you have finished decorating, hand your butterfly to Jenny who will bake it and
attach the safety pin.
Costs:
|
item |
no. |
cost |
total |
|
Poly Shrink plastic sheets (cut into 4) |
15 |
2.00 |
$30.00 |
|
Safety Pins (pack) |
1 |
5.00 |
$5.00 |
|
Permanent markers (got cheap off trademe) |
24 |
0.50 |
$12.00 |
|
|
|
|
|
|
total |
|
|
$47.00 |
|
Approx.cost
per mum = $0.80 (for 60 mums) Other: We made the committees names tags in advance and for a fun
meet & greet with the committee the MOPPETs helpers also made the
nametags. We also decorated spare nametags and left a blank space
for new MOPs mums to add their names. Throughout the year as more mums come along we can offer the
new mum a nametag, let them name it and then shrink it for them. How it went: - Further Notes from questions about this
craft: |
|
|
|
|
|||
|
|
|
|
|
||||
|
|
|
|
|
||||
|
|
|
||||||