|

Updated 3/01/02


My
plant tips
My record


Feel free to contact me
and tell me what you
think of my work
or to report any problems
with my site
|
|

Tim's
planting tips.
Root pruning.
Root pruning is one of the most important components
of the miniature tree to increase health and life span.
As a tree grows older, the rate of root growth decreases. By trimming
the roots, you encourage more growth
and in doing so, you increase the life span of the tree. This has been
important for trees that age over a century.
I read a while back that to learn- what is classically thought of as a
dark and "never do" of horticulture-
training and cutting roots, I learned that it is a good idea to practice
with another, omnipresent plant, thereby
not killing your beloved little tree and learning what to do and what
not to do.
I did this with an ivy which was growing in the pot holding my Monstera
(which happens far to often as I placed it
under an ivy when it was dropping seeds- my bad....). As it was a pest,
I cared not if the plant survived or not-
at least I would know if I had learnt right or not. As it turns out,
four months later, it still lives- in it's
aluminum, custard tart tray.
What follows is my second attempt with a conifer that I just picked up
for AU$1.00. So again, it will not be a
huge lose if it dose not survive. The whole group of seedling conifer's
were badly neglected and this one had
bent to grow under the mass above and for that made itself a great
subject for a cascade bonsai.
***This should be done at different times of the year for different
plants, most in winter when growth is slow
and nutrient needs are little- hence the reduced roots can handle the
need of the plant- but not all plants are the same.***
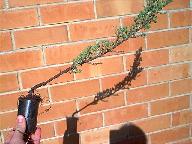
The bend can easily be seen in this picture. Not the roots that are
overflowing for the top and bottom.
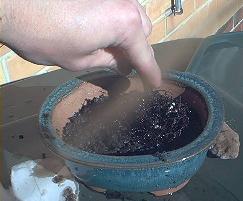
1.
The most important part of root pruning is to remember
to keep the roots moist- if they dry out the tree is as good as dead.
For this reason, keep a small bucket of water near by and soak the tree thoroughly
before starting with it.
While you are soaking the plant, get the pot ready. First you will need
a bonsai style pot which is typically clay, shallow
and has one or more large holes on the bottom of the pot. This (or
these) holes need to be covered with a mesh to ensure that no soil is
lost or pests can get in while allowing air and water to freely flow.
Next you want to fill the pot with you soil mix (click here for more
information on soil types), until the pot is about
2/3 or 3/4 full and water.
Soaking the plant.
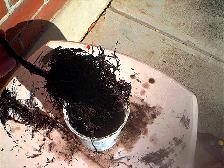
2.
Next remove the plant from it's pot. In my case with
the conifer, I found an impossible mess of roots with little soil.
You want to wash the soil clean from most of the soil before pruning.
Then carefully part the roots as much as possible.
The central root, a thick root that will head as far downward as it can,
is called the tap root. The tap root is what the plant uses as a counter
for its upward growth- it's anchor. Without the tap root- the tree can
never grow very high without losing it's in harsh winds (although some
still try!). Clear as much of the secondary, fibrous roots around the
tap root as needed to prune the tap root.
The best I could do with the conifer without damaging the roots too
much.
3.
Now comes the main point of the exercise- the trimming. You will
want to cut at least half of the tap root- even as much as two thirds.
Now clear it and any excessive secondary roots until you a fairly flat,
large "Disc" of secondary roots.
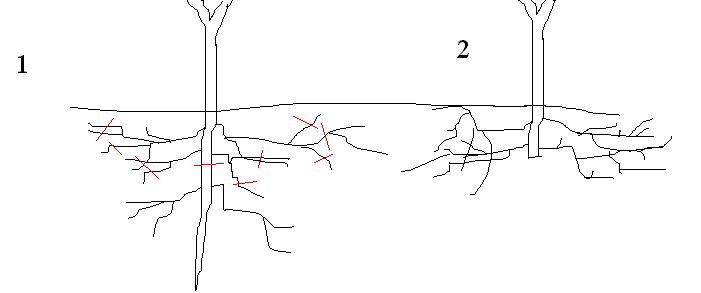
This is a simplified diagram of the pruning. The tree will eventually
gain its stability from the cared for fibrous
roots instead of the tap root.
4.
Remembering to keep the roots wet, wash the pruned plant to clear
away any cuttings and dirt- if any cut roots are kept near the plant it
could lead to the cut piece rotting and encouraging fungus to damage the
living tree.
Next, while the plant is soaking, make a hole in the soil mix in the
position you wish for the tree to be placed in.
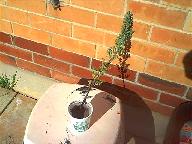
Then you place the tree in the position you want the it to face in the
pot. This can be very important from an artistic view point. This is
your tree, you want to show it off. So place it in the pot to create a
harmony between them.
The most important thing to remember here is to make sure that none of
the root are placed higher than their where they came from the plant-
this will render the root useless.
I placed the plant the the opposite side as that the plant will cascade
over the edge from. Sorry about the line
across the middle- I think that is my hair- it was very windy at the
time...
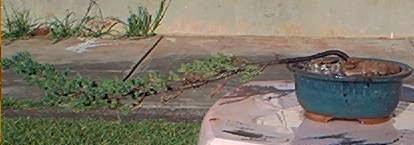
5.
After the plant is in position, next you have to place a moist
top soil over it. After that comes a few pebbles, maybe some moss
(although I could now get any at this time on year- too hot in Australia
for it), and a rock (or small log). The rock is for presentation, so it
calls for a keen eye- not just a omnipresent, driveway stone. Please
make it as important as the pot- you want it to create the feel of a
miniature scene of nature.
Then, if needed, wire or tire the tree into place until it has had time
to fix itself to the soil.
Do not place any fertilizer on it for a month. The new wounds will be
burned by the fertilizer, thus damage the tree.
It should take about ten days or more for he roots to have small
re-growth. A month should see it through the healing.
As soon as you feel sure about the plant, feel free to begin to wire and
shape it.
My end result.
Enjoy!
|