Squeezing Double Flush Trailing Edge Rivets
Click on these images to see the full size view.
 After reading an article in one of these recent RVators about double flush rivets,
I decided to take the advice and make a long steel "bucking bar" to use
for the trailing edge riveting. I used a peice of 3"x3"X1/4" angle iron
about 4 feet long that I had laying around the shop. I used the belt sander
to get a nice smooth finish, first with a course grit and then finer grit.
I then used a DA sander with a couple finer grits to put a finishing polish
on it. The piece of iron I used hapened to have two large holes near either
end which worked great to bolt it to the work bench flush with my work
surface. Note the 2x6 on the bench is secured to the bench to be used as
a stop for the leading edge of the elevator preventing it from slipping
during riveting.
After reading an article in one of these recent RVators about double flush rivets,
I decided to take the advice and make a long steel "bucking bar" to use
for the trailing edge riveting. I used a peice of 3"x3"X1/4" angle iron
about 4 feet long that I had laying around the shop. I used the belt sander
to get a nice smooth finish, first with a course grit and then finer grit.
I then used a DA sander with a couple finer grits to put a finishing polish
on it. The piece of iron I used hapened to have two large holes near either
end which worked great to bolt it to the work bench flush with my work
surface. Note the 2x6 on the bench is secured to the bench to be used as
a stop for the leading edge of the elevator preventing it from slipping
during riveting.
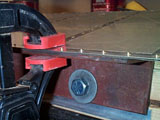
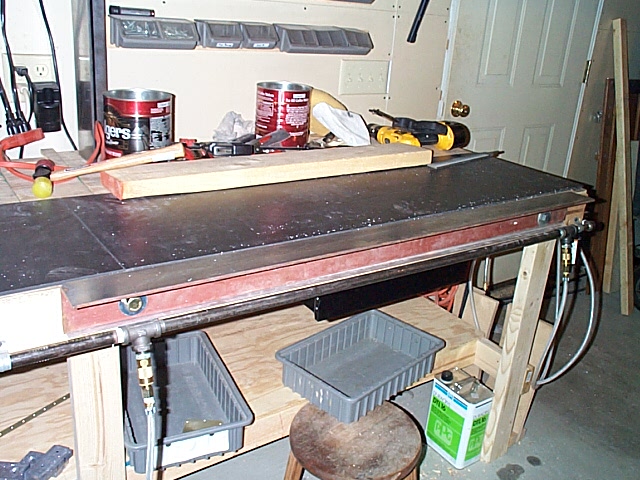
 I positioned the 2x6 stop so that the trailing edge was flush with the edge
of my riveting plate. This photo shows everything lined up and ready to
rivet - except the clamps!
I positioned the 2x6 stop so that the trailing edge was flush with the edge
of my riveting plate. This photo shows everything lined up and ready to
rivet - except the clamps!
 OK, now it's ready to go! I began the double flush riveting on the left elevator
using the rivet gun and the standard backriveting technique, and had reasonable
success. But, I thought it would sure be nice if I could use the pnuematic
squeezer on these rivets instead of backriveting. This got me thinking
about a flush set that had an appropriate angle to match the AEX wedge
used in the trailing edge.
OK, now it's ready to go! I began the double flush riveting on the left elevator
using the rivet gun and the standard backriveting technique, and had reasonable
success. But, I thought it would sure be nice if I could use the pnuematic
squeezer on these rivets instead of backriveting. This got me thinking
about a flush set that had an appropriate angle to match the AEX wedge
used in the trailing edge.
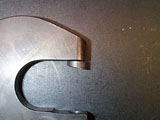 Soooo, I decided to sacrifice my 3/16" AN470 squeezer set and turn it into an
angled flush set. I used a benchtop disc sander to grind down one edge
and used a piece of AEX T.E. wedge as a guide to make the angle an exact
complement of the wedge. I took it down just far enough to remove the cup
from the set and have a smooth surface. After a few more passes with finer
sandpaper and a little polishing, I had an angled rivet set as seen here.
Soooo, I decided to sacrifice my 3/16" AN470 squeezer set and turn it into an
angled flush set. I used a benchtop disc sander to grind down one edge
and used a piece of AEX T.E. wedge as a guide to make the angle an exact
complement of the wedge. I took it down just far enough to remove the cup
from the set and have a smooth surface. After a few more passes with finer
sandpaper and a little polishing, I had an angled rivet set as seen here.
 Realizing that the angled set would have a tendency to fold the rivet over to one
side rather than set it flush the way I wanted, I used a standard flush
rivet set and pre-squeezed the rivets to the point where one edge was close
to flush with the thicker portion of the TE as shown here.
Realizing that the angled set would have a tendency to fold the rivet over to one
side rather than set it flush the way I wanted, I used a standard flush
rivet set and pre-squeezed the rivets to the point where one edge was close
to flush with the thicker portion of the TE as shown here.
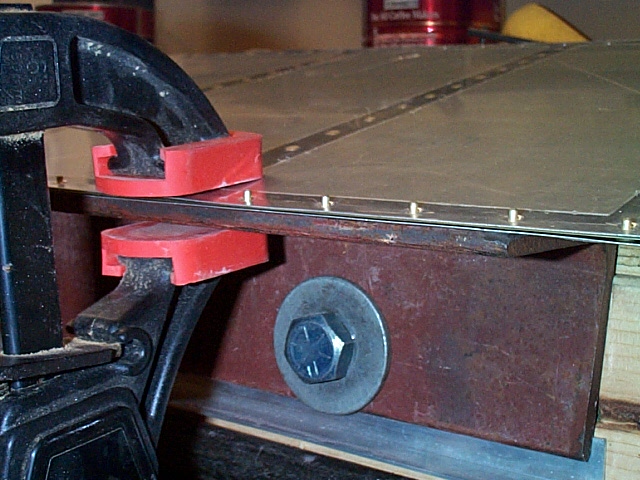
 I then used the angle set and completed the squeezing to get nice double
flush rivet heads. As shown here, I squeezed both the rivet plate and the
TE effectively using the rivet plate as the lower rivet set. I used an
AN470 squeezer set on the bottom of the rivet plate because I didn't want
to squeeze directly with the expensive adjustable set holder in the squeezer.
You can see one of the already set rivets through the yoke. Because of
the lighting, you can barely see a black reference line I made on the angled
set to make sure I could tell where the thickest part of the set was. A
firm grip on the squeezer was required when squeezing, as there was a slight
tendency for the angled set to want to slide off the rivet. However, this
could be easily compensated for with a firm grasp on the pnuematic squeezer.
I'm not sure how this technique would work with a manual squeezer, as it
might require a third hand to prevent the angled set from slipping off
the rivet. A firm back stop (as described above) to prevent the work piece
from sliding out from under the angled set is essential.
I then used the angle set and completed the squeezing to get nice double
flush rivet heads. As shown here, I squeezed both the rivet plate and the
TE effectively using the rivet plate as the lower rivet set. I used an
AN470 squeezer set on the bottom of the rivet plate because I didn't want
to squeeze directly with the expensive adjustable set holder in the squeezer.
You can see one of the already set rivets through the yoke. Because of
the lighting, you can barely see a black reference line I made on the angled
set to make sure I could tell where the thickest part of the set was. A
firm grip on the squeezer was required when squeezing, as there was a slight
tendency for the angled set to want to slide off the rivet. However, this
could be easily compensated for with a firm grasp on the pnuematic squeezer.
I'm not sure how this technique would work with a manual squeezer, as it
might require a third hand to prevent the angled set from slipping off
the rivet. A firm back stop (as described above) to prevent the work piece
from sliding out from under the angled set is essential.
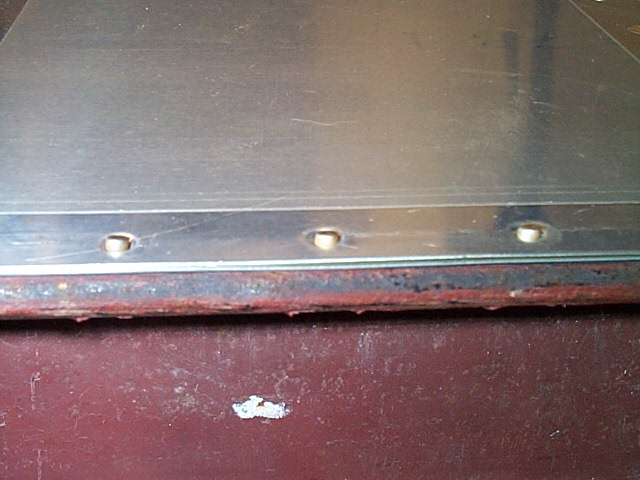
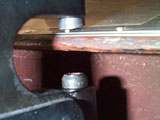
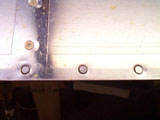 You can see the results are nicely squeezed double flush rivets. However, you'll
notice the slight indentation above the rivet on the left was caused when
using the standard flush sets to "pre-squeeze" the rivets and I didn't
have the rivet close enough to the edge of the sets.
You can see the results are nicely squeezed double flush rivets. However, you'll
notice the slight indentation above the rivet on the left was caused when
using the standard flush sets to "pre-squeeze" the rivets and I didn't
have the rivet close enough to the edge of the sets.
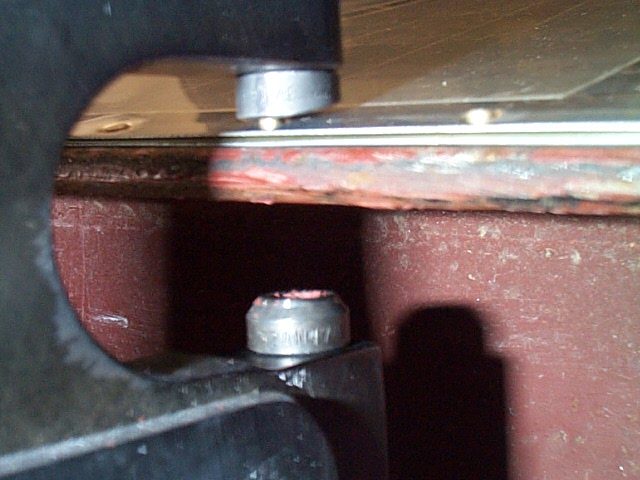
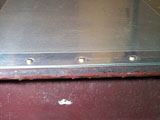
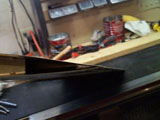 This is an end view of the right elevator after using the squeezing technique
with appropriate clamping along the trailing edge. You can see the E-906
root rib to the left and the end of the AEX wedge in the center. You can
see how straight the trailing edge turned out looking down it's length
to the workbench.
This is an end view of the right elevator after using the squeezing technique
with appropriate clamping along the trailing edge. You can see the E-906
root rib to the left and the end of the AEX wedge in the center. You can
see how straight the trailing edge turned out looking down it's length
to the workbench.
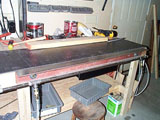
 After reading an article in one of these recent RVators about double flush rivets,
I decided to take the advice and make a long steel "bucking bar" to use
for the trailing edge riveting. I used a peice of 3"x3"X1/4" angle iron
about 4 feet long that I had laying around the shop. I used the belt sander
to get a nice smooth finish, first with a course grit and then finer grit.
I then used a DA sander with a couple finer grits to put a finishing polish
on it. The piece of iron I used hapened to have two large holes near either
end which worked great to bolt it to the work bench flush with my work
surface. Note the 2x6 on the bench is secured to the bench to be used as
a stop for the leading edge of the elevator preventing it from slipping
during riveting.
After reading an article in one of these recent RVators about double flush rivets,
I decided to take the advice and make a long steel "bucking bar" to use
for the trailing edge riveting. I used a peice of 3"x3"X1/4" angle iron
about 4 feet long that I had laying around the shop. I used the belt sander
to get a nice smooth finish, first with a course grit and then finer grit.
I then used a DA sander with a couple finer grits to put a finishing polish
on it. The piece of iron I used hapened to have two large holes near either
end which worked great to bolt it to the work bench flush with my work
surface. Note the 2x6 on the bench is secured to the bench to be used as
a stop for the leading edge of the elevator preventing it from slipping
during riveting.