After modeling a scene you can apply attributes such as color, texture, transparency and reflectivity to objects to achieve photorealistic results. These attributes are created using shaders to create realistic looking materials to assign to objects.
Shaders are kept in the Multi-lister, an important window that displays shaders, lights or forces, or all of these at the same time. The Shader mode of the Multi-lister is used in this lesson as you begin working with shaders and their various parameters.
In this lesson, you create shaders for all parts of a fruitbowl model and assign these shaders to the objects. At the end, you quick render the scene to see a test of the results.
| Note: In lessons 10 through 13 you will continue working on this model to add more sophisticated shaders, lighting and some animation. |
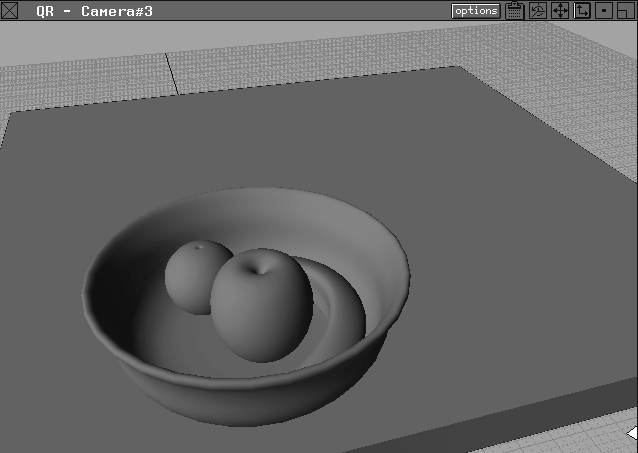
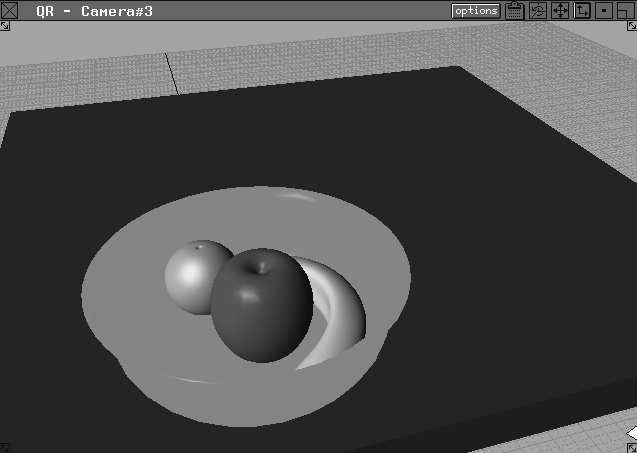
A file has already been prepared containing the fruitbowl model. Start by opening it and performing a quick render.
Show List button.
CourseWare project folder in the File Lister, double-click the L10_Fruit1 icon to retrieve the wire file. If a confirm box is displayed, click YES to delete all objects, shaders, views and actions.
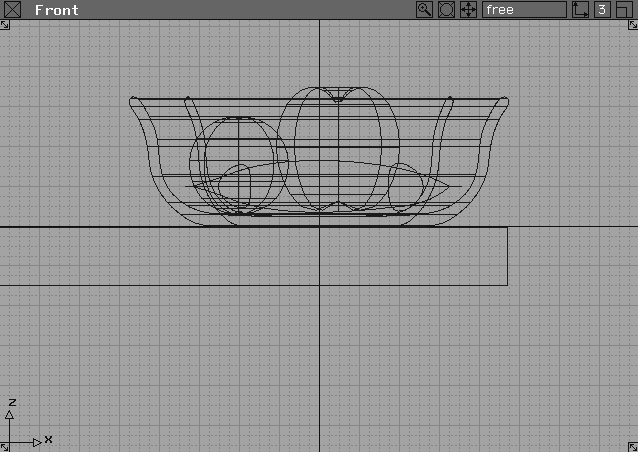
Four windows are displayed. Each window shows a bowl on a tabletop containing an apple, a banana, and an orange.
Next you create a shader for the apple.
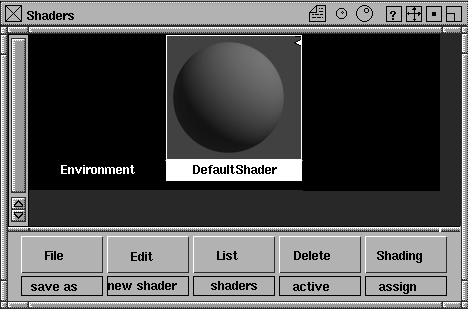
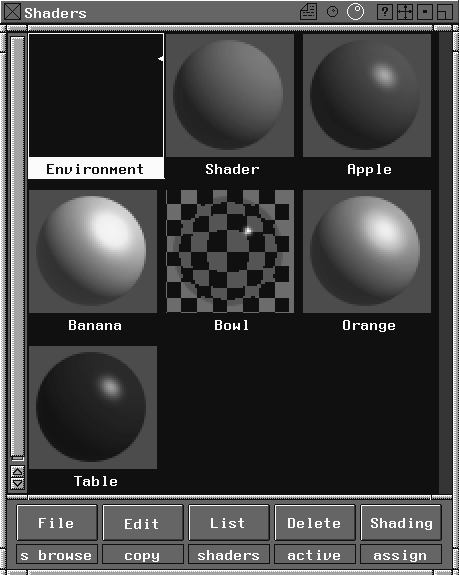
 Shaders. The
 Environment and Shader icons. The menus at the bottom contain relevant shader functions.
Tip: You can delete any shader, except the DefaultShader and Environment shader, by clicking on it to make it active, and then selecting Delete Active from the Multi-lister menu. |
Esc key to clear the existing text.
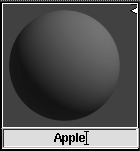
Apple and press Enter.
| Note: Both mixed case and lower case names are used for shaders in this series of lessons. |
In this lesson, the objects have already been named and can be picked by name.
|
Tip: You can also name objects using the Information window (Windows Information Information window). |
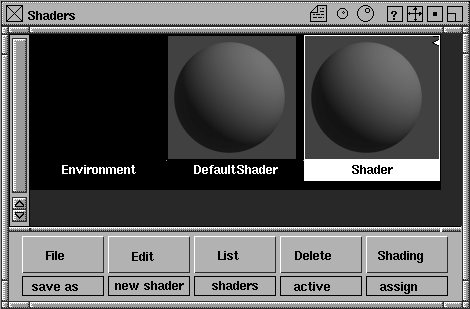
Apple shader icon has a white border to indicate that it is the only active shader.
 Select Pick Object from the Tool Palette and type
 apple in lowercase at the prompt line.
Enter to pick the apple.
Apple shader icon and apple object active, select Assign Shader from the Multi-lister menu to assign the shader to the apple.
| Note: You can also create shaders and not assign them to objects. However, only assigned shaders are displayed when you render the scene. |
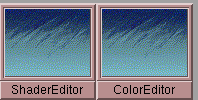
You can edit some of the shader parameters to create the look you want using the Shader and Color editors.
Apple shader icon to open the Shader editor.
|
Tip: You can also open the shader editor by selecting Edit Edit from the Multi-lister menu. |
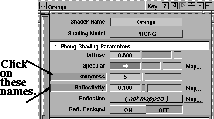
PHONG shader from the Shading Model pop-up menu at the top of the Shader editor.
This gives the Apple shader icon a shiny, reflective appearance, and displays parameters such as specularity, shinyness and reflectivity in the editor.
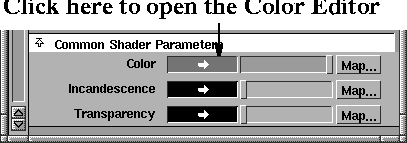
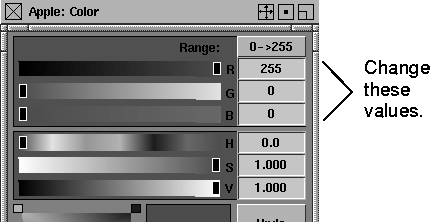
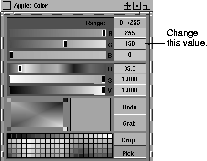
Common Shader Parameters section, click once on the blue color sample next to the Color parameter to open the Color editor.
|
Tip: You can also open the Color editor by selecting Edit color from the Multi-lister menu. |
R slider to 255, and the G and B sliders to 0. This changes the Red, Green and Blue values to define a new red color.
Notice that the Apple shader icon in the
Multi-lister has turned red. In another lesson, you will make this shader even more realistic by adding a texture map.
Keep the two editors open while you proceed.
To create a shader for the orange, you can copy the apple shader. This lets you create the orange shader more quickly.
Copy from the Multi-lister menu. This creates a copy of the Apple shader.
Apple#2, press the Esc key to clear the name, then type Orange to rename it.
 With Nothing picked, select Object from the Tool Palette and type
 orange when prompted.
Assign Shader to assign the shader to the orange.
Shading Model at PHONG.
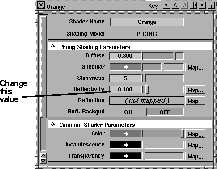
Shinyness value in the Shader Editor and change it to 5 to make it less shiny than the apple.
Reflectivity value to 0.1.
Color Editor, click on the value next to G and type 150 to change the color to orange.
| Note: In another lesson, you'll make this shader bumpy by adding a texture map. |
Editors always contain the most current parameters set for an active shader. The Shader and Color editors now contain the parameters for the Orange shader.
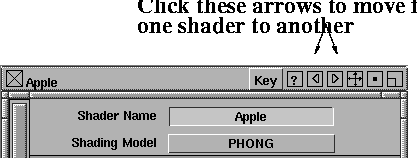
| Tip: To move from one shader to another, click on the left and right arrows on the Shader editor's title bar. However, if you have many shaders, you may find it easier to select the shader icon in the Multi-lister. |
Next, you create a shader for the banana and copy some parameters from the Orange shader.
 Select Pick Nothing from the Tool Palette to de-select active objects or geometry.
New Shader from the Multi-lister menu.
Select Pick Nothing from the Tool Palette to de-select active objects or geometry.
New Shader from the Multi-lister menu.
Shader#2 and press the Esc key to clear the name. Type Banana. Notice that the icon moves in the Multi-lister so all shaders are listed alphabetically.
Color Editor, change the RGB values to 255, 215, and 70 to make the shader yellow. In a later lesson, you edit this shader to create a label for the banana.
 Select Pick Object from the Tool Palette, type
 banana and press Enter to pick the banana.
Assign Shader from the Multi-lister menu to assign the new shader to the banana.
PHONG. By doing this, you can copy the reflectivity and shinyness values from the Orange shader.
Orange shader icon to select it.
Shift key and click on the names Shinyness and Reflectivity. The background color behind the names changes to gray.
Shift key still pressed, click on the Banana shader in the Multi-lister. It is highlighted in gray.
Copy Parameters from the Multi-lister menu to copy the selected parameters to the banana. Click on the Banana shader to confirm the copy.
Shift key and click on Shinyness and Reflectivity in the Shader editor to de-select them.
Click the close box icon in the top left corner of both editors to close them.
Next, you copy the apple shader to create a new shader for the tabletop and then edit the various attributes of the shader icon.
 Select Pick Nothing from the Tool Palette to de-select active geometry, then click on the
 Apple shader in the Multi-lister to select it.
Copy from the Apple#2, press the Esc key, type Table and press Enter.
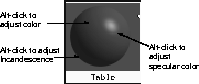
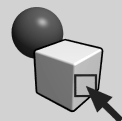
Pressing the Alt key while you click on areas of the shader ball opens the Color editors for the different parts of the shader without having to open the Shader editor.
Alt key and click on the shader ball where the red is darkest (but not in the shadow area).
Table shader's Color editor is displayed. The title bar of the Color editor reads Table: Color.
Alt key and click on the white highlight on the shader ball. The Color editor's title bar reads Table: Specular.
Alt key and click on the shadow area of the shader ball. The Color editor's title bar reads Table: Incandescence.
Alt key and click on the red area to return the Color editor's title bar name to Table: Color.
R value of the shader to 0 and the G value to 51 to create a dark green color.
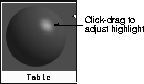
| Tip: You can also click-drag on the highlight to interactively change the highlight size. |
 |
 Select Pick Object from the Tool Palette and type
 table to make the table object active.
Assign Shader in the Multi-lister to assign the shader to the table.
You can import and work with shaders created for other projects. This means you can create a library of shaders that can be re-used as needed. A glass shader has already been created, which you can apply to the bowl.
Shader Browse from the Multi-lister menu to access the shader directory.
Bowl shader icon, then click the Load Shader button in the File Browser. The Bowl shader is displayed in the Multi-lister.
You'll add a texture map to this glass shader in a later workshop.
| Tip: Alias comes with many predefined shaders that can be found on the 3DCD. You can use these shaders in your own work to quickly render photorealistic images. You should take a few minutes after this lesson to examine some of the 3DCD shaders and look at how they were made. |
 Select Pick Nothing from the Tool Palette, then select Pick Object and type
 bowl at the prompt line to pick the bowl in the scene.
Assign Shader to assign the Bowl shader to the bowl geometry.
 Select Pick Nothing from the Tool Palette.
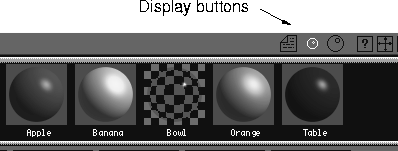
There are now seven shader icons in the
Multi-lister: Environment, Shader, Apple, Banana, Bowl, Orange and Table.
If there are more shaders listed than you can see, use the scroll bar at the left of the Multi-lister window, or resize the window by dragging at the corners.
You can also change the icon display to list by name or by a smaller icon. To change the display mode, click on any of the three small buttons on the Multi-lister title bar (text, small sphere, larger sphere).
To see the objects and surfaces an active shader is assigned to, select Shading List Objects....
Try clicking on some shaders to make them active, and notice how the object list changes.
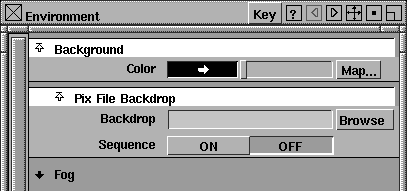
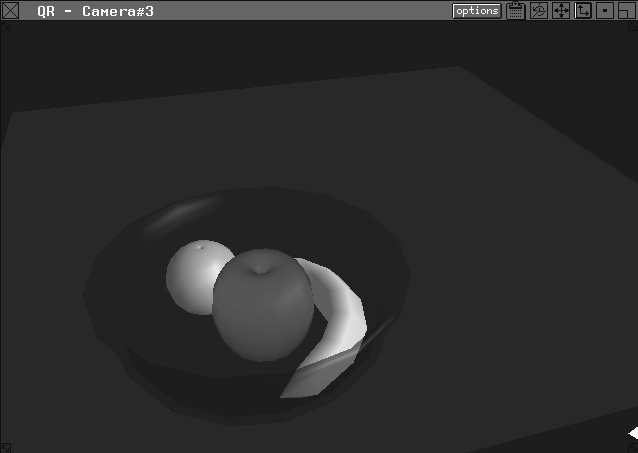
Now that the shaders are set up for all the objects, you can create the scene's background using the Environment shader. The Environment shader lets you assign a color or a pix file to the scene background, as well as other 3D environment effects such as fog and textures.
Environment shader icon. The Environment editor is displayed.
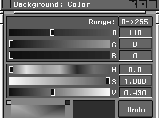
Color in the Background section.
RGB or HSV sliders to define a new background color.
Notice that the Environment icon in the
Multi-lister automatically displays the color you choose.
This turns the Environment and Color editors into icons that you can move into a convenient place on your screen.
To reopen the editor, click the icon.
In this section, you can use QuickRender to evaluate the scene with the new shaders.
| Note: While a quick render shows a preview of the rendered scene, subtle qualities, such as reflectivity and shinyness, are not displayed. To evaluate these qualities, you must perform a full rendering. |
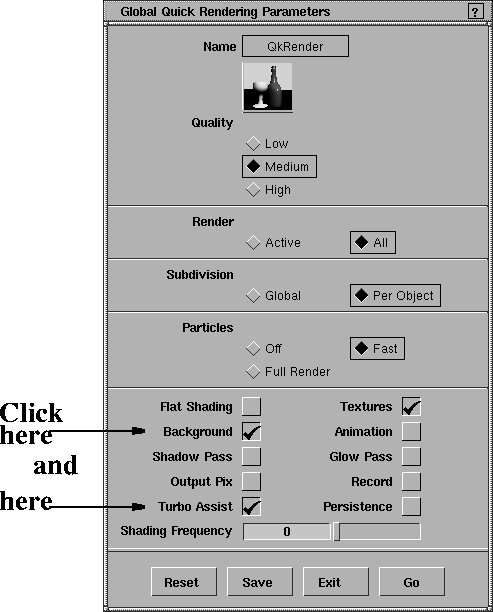
 to open the
 Global Quick Rendering Parameters window.
Background toggle to display the background color instead of the ground grid, and click the Turbo Assist toggle to render the transparency of the bowl.
Note: Turbo Assist uses the hardware rendering, which offers faster rendering and transparency. Some features won't display, and the lighting of the scene will be different from a normal QuickRender. |
 |
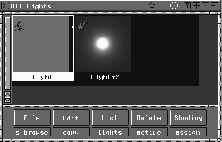
When you QuickRender a scene without defining lights, default lighting is added automatically. You edit the scene's lighting in Lesson 11.
To see these lights, select List Lights from the Multi-Lister menu. Two icons displaying a directional light and an ambient light are displayed.
QuickRender has a complete set of options. For example, you can keep the QuickRender on the screen and render only a part of it.
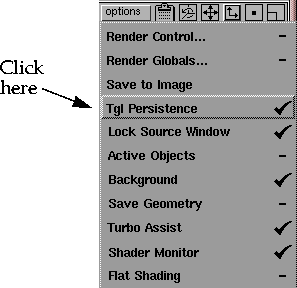
Options button located on the QuickRender window's title bar to display the pop-up menu and select Tgl Persistence.
Tgl Persistence is checked, the QuickRender window does not disappear at the next mouse click, but re-renders the scene with the new conditions. To de-select a checked option, click the window again.
Lock Source Window to turn this option off.
Note: QuickRender always renders in the active window, unless Lock Source Window is checked on in the Options menu. For example, if Lock Source Window had been checked when the Perspective window was active, the Perspective view would always be quick rendered, no matter which window view was subsequently selected. |
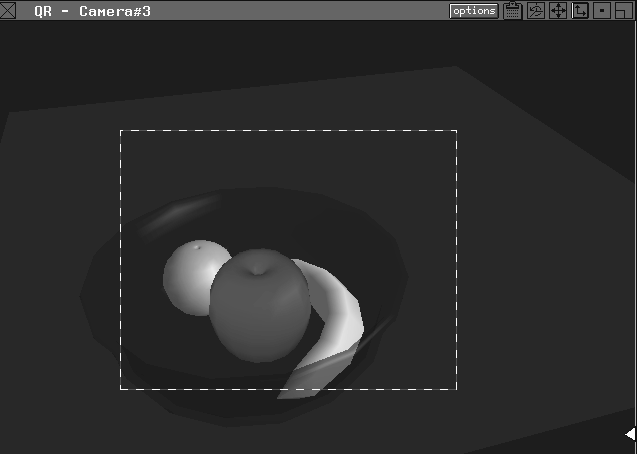
| Tip: A handy way to QuickRender only a portion of a scene is to use a bounding box. Drag the cursor diagonally in the QuickRender window to create a box around the view area. That area quick renders and displays a bounding box around the re-rendered area. |
This is useful when you have changed an object's shader and you only want to re-render the area containing that object.
To return to regular QuickRender mode, click outside the bounding box.
To close the QuickRender and Multi-lister windows, click the close box in each window's title bar. You may have to maximize the Shader and Color editors to close them.
From the File menu, select Save as to save this file in your CourseWare project. Name it myfruitbowl2 so you can use it in the next lesson.
In this lesson you have learned how to:
In the upcoming lessons you'll add texture maps and lighting effects to this fruitbowl.