|
|
The Estes Shadow is one of my favorite rockets. I love the slow lift-off's and the dramatic flights. The only negative thing is that it doesn't fly very high at all on the recommended D12-3 engine. While searching on the web, I came across two sites where a Shadow had been altered to accept multiple engines. They were a great inspiration for my project. Here are the sites, if you're interested.
Dean Walker modified his Shadow to use a two D-engine cluster. http://www.geocities.com/CapeCanaveral/3438/rockets/shadow.htm
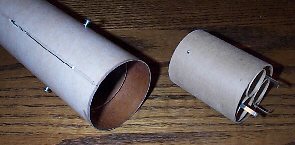
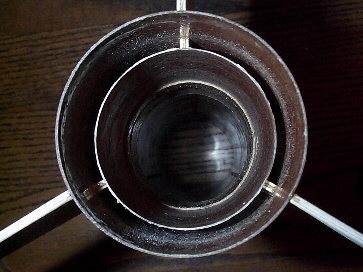
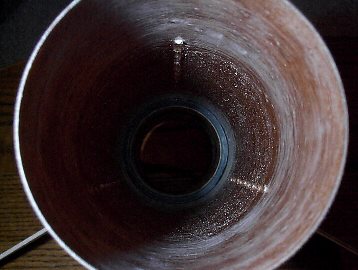
Mark Recktenwald modified his Shadow to have a five engine cluster. http://web.raex.com/~markndeb/rockets/fleet.htm I had quite a few things to consider for my Shadow. The field that I go to for most of my launches is limited to D-engines, so I figured that a cluster would be a good idea. There are also monthly launches (about an hour drive away) where I can launch higher power, so I also wanted a singe 24mm capability. As I write this, I've never launched anything higher than a D-engine, so I'm not too excited about jumping to 29 mm. I decided to go with replaceable engine "cans". I came up with 3 cans, to start with - a singe 24mm engine, two engines and three engines. The engine cans are held in place with 2 small screws that pass through the BT-80 and BT-70 body tubes. I also decided to use a zipper-less design combined with a baffle system.
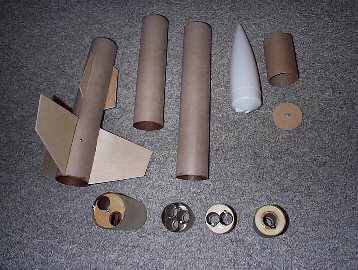
A CHANGE IN DIRECTION................ After spending some time away from my project, I came back to it with a different perspective. The aft part of my rocket is heavy. It's no wonder with all the wood and epoxy I used for the baffle system. I revisited Mark Recktenwald's design and saw some advantages that I hadn't considered previously. With Mark's 5-engine approach, he was able to launch with a large variety of engines. Plus, his baffle system was considerably lighter than mine. I decided to "table" the aft part of my design and try something else. I also decided to forgo the plywood fins and use basswood instead. It's strong enough for my applications and a little lighter. Here the aft section takes shape. Like Mark's "Shadow 5", I attached 4 18mm tubes to a 24mm tube. The 24mm tube has 1/2" holes drilled in it along it's length. The aft 4 holes direct ejection gasses from the 18mm motors into the 24mm tube. The next 6 holes direct the gasses out of the 24mm tube. There's a balsa adapter epoxied in place to make sure the gasses exit. Then the next 6 holes direct the gasses back into the 24mm tube and out the top.
THE REST OF THIS PAGE IS STILL UNDER CONSTRUCTION. CHECK BACK LATER.
*************************************************************************************************** This page was created: April 3, 2001 Modified: April 3, 2001 I welcome comments from viewers of my pages. Feel free to send me an email: [email protected]
|