Step one, I needed a place to work. I measured the garage several times and could not convince my self that I could make enough room to work. I'd have to remove half the detritus and banish two vehicles to live out doors for the duration. This was not going to fly with the household manager.
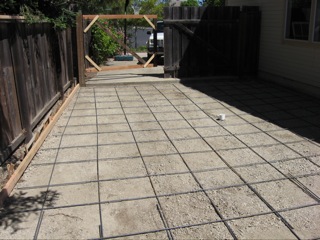
Fortunately we did have a plan to pour concrete along the side of the gararge to utility purposes. Nothing like a real need (boat building!) to drive a real need (landscaping). I'm glad I paid contractors to do this, those guys worked hard to prep the ground, pour and finish the concrete. That was money well spent.
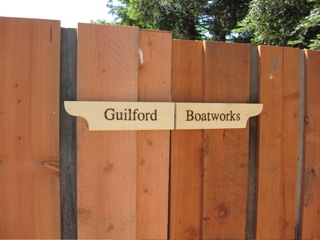
Step two, formally name the work area "Guilford Boatworks". A storm in the spring had destroyed the gates and I needed to rebuild them if I was to have an active construction project. In a bit of whimsy, I formally named the area and put up signage, technically the first boat related wood project on site.
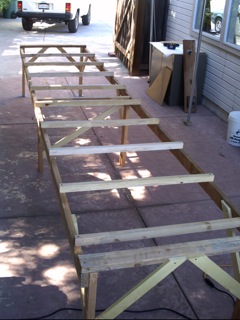
The first thing to be built was the strongback. I finished it a week or so before this photo. I realized it was going to be an excellent work platform, so I plan on using the strongback and the bottom (flat) as a work bench for most of the frame cutting and gluing. Once the pieces go together, I'll need to get from saw horses or something to make a work surface.
This sure does give me an idea of the size of the craft. I think I'm going to like it.
Some people start a Navigator in different ways, I chose to start by scarfing the two seets of plywood which would become the bottom of the boat. I tried several techniques to put the 8:1 bevel in, and finally ended up using my belt sander. 60 grit belts are great!
This picture shows the wood prepped and I've got a first coat of glue turning tacky. This is prior to joining and clamping the pieces.
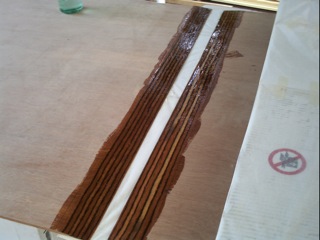
Each side the joint was backed with cardboard covered in waxed paper, and then backed by 2x4 boards. The cross scheme is there to make sure there is even pressure across the joint.
I was very happy to pull the clamps off the next day. Not only was the joint solid, the waxed paper covered cardboard had flattened out the epoxy and this made final sanding much easier. You really need to look closely at the edge to see where joint it. I was afraid that this would be hard to do, but this is probably one of the easier things I've done (so far).

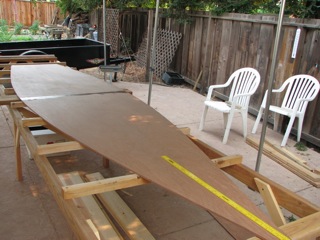
After the scarf joint, it was time to turn the long sheet of playwood into a boat part, the bottom. I snapped the center line using my chalk line, and measured off the station offsets. I used a sail batten to draw the lines relatively fair. My station marks were within 1 mm of fair so I was happy.
I used my hand held jig saw to cut the profile, but founded out that I needed to use a finer saw blade. I also found out that 9mm Mahagony dulls the blade much faster than the regular pine I normall cut.
With the bottom cut, I really feel like I am making a boat!
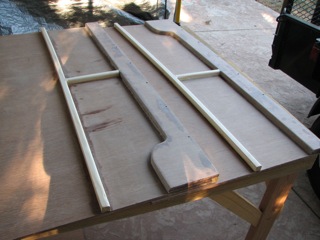
I knew that the first major assembly to be put into the boat would be the swing keel and the center case. I spent a couple of hours just learning to read all the details in the plans. It took a couple of days gluing on one side, then the other, some sanding, then they look ready.
Still to go is fiberglassing the inside of the case. I need to make the swing keel itself first, then I can assemble the entire thing.
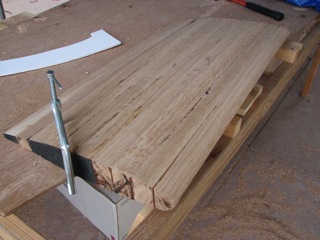
I have a huge white oak board I plan on using the make the swing keel. Unfortunately I need to plane it, and was going to get some help from a neighbor (and his surface planer). Since vacation time was coming up, I wasn't going to be able to get to work on that... so it is frame and bulkhead time.
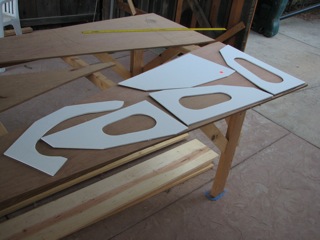
Not wanting to draw these twice, I chose to layout the pieces on foam core board, purchased from the craft store. Who knew that a craft store had boat building parts? Anyway, I drew up the parts and and it was not a quick exercise, but I'm glad I did it only once.
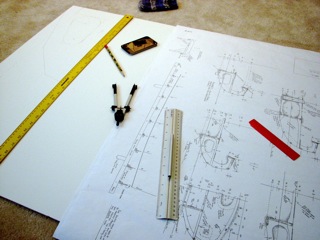
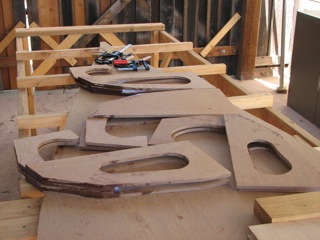
This photo shows some of the templates arranged on some plywood so I can cut them out. The wood I'm using is the scrap from cutting the bottom. I got most of my frames from the left overs, so I feel reasonably thrifty with the plywood. (that being said, I may need to get another sheet of 9mm. Looks like I might run short).
After cutting out all the parts, I glued the upper frame pieces to the lowers, then I stacked port and starboard parts together to check for size agreement. A little touch up with the belt sander made sure I was going to have symetry between the two sides.
If one side has a defect, they both do.
It looks like all of my measurements were within about 2 mm on the plans. That sounds workable to me.
I managed to arrange time with my neighbor and we planed the oak board. Check out the shavings! Oak smells nice, but I think Mahogany smells better.
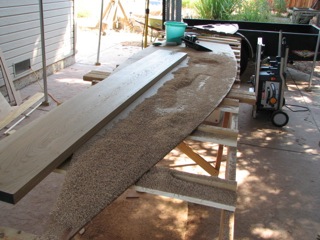
It was with great relucance that I ripped the oak plank up, but I did. A couple of days later, with the help of a power plane and a template for the foil (more foam core board), I had a nice foil shape. The next step is to finish the machining for the top part, get a shackle to the uphaul, glass the case sides, glass the swing keel, and assemble it.
I really want to get the swing keel and case done. Once I've done that I can put the station offsets on, create the rocker on the bottom. Then I've got a boat instead of just parts.
A lot of work is going into this one piece. Sometimes I feel that the boat is nothing more than a swing keel, and the hull, rigging, and sail are just decoration around the keel...