| Texturing Tutorial by Joseph Mccollum |
| Tools Required: |
 |
 |
 |
 |
 |
 |
 |
 |
 |
 |
 |
 |
 |
 |
 |
 |
 |
 |
 |
 |
 |
 |
| This page may take a few minutes to load. This is why you are required to have along with you a Ham & Cheese on white. By the time your finished eating this should be good to go. Lets Begin: STEP1 Take your model. The reason I chose a cave is because it has lots of curves. Normally i'd just slap a Standard Cylinder type of UVW map and tile it with a seemless texture. We are going to do it the hard way. This technique will lend a good hand at texturing things like cars, lowpoly characters, heads etc. |
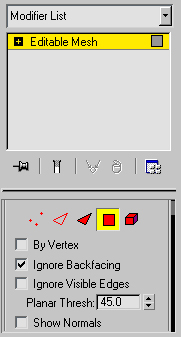
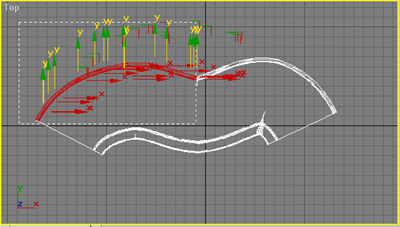
| STEP2 Now we need to seperate your model into bits and pieces. Do this by going to the Editable Mesh and selecting "polygons" as your type. Now region select a portion of your model like I did below. |
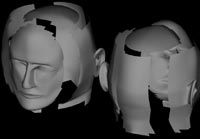
| Here is a head. I did this so you could have an example of exactly how you might seperate the sides. Front face, side head, top head, etc.. |
| WARNING!! Hey watch what your doing. Make sure you dont miss areas that should belong to a specific side.. Here I missed a hole row. I'm going to go back and "ctrl" region select to add those to my selection. |
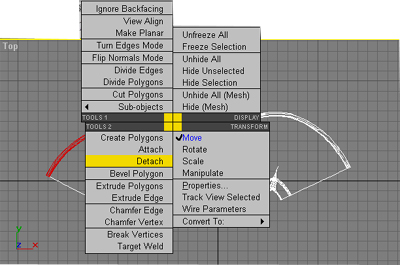
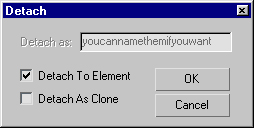
| STEP3 Now I'm going to right click the side i've selected. Here you want to locate "detach", Click it and a window exactly like the one here to our left will pop up. Make sure you check "element" and click ok. It's not really necessary to name the sides. I'm just to lazy. |
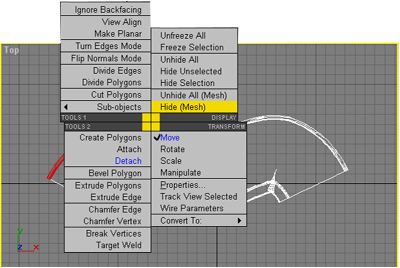
| STEP4 After you have detached a side, you'll want to right click it again. You'll see a menu just like this one. Select what is highlighted in yellow (Hide (mesh)). The reason why this should be done is to keep track what has been detached and what is left. When your model is completely gone you have detached all the sides into elements. |
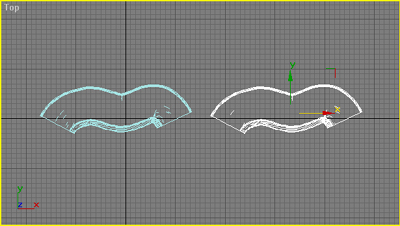
| STEP5 Now go back to the main object level. And drag over a copy of the mesh to the right. Just like I have done here. |
| STEP6 Now select the original model and apply a "morpher" modifier to it. You'll find this in the same area you find MeshSmooth modifier. |
| WARNING!! Do not continue untill you have all your sides seperated. To see and example of which sides I seperated scroll down to STEP 8. But quickly return here. Remember you have left off at STEP4. STEP4... STEP4.. you are getting very very sleepy.... |
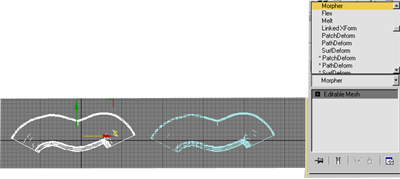
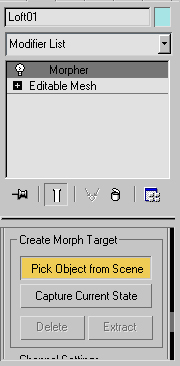
| STEP7 With the morpher selected (which it will be by default) scroll down it's attributes window till you see the following selection. Then click it. |
| Now select the copy of the original model you have made earlier. It's name will pop into the channel list. If this is confusing. Just select the copy after you click "select object from the scene". |
| After you do that. Go back to the Main Object level. And hide your your copy you have made earlier. Now select the original and prepare for the dirty work. |
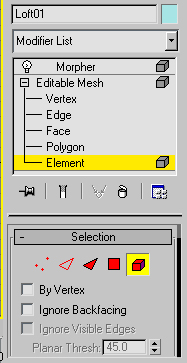
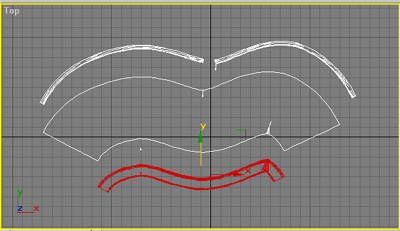
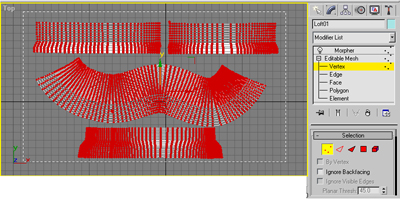
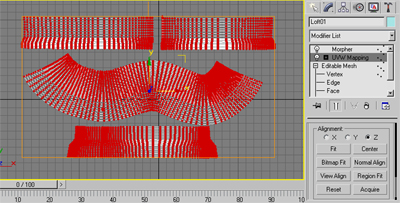
| STEP8 Your stack should look exactly as the one to the left does (with the exception of the name loft01). Now in the Sub-object level select "Element" just like I did here. This will let you select only the sides you have seperated earlier. Below is an example of how I seperated my cave model. WARNING!! When seperating the sides always make sure you have elements selected, other wise you'll destroy your mesh.. |
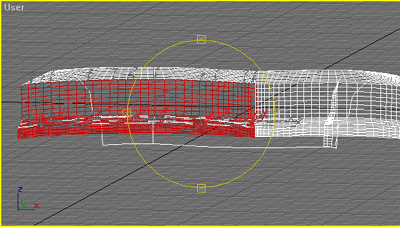
| STEP9 Now rotate the side so they are all facing you. Make sure the back isnt facing you, you may even want to do this in a shade viewport. Then Select "Vertex" from the sub-object level and region select ALL of the vertices. Your out come should look similiar to this picture to our right.. |
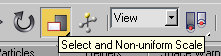
| Step10 Now select the scale tool and make sure it's switched to "non-uniform" scale. |
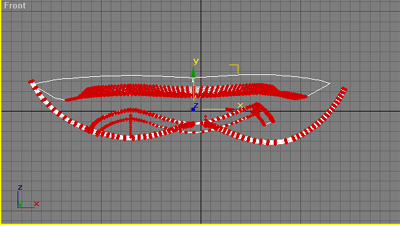
| With the model facing you just like above. Non uniformly scale the model down the "Z" axis. Do this by holding the Non uniformly scaling tool over the letter "Z" Till it highlights yellow. Or by selecting it from the main tool bar and locking it in. Either way, make sure you do this only down the "Z" axis. The picture to our right would be a view from above the model (in this case it's faces are facing down) This is what it would look like at this angle before the scale. |
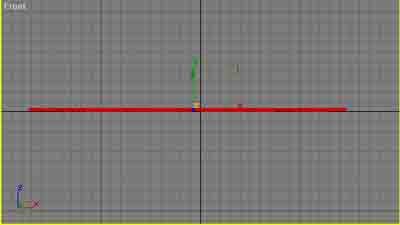
| This is what it would like look after the scale. If done correctly you should have completely flattened your model. |
| STEP11 Now apply a UVW MAP MODIFIER to it. Select "planar" as the type. Scroll further down in that window. Then select "View Align" then "Fit". In that order. Your finished product should look like the picture to the right. And yes, all of your vertices should still be selected. |
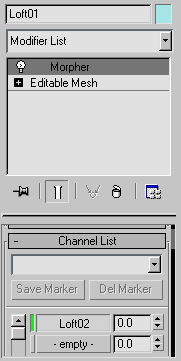
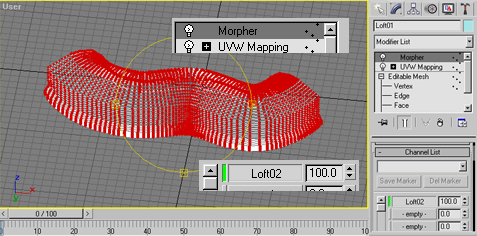
| STEP12 Next locate the Morpher modifier in the stack. Your stack should look exactly as mine does. Select the Morpher modifier in the stack. Now scroll down it's attributes window and locate the "channel list". If you cant find it,I took a picture as proof it's there. |
| See that green bar? To the right of that is the name "lofto2" which is our copy of our now flattened model. Now to the right of that is "0.0" with an up arrow and a down arrow. Left click and hold the up arrow and drag it all the way to 100. This will bring your model to it's orginal state. Kind of.. :*) |
| STEP13 We are almost done. Right click the stack and collapse it. The select "vertex" in the sub-object level. If you've done everything correctly your vertices should all still be selected (red). Now find the "weld" button (because your model is technically still seperated) the default setting of .001 should be enough. Then click weld. Now your model is back to it's orginal state. You can even delete the copy. |
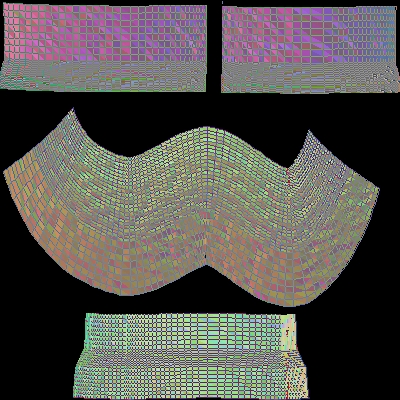
| FINAL STEP Now if everything was done correctly if you goto the textporter and select the object, you should come out with the Planar UVW mapping coordinates. Just like shown here. On a cave it's really kind of useless. But on a Car, or a Human model, the sky is the limit. And if you dont have textporter you can actually access something called "UNWRAP UVW" from the modifier list. This will let you render the coordinates but it wont let you save them. But all you'll have to do is maximize the window then ALT-PRTSCN it. then paste it into a paint program and be on your merry way. |
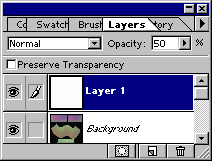
| To end this tutorial I'd just like to leave you with a cool tip. When you bring your map into a paint program like photo shop try this. Add a layer. Now decrease the opacity down to 50%. This will let you see your map underneath. Just use that as your template. Paint over the template on layer one. Then when your finished increase the opacity up to 100 and flatten it. Then try applying it to your model as a bitmap. Hey are you going to finish your Ham & Cheese? |
| Any questions or comments, please contact me at [email protected] |
 |