This is one of my old systems. Pictures of my new system to come. 4-15-03
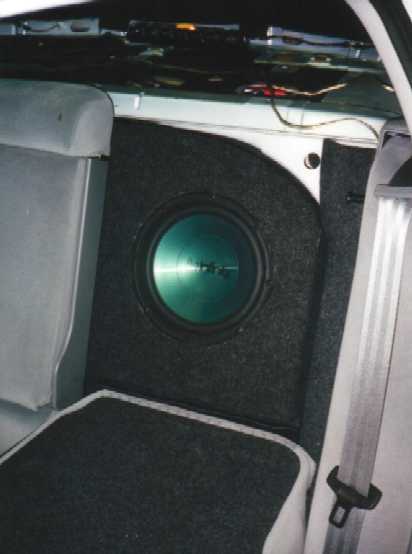
These pictures were taken during the building and installation of my custom subwoofer enclosure for my 1998 Passat. I designed the enclosure myself to fully utilize the space in my car's trunk. I tried a few enclosures before this one. My first enclosure was a sealed Qlogic box that I bought from Crutchfield. I wasn't happy with the way the box vibrated. Also, it was apparent that the box didn't have the right interior volume. My second enclosure was a 1.6 cubic foot ported enclosure made of 3/4 inch MDF. This box had great low bass and it was very efficient. Unfortunately, the high bass wasn't substantial enough for my tastes. My next box was a 0.6 cubic foot sealed enclosure that I bolted to the underside of my rear deck. I loved the way this box sounded, but I hated the way it took over my trunk. It really restricted what I could put in my trunk. I finally decided to design and build my current enclosure. It's about 0.7 cubic feet. This makes the low bass a little louder while still keeping a great high bass response. It is a modified wedge style design that pushes right up against the rear seat. There is about 1" of clearance between the back seat and my 10" subwoofer. My subwoofers maximum excursion is well below 1" so I don't have to worry about my speaker hitting the back seat. Well, here's some pictures. I hope you enjoy them.
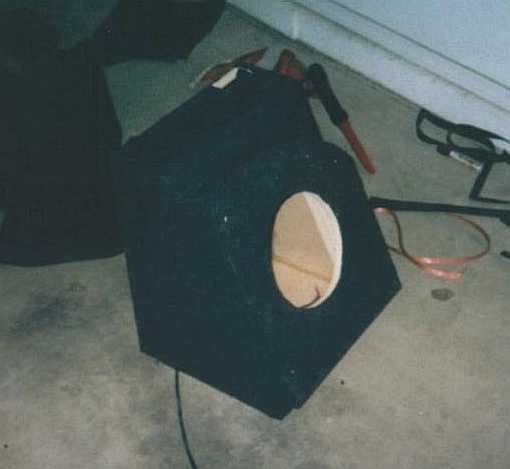
Here's my first attempt of installing the box in my car. After cutting all the pieces and attaching them together, I wanted to make sure that the box fit perfectly before I put more work into it. It just happened to fit perfectly! The box wasn't put together very well at this point. The front was just held on loosely with a couple of drywall screws. I was mostly checking to see if the curvature of the front piece matched the curve of the support under the rear deckThe picture on the right is a picture of the nearly finished enclosure. Notice that the carpet really finishes it off well. I bought the carpet for a whopping $5.00 at a local shop called "Tempe Sales". It was a perfect match to the factory grey carpeting. I honestly couldn't tell the difference between the two.
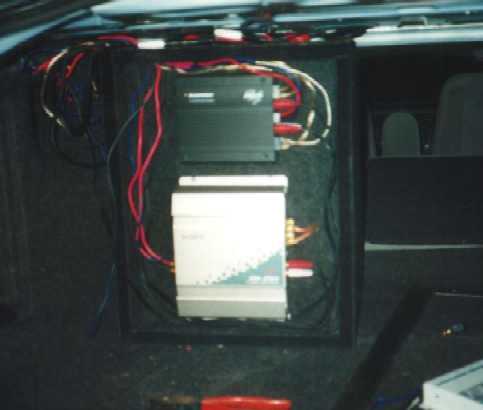
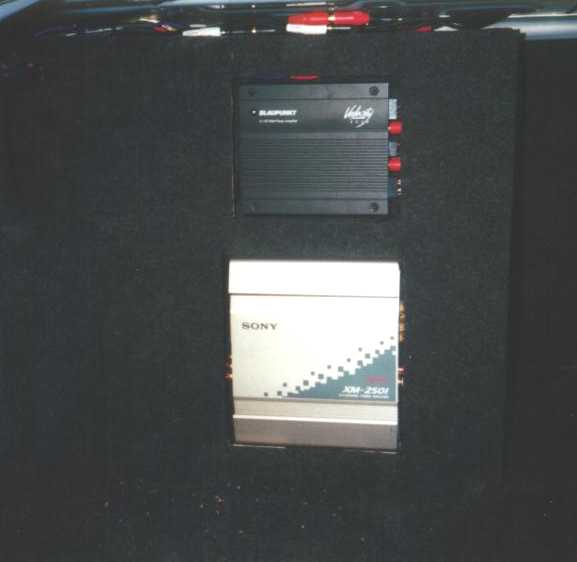
I have to apologize for the quality of this image. For some reason, pictures of stuff in my trunk don't come out well. This is what the finished enclosure looks like without the carpeted cover. This is a really good illustration of how ugly the wiring can get. I tied up all the wiring and cleaned it up after this step. The amplifiers are recessed into the enclosure. This allowed me to make a cover out of a carpeted piece of 1/4 inch masonite. The masonite cover is flush with the fins on the amps. It is held on the enclosure by an outer edge of 3/4 inch wide Velcro. The loop side of the Velcro is on the outer edges of the enclosure and the hook side is on the cover. See how the cover really finishes off the job?? I really wish these pictures came out better.
Here's what the finished project looks like from the front side. Of course I put the rear deck cover back on the car too! :)