


It seams to me that there has been much ballyhoo about emergers lately. I am not an old man (child of the '70's) but I am a student of history. Fly fishing is believed to have started with wet flies. I think of wet flies as emergers. They have been around for at least 200 years, but more likely 3000 years. This is one of my favorites. I only uses two materials, and is cheap and quick to tie. I like to fish this fly on the swing. I cast across stream and let the fly swing down in the current. As the current pulls on the line the fly swings across the river and comes up in the water column. This seems to really turn the trout on. Rainbow trout in rifles seems to be very vulnerable to this technique. Give it a try some time.
Hook: Any standard length dry fly or nymph hook
Body: Peacock hearl twisted into a rope around the tying thread.
Hackle: Hungarian Partridge feather length of fly body.
|
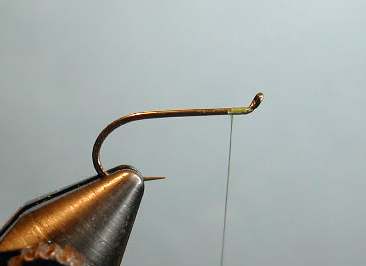
Attach thread at the hook eye. I am using an up-eye hook here. I don't recommend these hooks to anyone. I happened to have this one lying on the bench, and thought it might make a nice hook for this "photo fly". To me, there is no reason to use an up eye. This hook is about as old as I am, but it was given to me with a lot of other useful stuff. |
|
Wrap your tying thread back to the bend of the hook. This is going to be the tie in point for the body of the fly. |
|
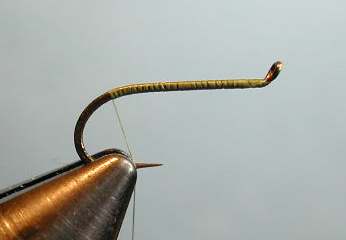
Tie in the peacock hearl tip first like the image to the left. |
|
Twist the peacock into a "rope" around the tying thread. This technique really helps hold this fly together as there is no rib to keep the peacock from unraveling after the first fish. |
|
Wrap the peacock forward. Stop about two eye lengths behind the eye. Notice that the peacock has actually broken a few times. This is why we use the rope method. Otherwise we would have to start the peacock over. This way we just tie off and trim the broken peacock back. |
|
This is the skin of a Hungarian partridge. This is a material that every tyer should have. It is sold in bags, and on the pelt. This pelt cost me about $16 and has enough feathers that I don't think I will need to buy another for quite some time. This can be used for many things. I highly recommend this. |
|
This is a prepped feather. The feather you choice should have barbules that are about as long as the body of the fly. This is not critical to the fishiness of the the fly, but I think makes it more aesthetically pleasing. Some tyers prefer the feather to be shorter and end at the point of the hook, but I have not noticed much difference in how the fish react. Some tiers will strip all the fibers from one side of the feather, but I like just a little more bulk to the hackle on this fly. Do as you please. This is just how I do it. |
|
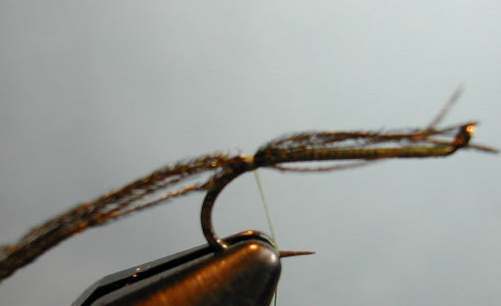
Tie the feather in by it's tip. Notice that the stem is left to use as handle while you wrap the feather. This is a size 12 hook, and I used my fingers to wrap the hackle. Priers might be help some, but I find them a hassle on this fly. |
|
As you wrap the hackle forward, pull the fibers back before you lay down the next wrap. This keeps the fibers under control. Notice the large area that is left to create a head on this fly. Leaving a lot of room at the head is a good habit to get into. Many tiers crowd the head of the fly and ruin the proportions. |
|
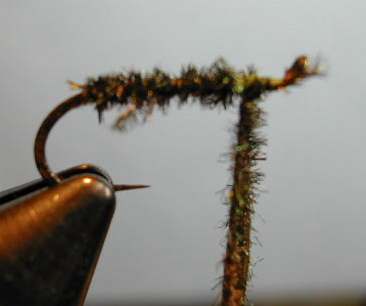
This is the finished fly. Very easy and very effective. Have fun. |