
Tools/Material: aluminum wire, thin steel wire, aluminum foil, sculpey, super sculpey, clay softener, sand paper, oven/stove, enamel paints/acrylics/airbrush, and shaping clay tools.

1. Draw your character so that you can reference it when you start sculpting. In this example I will use Mazedicer.
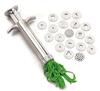
2. Make the skeleton with the aluminum wire. Use the thin steel wire to hold each part together.

3. Wrap the aluminum foil all over the skeleton as necessary.

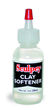
4. Start putting the clay on top of the aluminum foil layer. tip: you can mix sculpey with super sculpey, use super sculpey in very detailed areas. Use the clay softener to help you shape.
5. You can cut out the different parts of the character: arms, legs, etc to shape them seperately.


6. Shape the parts where they join to articulate.
7. Hardening the clay is as simply as boiling the parts or baking them, use whichever works best for you with caution.
8. Once the parts are hard, start smoothing them out with sand paper. Use primer(spray paint color gray) on the parts because you can see the details better.

9. Paint the parts with enamel paints/acrylics/airbrush/clear coat, etc.
10. Finally, attach the parts together using hobby glue. Make sure to test for articulation.
Some of my sculptures:


