 |
|
|
|
|
|
|
|
|
|
|
|
|
|
|
|
|
|
|
|
|
|
|
|
|
|
|
|
|
|
|
|
|
|
|
Progress - July 6, 2004 |
|
|
Home |
|
|
|
|
|
|
I spent all this morning working on the "tail thing" for Yuna's FFX2 Gunner Costume. My arms are incredibly tired, and I need a tuft of brown hair.... |
|
|
|
 |
|
|
|
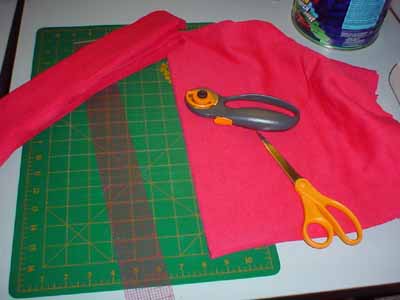
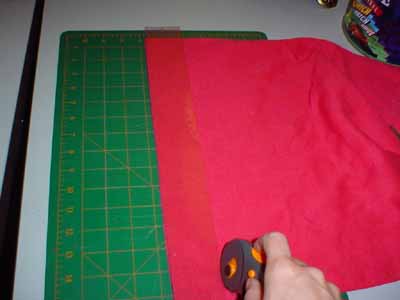
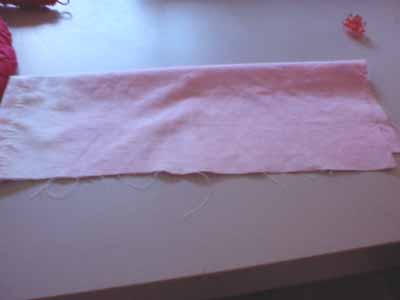
Firstly, this fabric came in bright fuscia. Yech. I used some scarlet dye to tone the pink down a bit, and after waiting all week for the fabric to dry after rinsing, it was ready to go. I can not stress enough just how handy rotary cutting tools are. You need a big self-healing mat, a long see-through ruler and a rotary cutter. My cutter is made by Fiskars, and has lasted through 3 years of heavy use (so far!). Using rotary cutting tools allowed me to cut perfectly measured strips from which to construct the tail. I used 2 inch strips of 60 inch wide fabric, and added about 25 inches to each length since it wasn't long enough. All in all, I made 7 strips. 3 for the inside and 4 for the outside. |
|
|
|
|
 |
|
|
|
|
|
|
 |
|
|
|
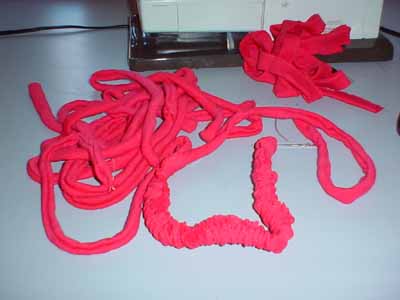
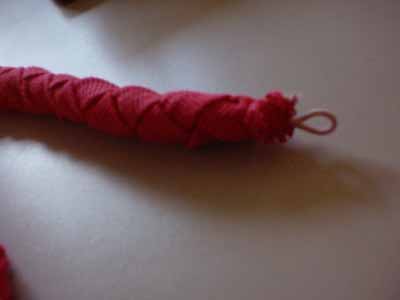
I wanted a fairly finished look, so I chose to sew tubes from the 2 inch strips which made the fabric look more like "belting". Flipping the fabric right-side-out was a chore to be sure. I used a huge, blunt darning needle in place of a bodkin. This is the mess so far... |
|
|
|
|
|
 |
|
|
|
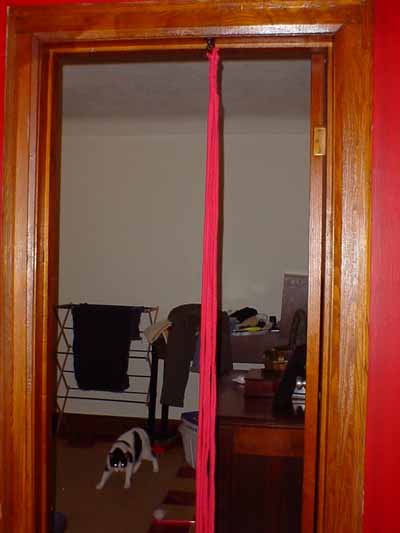
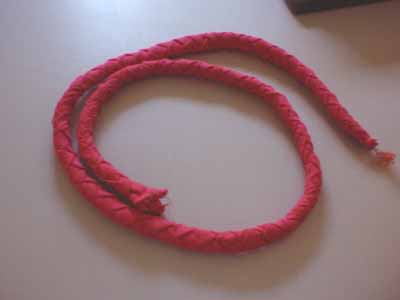
Whenever you make something that is to "hang", it is best to make it hanging! This ensures that it will hang or drape properly, and not have wierd twists and kinks. I first took the 3 unsewn strips (just raw edges) and made a plain old braid. This braid became the centre "core" of the tail. Many cosplayers have tried to get away with just a braid, but it is often too skinny and unfinished looking. Yuna does not wear a braid, but a woven hair wrap. |
|
|
|
|
|
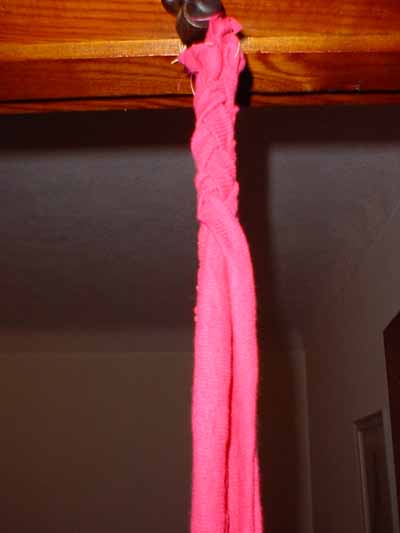
Here I am beginning to weave. I used the 4 sewn strips (already turned out) and fixed the securely at the top. Four-way Braiding is nothing simple to accomplish. I would say it took me about 1.5 hours to cover the inside core. When I needed to take a break since my arms kept going numb, I stuck a straight-pin through the side to hold the loose ends. Another advantage to working on the tail as it hung was that the strips didn't really get knotted or tangled. You will have to figure out 4-way braiding on your own. Test! |
|
|
 |
|
|
|
|
|
|
 |
|
|
|
After the weaving the tail cover was complete, I needed something to secure the tail to me. I used a piece of covered elastic from a bobble (I don't even know where it came from....) and sewed it to the tail. I also secured the ends with lots of thread, alternatively wrapping and sewing through all the layers. |
|
|
|
|
|
 |
|
|
|
This is how the tail looks so far. It has a diameter of about an inch, is lightweight, and has a nice "sway" to it. The wrap looks just like the original. |
|
|
|
|
|
 |
|
|
|
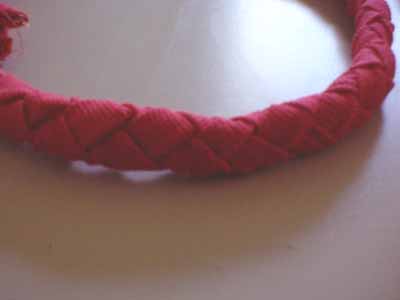
Here is a close-up of what the weaving looks like. It takes lots of patience, but I wasn't doing much else, lol! |
|
|
|
|
|
 |
|
|
|
I had previously gradient dyed a piece of white fabric (fading to light pink) for the hair-tuft tie. Now all I need is some hair. I think I will see about finding it downtown at a place where they do extensions. I have never worked with fake hair before, so wish me luck! |
|
|
|