| Progress! July 2, 2004 | ||||||||||||||||||||||||||||
| Home | ||||||||||||||||||||||||||||
| Well, I have come a long way since I decided to undertake this project. I would estimate its completion at 50% more or less. | ||||||||||||||||||||||||||||
![]() |
||||||||||||||||||||||||||||
| I have been working my butt off on this skirt! Firstly, I dyed all the fabric by hand using a special method called "gradient dyeing" which was a bit frustrating. Make sure you have enough fabric to do a few test pieces! Next, I sew the top from a stretchy royal blue fabric. This includes the waist ties to hold the skirt on. Then it was assembly time. I pinned the whole thing together and tried it on. Since I don't have a dressform, I usually pin things right to the clothes I am already wearing. I wanted to make sure that the three sections got progressively longer and wider, while making sure that the dye gradients were in the correct place. This was no small feat, and involved lots of pinning and re-pinning. Since I used crinkle cotton, I set my sewing maching to do a narrow zig-zag stitch to avoid flattening out the crinkles. (Dials to 2/4 and 2/4 for length and width) I also used 4 colours of thread! This may have been a bit over the top, but I am a perfectionist. I attached each section under the first one which gives the skirt a nice flow when I walk. The third picture is a small spilder of what it looks like on. I feel awesome in it already. | ||||||||||||||||||||||||||||
![]() |
||||||||||||||||||||||||||||
![]() |
||||||||||||||||||||||||||||
![]() |
||||||||||||||||||||||||||||
| The shirt was a major pain. I ran into a few difficulties, but nothing that couldn't be overcome. 
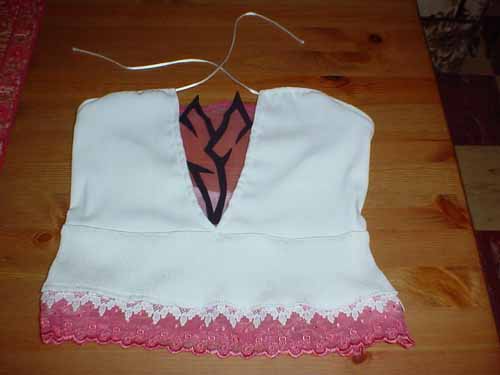
Firstly, I made the main white part in 2 pieces. I put on a tank-top that I already own, with a fit that I like. Using the reference image, I pinned key spots onto the shirt (ex. where the other fabrics/laces go, where to put the "V", where it should begin to slope down under the arms, where to dart to give a fitted look etc.). I stabbed myself a few times! But, doing this pre-planning paid off, because everything is in proper proportion and position. 
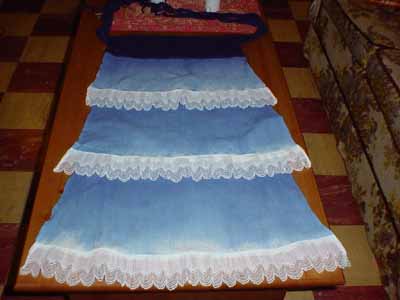
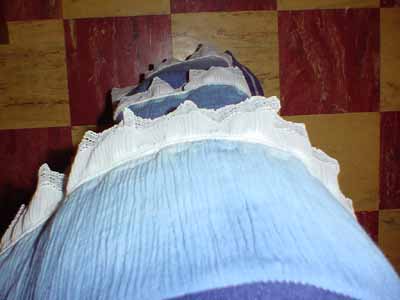
Next, I sewed the top section, and then it was onto the middle section of jersey-knit fabric. This was a huge pain. Since both of the white fabrics are stretchy, I had to use a stretch stitch, which always clogs my machine up. Grrr! Also, with this second fabric, you more or less have to force the ridges together and cram them under the presser foot, or else it ends up frilling in a really silly way. From looking at other Yuna cosplayers, I can see that many run into this problem. Cram! 
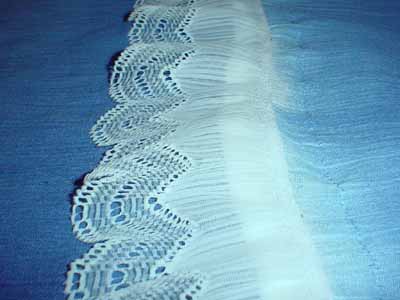
Sewing the lace on was easy peasy, but since it wasn't stretch lace, I left a lap at each side. Here the lace will overlap slightly, but it makes it easier to get the shirt over my head. Next, I sewed in the satin cord. I used a bodkin to pull the cord through the seam and secured it about 4 inches down (there is no need for it to go all the way around). I also secured it right at the opening so that the cord pulls slightly on the fabric, but not excessively. Then, I had to put the centre mesh panel in. I tried going without, and even with a small bust, I was popping out! I used a pink non-stretch mesh that I stole out of some old lingerie. Sew this stuff very carefully, and use a sharp needle, or it will pull and look awful. I made a few templates for the Zanarkand Abes symbol. The trick is to make it after the rest of the shirt so that it fits perfectly into the wedge in the shirt. I used kids craft foam that comes in sheets (thanks Mom!) and hand-sewed it onto the mesh using a very sharp needle and tying my ends carefully. |
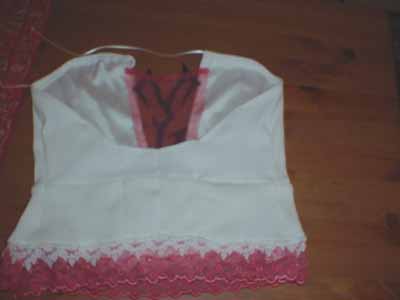
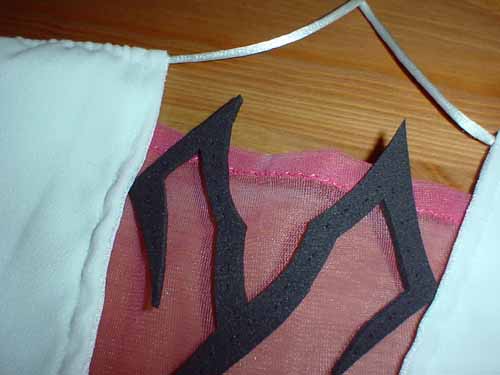
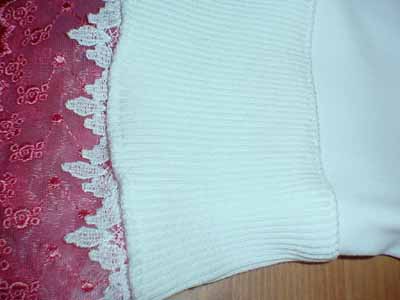
||||||||||||||||||||||||||||
![]() |
||||||||||||||||||||||||||||
![]() |
||||||||||||||||||||||||||||
![]() |
||||||||||||||||||||||||||||
![]() |
||||||||||||||||||||||||||||
| This is the hood. I decided to leave it unattached to the shirt for ease of dressing. This is about the right shape if you want the hood to have some fulness over the shoulders. I still have to add a snap closure. Make sure not to sew it shut at the neck! I almost made this mistake! | ||||||||||||||||||||||||||||
![]() |
||||||||||||||||||||||||||||
| This is me sewing the Abes symbol on. Note the stern look of concentration, poor posture and even poorer lighting. Photo by Chris. |
||||||||||||||||||||||||||||