Firstly, ignore the package directions, since we are gradient dyeing. The last thing we want to do is immerse and cook the fabric for 25 mintues. Nuh uh.
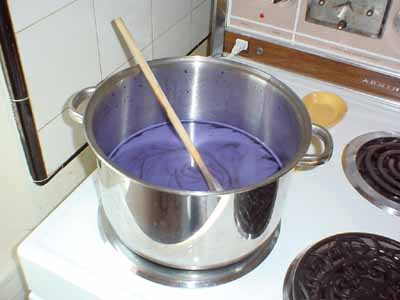
1) You need a big pot and a long-handled spoon, neither of which you want to use for cooking again.
2) Add 1 litre of hot water to the pot, place on the stove on MINIMUM. We are aiming to keep the water as hot as what will come out of the tap, not boil it.
3) Add dye crystals 1/8 tsp at a time, and use test strips of the fabric you intend to dye. You want the darkest colour of the gradient first, a royal/navy blue.
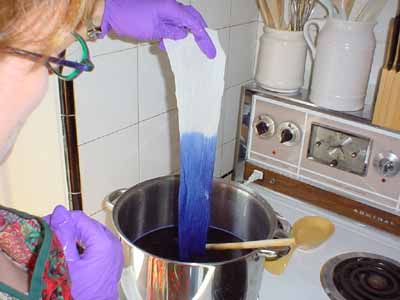
4) dye your fabric by holding it loosely in a bunch at the top. Don't fold it! I tried this, and it makes it very difficult to get the dye line even at all. Only dye about 1/3 of the section.
5) Once you have plunged the fabric in, pull it out of the dye just enough (pic 2) that you have access to the dye line. Spray it with water from a squirt-bottle so that the line blurs. You have to keep moving the fabric around, so be prepared for stress! You can't let that line sit there too long without blurring it.
6) Squish out the dye at the bottom of the fabric.
7) Repeat Steps 1-7 with the other 2 skirt sections.
Next:
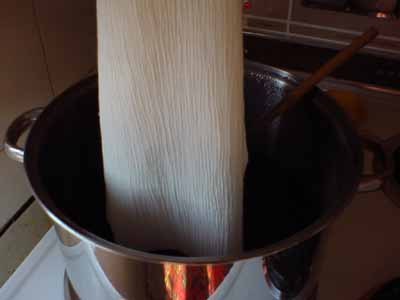
1) Time to do the next dye grade. I removed some of the dye-water from the pot, and added some clean, hot water to dilute the dye. Make sure to do a test to make sure that the second blue is lighter, but not too much lighter, or you will get a "neopolitan icecream" effect.
2) This time, dip in the dark dyed portion, as well as another 1/3. You will have 2/3 of the fabric in the pot, and this will require some poking with the spoon to manage the bulk.
3) Repeat Step #5 from above, to blur the lines.
4) Squeeze out excess and hang. I used a normal clothes drying-rack (comes in handy for everything!)
Tips:
1) Dissolve dye completely. Stir, Stir, Stir!!! I didn't at first, and there were dark inky spots in odd places. Yuck.
2) Wear gloves. I have one blue hand, and one coral-coloured hand. This is okay because I'm just a college kid. If you don't have a posh job, I wouldn't worry too much.
3) Open a window. Perhaps it was psychosematic, but I started feeling a bit stoned. Dye Stone=No Good.
4) Dye the fabric, and then sew it. Polyester thread won't take dye at all.
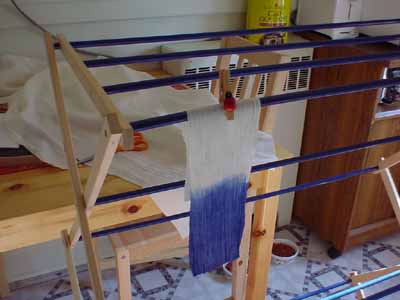
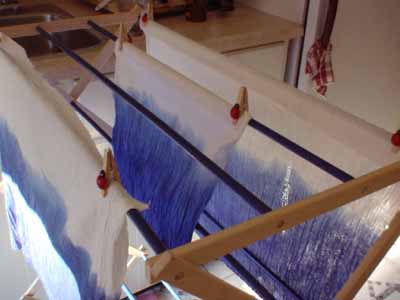

I recommend placing a towel (that you don't like) under the drying rack. It will catch excess dye. No matter how much you squish or twist, it will still drip!