CLICK HERE
2 - 4 1/2: x 4 1/2" cardboard squares
2 - 5 1/2" x 5 1/2" cover paper (this is what will be on the front of your album so choose wisely)
3 - 8" x 8" cardstock squares
1 - 18" ribbon
Adhesive
accessories
- Begin by laying one piece of cover paper print side down (the side you will color or stamp) on a piece of scrap paper. Apply adhesive over complete sheet of cardboard. Place cardboard piece centered onto cover paper.
2. Cut the Corners
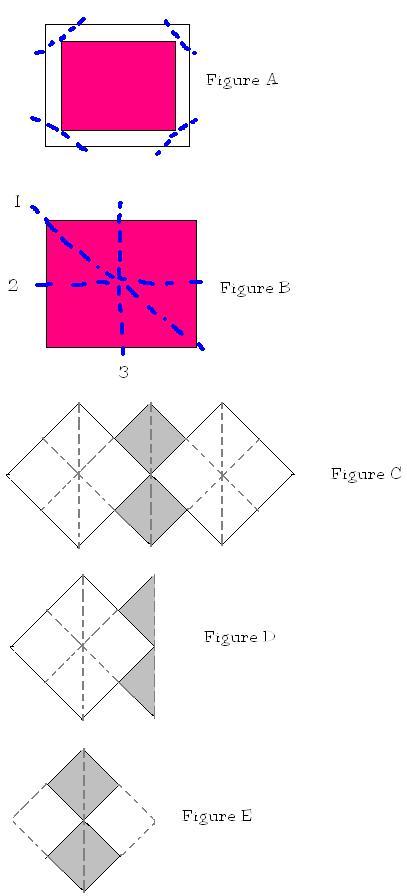
- Cut corners of cover paper at an angle (see Figure A). Fold and glue cover paper over the edgers of the cardboard
Repeat steps 1 and 2 to make the other cover (the back).
3. Fold Away
- Begin with one piece of 8"x8" cardstock. Fold paper in half diagonally (Figure B-1). Be sure to make a strong crease by folding in both directions. Open the paper up and now fold it horizontally (Figure B-2). Open that paper one last time and fold it in half vertically (Figure B-3). Your paper should now have three creases. Follow the same process in folding the other two sheets of cardstock.
4. Glue
- Glue the three pieces of cardstock together as shown in Figure C. Pay attention to the way the lines are. The center panel will be below the two side panels. You may choose to stamp and decorate before gluing but keep in mind how the book will be assembled
5. Fold Away
- Now it is time to fold the book together (Figure D). Begin with one of the side panels. Bring corners A and B together, easing inward, until the side panel lays flat into a square. Repeat with the other side panel. Now you should have a diamondshape in front of you. (Figure E).
6. Flip and Fold
- Flip the diamond shape over, keeping the two side panels in their folded form. Now, once again bring points A and B (Figure D) together. you should end up with a four inch square.
7. Cover the sheets:
- Now we must cover the sheets of paper with our covers! Apply paper glue to the top of the square sheets. Be careful not to dirty your sheets with glue. Adhere cover to the top of the sheets. Turn your stack over and adhere back cover the same way.
8. Finishing
- Finish your book by decorating the covers, attaching ribbon, and adding those special touches.