Figure 1 Figure 2
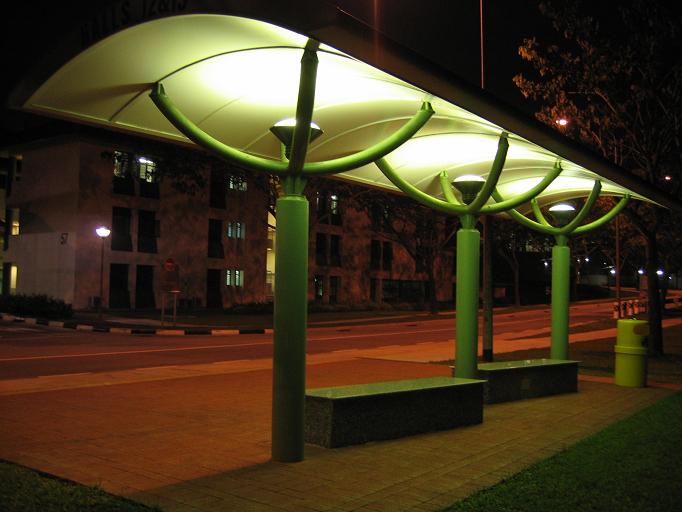
This is the scene I'm rendering. A picture taken during the day.
SC443 Computer Game Programming
Assignment #02: Night Life in NTU
This assignment was about finding a place in NTU and render it as an night scene. We would construct a simple 3D world using polygons. Three light sources or more had to be in this scene. To make the world look more realistic, lightmaps should be added and textures could be used. For navigation, only left, right, fron and back was a must for this assignment.
I have chosen a busstop in campus, just across hall 12 and 13. I have chosen this because it looked really interesting to render. It has 3 light sources and is placed so it's possible to walk around it, so it's possible to create a scene you can actually see from all sides, without cutting anything.
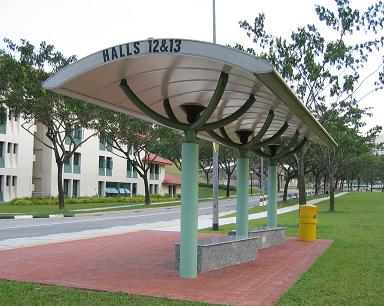
I started out with taking some pictures with my digital camera (see figure 1). I then choose one of these pictures to render. Since you can only walk along the x and y axis I decided to take that where the view ia from the corner of the busstop. This makes it possible to see all the structures of the scene (from the front it would not be possible to see the pillar-supporters nor the light because the roof would be in front of them).
Figure 1
Figure 2
This is the scene I'm rendering.
A picture taken during the day.
I made a drawing of the scene, so I could draw my coordinates before I started to code. I have used Microsoft Visual Studios 6.0, witch caused som problems because the tutorials I found usefull on the net was for .NET. I have therefor used some things from different tutorials on NeHe's site: http://nehe.gamedev.net/.
I have used OpenGL with the following libraries:
<gl\gl.h> // Header File For The OpenGL32 Library
<gl\glu.h> // Header File For The GLu32 Library
<gl\glaux.h> // Header File For The Glaux Library
<math.h> // Header File For The Math Library
This is my first time using OpenGL so I had to learn by during this assignment, witch resulted in some problems compiling the code, and when I wanted to add my ligthmaps I was told that my OpenGL did not support MultiTexturing so I have no lightmaps in my scene. I will however try to go to the lab when I find the time and see if I can figure something out there. Instead of using lightmaps I have placed a diffuse light under the roof, so it still looks like some light comming from there (Figure 4). The whole scene looks so much more realistic when light is added.
During the day, the pillars of the busstop is blue, but because of the supportes green color and the light reflecting, they appear green too. So the texture for the pillars as well as the supporters is the same. I have textured the ground with a picture I took of the floor when I was there during the day so it should have been a bit darker. The texturemap I have used for the beches is also real picture from when it was light. As you can see, the contruction of the lamps are really complex, so instead of creating it complete as it looks like in the real world, I draw a cone with a sphere inside so you still get the picture of the contruction. The use of MipMap would have been better, but because of the use of processor power, I choose not to.
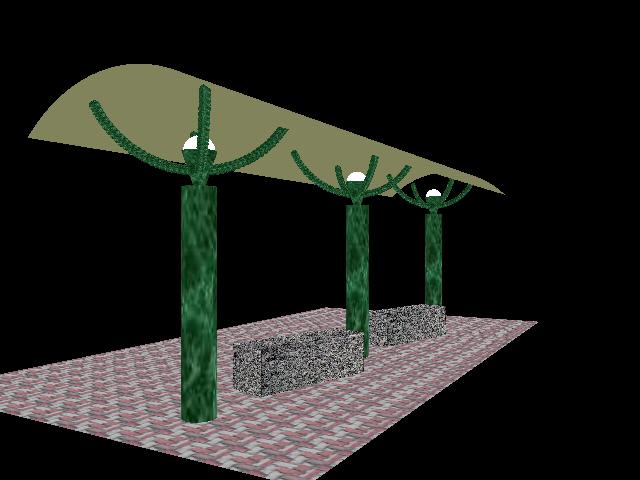
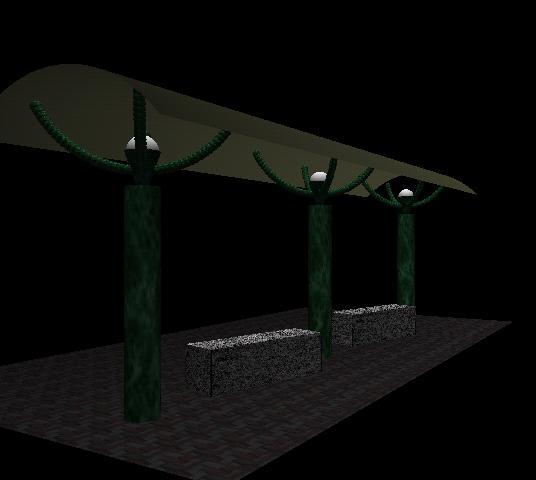
Figure 3
Figure 4
The Busstop before adding the diffuse light.
After the diffuse light has been added,
it looks so much more realistic =)
Keys to use:
L = will turn on/ off the Light. Press to see night effect.
F1 = this will change the windowsize from full screen to windowmode and visa
versa.
Left Arrow = move your position left, as if you were walking left and the scene
right.
Right Arrow = walk right.
Up Arrow = walk toward the scene.
Down Arrow = walk away from the scene.
The assignment given can be seen
here.
The source code, textures and exe file can be
downloaded here.
My thanks to NeHe and his partners for using the tutorials found on his site.