|
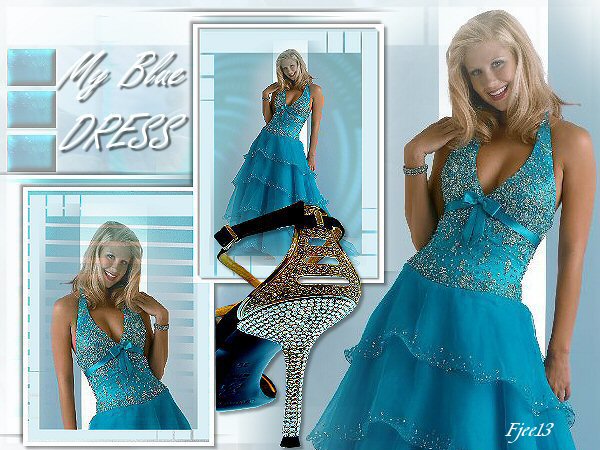
My Blue Dress
***
The
tutorial can be done in any version of
PSP. An average knowledge of
PSP is required.
This tutorial was done in PSP 8
***
MATERIALS NEEDED:
6 tubes supplied by Yvonne
Download here
***
METHOD.
Open a new transparent canvas, size 300-400.
Fill with white.
Copy 'image 1' and
paste as a new layer onto the canvas.
Add a new raster layer.
Selections --> Select All
Selections --> Modify --> Contract by 25.
Copy the tube 'blue dress' and paste it into the selection.
Sharpen 1x and merge all layers.
Minimize for now.
Open a new transparent image, size 300-400.
Fill with white.
Copy 'image 2' and
paste as a new layer onto the canvas.
Add a new raster layer.
Selections --> Select All
Selections --> Modify --> Contract by 25.
Activate the blue dress tube again
and select the head, and a small part
of the
breast in a nice rectangle.
Copy it and paste into the
selection on the canvas.
Sharpen 1x and and merge all layers.
Minimize it for now.
Open 'image 3', duplicate and close the original.
Copy the tube 'blue dress' and
paste as a new layer onto the canvas.
Position her in the bottom right corner.
Add a new raster layer.
Activate the selection tool.
Choose the 'Custom Selection'- option
in the top Selection toolbar.
Set the values as follows:
Left - 33
Top
- 19
Right - 224
Bottom - 278
Copy
image 1 and paste into this selection.
Keep selected
Add a new raster layer.
Copy image 2 and paste into selection.
Position both layers where you like it.
Merge the 2 layers and apply a drop shadow:
3-3-35-4.
Repeat with H & V on minus 3.
Duplicate this layer and activate the bottom one.
Apply Effects --> Distortion Effects --> Wind:
100 to the right.
Repeat with the wind-effect 75 to the left.
Shift the top layer so that some of the wind effects
on the lower layer can be seen.
Merge all layers
(Layers --> Merge--> Merge All).
Copy the tube 'tree' and
paste as a new layer onto the canvas.
Position it precisely on the three white blocks.
Change the layer opacity to 40%.
Copy the tube 'shoe' and
paste as a new layer onto the canvas.
Arrange it nicely against the edge.
See example.
Add some text and your name.
Finished ! :-)
Have fun!
Back to Index
Click on the banner
to go to Yvonne's Dutch Tutorials
Yvonne Email
***
Updated 13th May 2007
�Magstags2005 - 2007
Home | Filter
links |
Email
|