|

Asian Girl
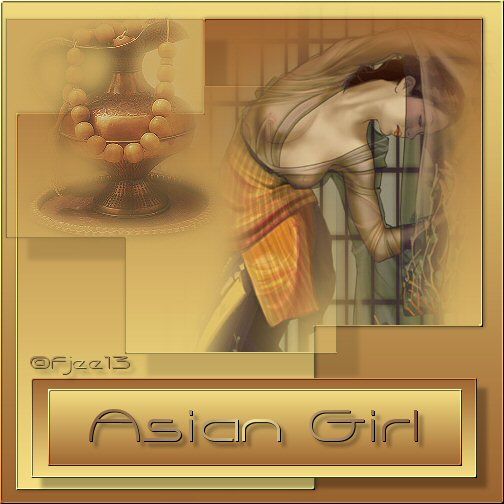
***
The
tutorial can be done in any version of
PSP. An average knowledge of
PSP is required.
This tutorial was done in PSP 8
***
MATERIALS NEEDED:
3 tubes supplied by Yvonne
Download here
***
METHOD.
Open a new transparent canvas, size 500-500.
Make a gradient: Linear - 0-0,
colors #EFDA7F and #9A6230.
Fill the image.
Copy the tube 'squares' and paste
as a new layer
onto the canvas.
Duplicate this layer.
Resize to 71% and mirror.
Drag it to the top left corner.
Position it nicely against the first layer.
Apply a drop shadow with these settings: 22-22-30-6.
Change the layer opacity to 40%.
Copy the tube 'asian girl' and paste as a new layer.
Position it nicely in all the corners. It will fit perfectly.
Merge all layers.
Copy the tube 'kan' and paste as a new layer.
Drag it to the top left of the canvas.
Add a new raster layer.
Draw a selection from the left to the right in the bottom
part of the canvas.
Fill with the gradient.
Apply Effects --> 3D Effects --> Inner Bevel,
with these settings: Bevel 2,
2-2-2-3-6-315-50-30.
Apply a drop shadow, but change the '22' to '10'
Deselect.
Make a selection in
the rectangle you have just made.
a little bit away from its edge.
Invert the gradient and fill the selection.
Apply an inner bevel.
Use a nice font to add some text.
(The' Capsule'- font was used in the tag example).
Apply a drop shadow: 1-1-100-1
Apply a drop shadow: 5-5-30-5.
Merge all layers
(Layers --> Merge--> Merge All).
Add a 2 pixel black border.
Select and fill with the gradient.
Apply a nice inner bevel.
Add your name and you are finished! :-)
Back to Index
Click on the banner
to go to Yvonne's Dutch Tutorials

Yvonne Email
***

Updated 13th May 2007
�Magstags2005 - 2007
Home | Filter
links |
Email
|