|

~*~ Roses ~*~

Vika's original Dutch tutorials
can be viewed here
Terms
of
Use
None
of the
images
used
in
these
tutorials,
which is offered for download in the zip files,
nor the tutorial results may
be
used
for
any
commercial
purposes
in
any form whatsoever
!!
The
copyright
remains
with
the
original
artists
and
are
protected
by
international
copyright
laws.
Artwork used in the tutorials is used for
educational purposes only.
Copyright of the tag design remains solely with
the tutorial writer.
You cannot claim the tag design or tag results as
your own or sell it as your own.
You cannot sell the images used in the tutorials
as part of a web design or web sets or anything
else.
NOTHING CAN BE SOLD!!
Kindly report any illegal sale of the tutorial
results or material to
Maggie
Magstags
Download the supplies
here
A collection of tubes, masks, brushes, backgrounds
and the font 'Al Havenly'.
Save everything in your different folders before
you begin
the tutorial :)
***
FILTERS NEEDED:
None
Foreground color: #f1c7c7
Background color: white.
1. Open a new transparent canvas, size 700 x500
pixels.
Fill with white.
2. Layers - New raster layer.
Fill with foreground color.
3. Lagen-masker laden/opslaan-masker laden vanaf
schijf, zoek SaraLettersMask

Layers - Merge - Merge Group
4. Layers - New raster layer.
5. Activate the Brush tool and find the
'Roses'-brush.
Apply it 2x in the foreground color to the right
side of the canvas.

5.Open the background image - yellowroses
Adjust - Hue and Saturation - Colorize:
Hue 255 / Saturation 83.
Edit - Copy.
Edit - Paste as new layer.
6. Layers - New raster layer.
Layers - Arrange - Move down.
7. Activate the Brush Tool again.
Find the 'Geometric 04'- brush
and apply 2x, next to each other, in the
foreground color,
to the top of the canvas:

Layers - Duplicate.
Image - Mirror.
8. Layers - New raster layer.
Activate the Brush tool again and change the
'Geometric 04'-brush's rotation to 90.

Apply the brush to the left side of the image.

9. Layers - Merge - Merge All.
10. Layers - New raster layer.
11. Selections - load/Save Selection - Load
Selection from Disk:
Find the 'Roses-Vika' - selection and apply.
Change the foreground color to gradient:
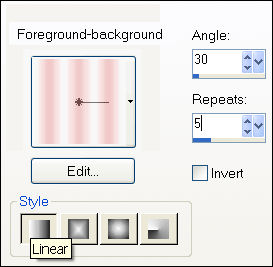
Fill the selection with the gradient.
12.Effects - Texture Effects - Blinds:

Selections - Select None.
Layers - Duplicate.
Image - Mirror.
Layers - Merge - Merge Down.
Effects - 3D Effects - Drop shadow:
3 / 3 / 50 / 6 / color black.
Repeat with V & H -3.
13. Open tube border rose
Edit - Copy.
Edit - Paste as new layer onto the canvas.
Move it to the top left as seen in the exampe.
Layers - Duplicate.
Image - Flip.
Move the shape(bar) to the right.
14.Open the 'mysonia'- image.
Colorize it with the same settings as before.
Image - Add borders:
12 pixels - white.
2 pixels - foreground color.
Edit - Copy.
Edit - Paste as new layer onto the canvas.
Image - Rotate - Free Rotate: Left / 16.
Move it to the top left.
Apply a drop shadow: 2/ 2 / 40 / 7.
Repeat with -2.
15.Open tube 'Misted Red Rose Spray RM'
Activate the tube-layer in the Layers palette.
Colorize same as before.
Edit - Copy.
Edit - Paste as new layer onto the canvas.
Move it to the left side.
16. Layers - Merge - Merge All.
17. Image - Add borders:
1 pixels - color #623132.
30 pixels - white.
1 pixels - color #623132.
18.Open tube 'LD lintstrik'.
Colorize the tube-layer again.
Edit - Copy.
Edit - Paste as new layer onto the canvas.
Move it to the right side as seen in the example
tag.
You can draw the bow out with the Deformation
tool.
Adjust - Sharpness - Sharpen.
19. Change the fore - and background colors around
in the Color palette.
Lock the foreground color.
Activate the Text tool.
Find the 'AL Havenly'- font, size 48.
Type '"My Love is Like...Roses"
Apply a drop shadow:
1 / 1 / 66 / 1.
20. Add your name.
21. Layers - Merge - Merge All.
Vika
July 2007.
********************

Email
Maggie
at Magstags
Email
Vika

Website design and management by
©Magstags |