|
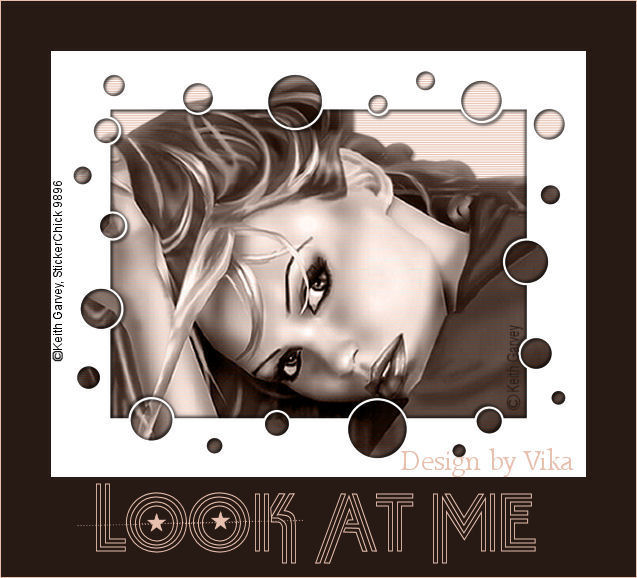
~*~ Look At Me ~*~
Vika's original Dutch tutorials
can be viewed
here
Terms
of
Use
None
of the
images
used
in
these
tutorials,
which is offered for download in the zip files,
nor the tutorial results may
be
used
for
any
commercial
purposes
in
any form whatsoever
!!
The
copyright
remains
with
the
original
artists
and
are
protected
by
international
copyright
laws.
Artwork used in the tutorials is used for
educational purposes only.
Copyright of the tag design remains solely with
the tutorial writer.
You cannot claim the tag design or tag results as
your own or sell it as your own.
You cannot sell the images used in the tutorials
as part of a web design or web sets or anything
else.
NOTHING CAN BE SOLD!!
Kindly report any illegal sale of the tutorial
results or material to
Maggie
Magstags
Download the supplies
here
***
FILTERS NEEDED:
None
***
Change the foreground color to #e7c0af,
background color to #271913.
1.Open your tube.
2. Add a new raster layer.
Fill with the foreground color.
Layers - Arrange - Move Down.
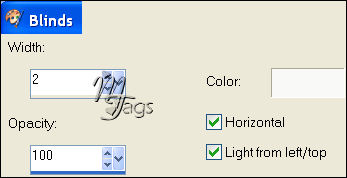
Effects - Texture Effects - Blinds:
3. Activate the tube layer in the Layers palette.
Change the Blend mode of this layer to
'Luminance(Legacy)'
in the Layers palette.
Adjust - Sharpness - Sharpen
4. Image - Resize to 110%
Repeat 1x.
5.Layers - Merge - Merge All
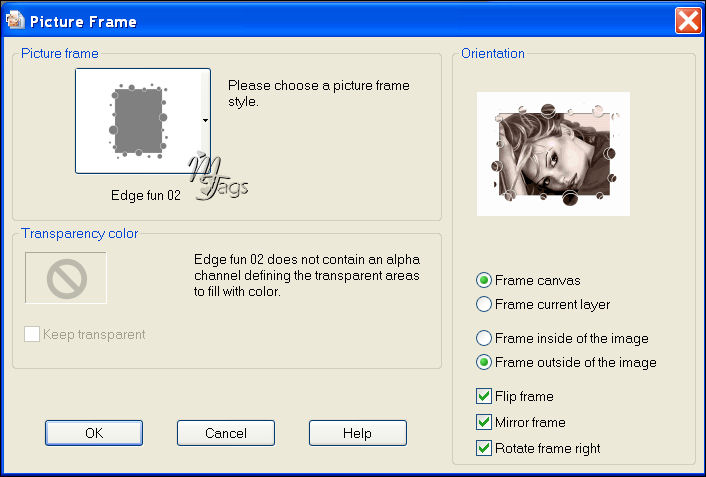
6. Image - Picture Frame - Edge Fun 02 (PSP X):
7. Effects - 3D Effects - Drop Shadow:
2 / 2 / 70 / 4 / color - black.
Repeat with H & V on -2.
8. Image - Add Borders: 'Symmetric'= NOT CHECKED!
Top, Left, Right - 50
Bottom - 100.
9. Open the ''Tabulation Twin'- font, size 72.
type 'LOOK AT ME'.
10. Add a new raster layer.
Activate the Brush Tool and find the
'cross stitched star 006'- brush.
Apply with the foreground color over the letters.
11. Layers - Merge - Merge All
12. Add your name and you are finished! :)
********************
Vika
Maart 2007

Email
Maggie
at Magstags
Email
Vika
Translated 30th May 2007

Website design and management by
©Magstags
|