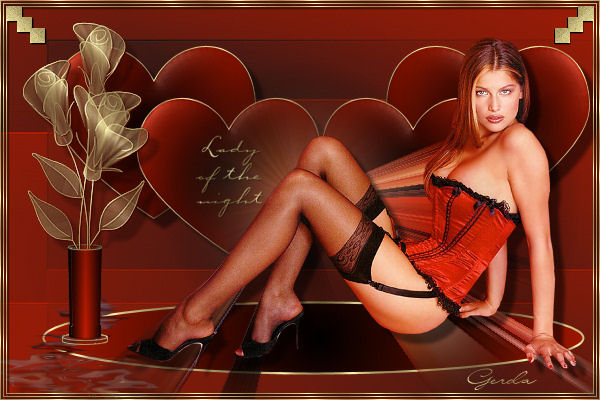
Lady of the night
Gerda's orginal Dutch tut can be found
here
This tutorial was done in PSP 9.
You need a good knowledge of PSP to complete
the tut.
It is a long tutorial, and you have to read
carefully as you go along,
but it will be worth it! :)
We're going to make everything ourselves.
The 'keigave'-tube is from Susan.
***
Filters needed:
*VM Toolbox - Zoom Blur ( included in the
zip)
but you can also use VM Stylize works the
same.
*FM Tile Tools
*Eye Candy 4000
*Flaming Pear - Flood download
download here
***
MATERIALS NEEDED:
*166-kris.msk ,
* Preset Shape - heart1
*Top hat
*Brushes 'sr flowers'and 'gerdatekst23'
*Tubes: ' 010 ladygerdafr 2' and 'susan
t619'
*Gold pattern
Download the supplies here
Step 1
Open the '166-kris.msk'
and minimize it.
Open a new transparent canvas,
size 600x400 ,transparent.
Change the foreground color to #a71700
and background to black.
Change the foreground to
gradient: Style = Liniar
Angle = 45
Invert = unchecked.
Fill the canvas with the gradient.
Step 2
Change the foreground to the
red color #a71700
Add a new raster layer and fill
with the color.
Layers- New Mask layer--> from Image
Find the '166-kris.msk '
INVERT MASK DATA = CHECKED!!!
Click 'ok'.
Delete mask and reply 'yes' to
the question.
Merge all layers.
FM Tile Tools -->Blend Emboss -
2x.
Step 3
Open the ' susan t 619'-tube.
Copy and paste as a new layer and shift it
to the right so that the tip of her hand is
positioned on 580 as seen in the tag example
above:))
Duplicate this layer.
Layers --> Arrange --> Move down.
Note !!!
If the VM Toolbox - Zoomblur
filter doesn't want to work,
try the VM Stylize filter as suggested by
Yvonne - the master tester of Gerda's tuts
:)
Effects--> Filter VM
Toolbox --> Zoom Blur -->amount 100, adjust
143
(the zoom of the colors can
verify
depending one where you positioned the
tube.)
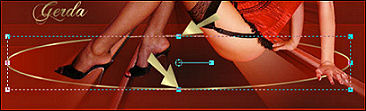
Activate the bottom layer. We are
going to build new layers from there up.
Preset Shape --> Oval --> 'Retain
Style'- unchecked,
'Anti-alias' and 'Create as Vector' = both
checked.
'Width' = 2.
Change the foreground color to the gold
pattern and
the background to gradient:
Style = Sunburst
Angle and Repeat = 0
Invert = not checked.
Now draw a horizontal oval shape
below the woman.
You can always make it flatter afterwards
while it remains
a vector shape.
If you leave it until you have converted the
vector layer to raster layer
you will have to sharpen it, and it won't
look good at all :-))
Your image should look like this
now:
Activate your tube layer - the
top layer.
Drop shadow: 10/10/10/5
color black.
Step 4
Activate the
bottom layer again.
Foreground on
gold,
background on gradient - the same settings
as in step 3.
Preset Shape 'heart 1' , 'Retain Style' = unchecked, 'Anti-alias'and
'Create as Vector'= checked.
Line WIDTH
should be
1
Draw a heart
shape as seen below

Convert the
vector layer to raster layer in the layers
palette
Effects --
Inner Bevel with these settings:
Width 31 , 9/6/9/22 ,Angle 315 , 28,54 color
white
Duplicate
this layer
Resize the duplicated layer to 90% -
depending on the size of the heart.
You might need to reduce the size a little
bit more.
'RESIZE ALL LAYERS' SHOULD BE UNCHECKED!
Drag the
heart to the right with the
Mover Tool so that the hearts forms steps
behind the woman's leg.
Lock all
layers except the heart layers !!!!!
Activate one
of the heart layers and merge them visible.
Unlock the other layers.
Activate the hearts layer and duplicate.
Image --> Mirror.
Schift it more to the right so that the
hearts touch each other.
Lock all layers, except the heart layers,
again.
Merge the heart layers visible.
Drop Shadow 10/10/10/5
color black
Unlock the layers.
Merge all layers.
Merge
Step 5
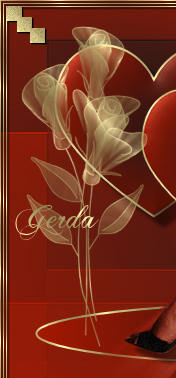
The Vase and
the Flowers.
Stick to the
lesson: We're going to make the vase
ourselves :)))
To save some time, since the tutorial is
already a bit long,
copy and paste the 'ladygerdafr2' - frame
provided in the zip on the image.
Add a new raster layer
Change the foreground to gold.
Activate your Brush Tool and and find the
' sr flower 010'- brush --> size 325
--> Blende mode on 'darker'
Apply thee brush on the right side - see
screenshot
Adjist
--> Sharpness --> Sharpen
Drop shadow
1/1/100/0 color #400000
Step 6
Foreground on
the red color,
background on black
Lock the foreground.
Change the
background to your gradient:
Style = Linear
Angle = 90
Repeat = 1
Invert = checked
Basic
shape--> Top hat - yes,
you're going to make a vase with the top
hat-shape :))
'Retain
style' must be unchecked ,
anti alias and 'create as vector' are
checked.
Draw a sshape
over the flower stems.
You can draw the shape as small or big as
you want - as seen below.

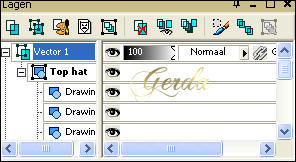
Open the
vector layer in the Layers Palette - click
on
the small cross next to it.
Click on the cross next to the top hat as
well.
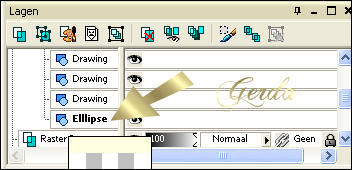
Your Layers palette should look something
like this now:
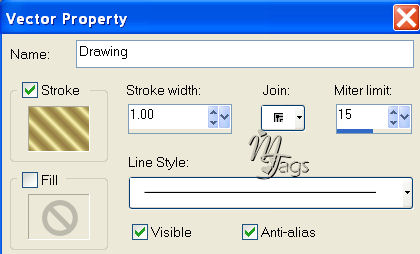
If you
double-click on the first'drawing'- layer
just below the 'top hat' llayer,
a screen will open. Here you can change the
vector - attributes as seen below
The Stroke can be changed to your gold
pattern.
Scroll down
in the Layers palette to 'ellipse' and
repeat the same steps as you just did with
the top hat in the Layers palette.
Do the same
with the 'drawing' layer just above the
'ellipse'
layer.
When
finished, you can click on the minus sign
next to the 'top hat'and 'vector layer'again
to change itback to the plus '+' sign.
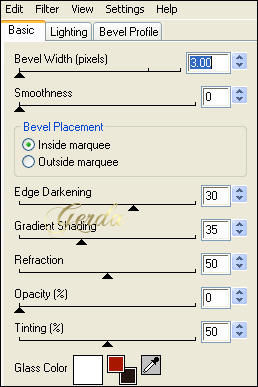
Convert the vector layer to raster layer.
Apply the Eye
Cancy --> Glass effects
with these settings:
Layers --
Arrange -- Move Down
Activate the top layer ( it should be the
flowers layer)
Activate the
Eraser tool and erase the flower stems, so
that
the flowers fit nicely into the vase.
Move the flowers into the vase if you want
to.
Apply a drop
shadow to the flowers:
10/10/50/5
color black
Step 7
Lock all the
layers, except the flowers and vase layers.
Activate one of the unlocked two layers *
flowers or vase)
and merge them visible.
Duplicate this layer.
Layers --> Arrange --> move down.
Repeat the Layer arrangement once.
This layer should be above the background
layer.
Apply Effects --> Flaming Pear -- Flood
with the settings below.
The size of the vase will determine the
outcome.

Merge all
layers.
Step 8
Foreground on
gold.
Add a new raster layer.
Find the ' gerdatekst23--> Blend mode
on 'Darker',
size = 100
Apply the
brush on top of the heart.
Add a drop shadow:
1/1/50/0 color black.
Add your name
and merge all layers.
Your tag is finished.
If you want to share this tutorial in groups
or email,
kindly only use a text link to it.
PLEASE DON'T HOTLINK IT !!
Back to Index
Design by Gerda©
translated 17th June 2006
©magstags
Visit Gerda's Dutch
website here


This website was created in March 2005 and is owned
by
©Magstags
Home |
Filter links |
Email | Terms Of Use
|