|
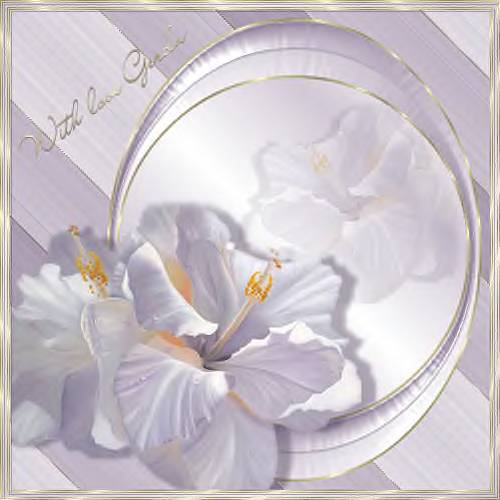
Flower Connie
Gerda's original Dutch tutorial can be found
here
***
Materials needed:
You
need a good knowledge of PSP for this tutorial.
|
Filter: |
Superblade Pro
download here
|
Supplies: |
susan
1090 ,
a
gold pattern
a flowerconnieger psp image
a tube
flowcongerframe 3
and a zip with the clear glass
preset for Super Blade Pro
|
Click
here if you don't know
how SBP is working.
You need the Preset
Shape, named "p" in the Preset Shape 60 package
The tube is from Susan.
Download the supplies here
Ok
are you ready ?? Take a deep breath , lets go and follow me :)))
Step 1
Foreground on #d1c9d5
, background on #f0ecf2
Open the flowerconnieger psp image (the
selection is in the alpha channel. There's only the multicolored pattern on
the image you open. :)) lol
Adjust -- Hue and
Saturation -- fill in the hue and saturation values, 198 and 32,
of your foreground
color.
Change the opacity of
this layer to 80%
in your Layers Palette.
Layers -- Merge -- Merge
All.
(You will find this step
a but confusing, since you only have one layer, right?
But you will see when
you merge it that the background becomes lighter.
When you merge it, a
white background is added, which makes it lighter.)
Effects--> Edge
Effects -- Enhance
Step 2
New raster layer.
Change your foreground
color to gradient: style linear, angle 45, repeats 3,
invert not
checked.
Selections -->
Load the flowerconnieger selection from your alpha channel
and fill with your
gradient.
Deselect
Step 3
New raster layer
Change your foreground
color to the gold pattern
and fill the layer with
it.
Selections -- Load the
flowerconnieger1
from your alpha channel
Selections -- Invert.
Press delete on your keyboard - that is a easier than
filling
everything :))
Layers --> Arrange
--> move down
Drop Shadow 1/1/42/ 0
with this color #4e3f57
Step 4
Activate your top layer.
Foreground color on
gold.
Background on this color #d1c9d5
Activate your Preset
Shape tool and find the "p" preset shape
with these settings:

Now draw an oval like
this:
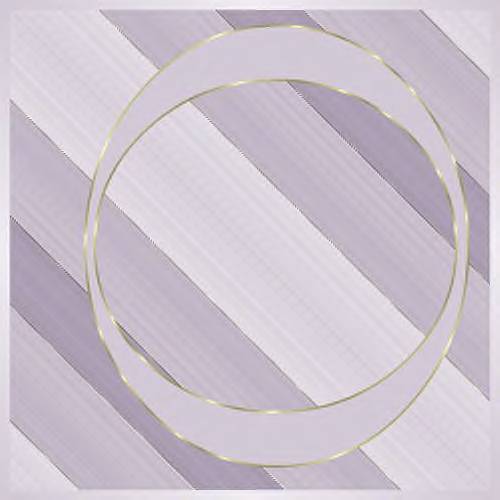
Arrange it it neatly so
that you have the same space above and below it
on the canvas.
Convert the vector
layer to raster layer
Click with your Magic
Wand in the lilac part between the two
gold ribbons
Filter --> Flamingpear
--> Super Blade Pro -->Clear Glass
( If you can't see the
preset in SBP, change the file name from q5q to q9q)
Adjust --> Hue and
Saturation -- Colorize, and fill the H and S values of your
foreground in. It should
be 198/32
Deselect.
Step 5
Foreground on
#d1c9d5, background on #f0ecf2
Change your foreground
to gradient: style linear; Angle 45; Repeats 3.
Invert checked !!!
Click in the center of
your oval and fill with your gradient.
Deselect.
Merge All layers.
Step 6
Open your tube susan 1090
Resize to 70% ( resize
all layers checked)
Image -- Mirror.
Edit -- Copy
Edit -- Paste as new
layer onto the canvas,
Position it against the
border you have made in step 2.:))
You will notice a slight
border on the top border of the flower,
don't worry, we will
fade it out now.

Activate your Eraser
Tool -- on round, size 32, hardness on 25
and click a few time on
the border of the flower.
Look at my example tag
above.
Apply a drop shadwo 0,15,42,5
with this color #4e3f57
Activate the tube layer
Layers --> Duplicate
Image --Mirror
Resize to 70 %
resize all layers not checked
Layers -- Arrange --
Move Down
Drag your tube with your
Mover tool slightly to the top
so that it forms a
mirror image of the other tube.
Erase the parts that
overlaps the border.
Reduce the opacity of
this layer to 26%
Merge layers visible.
Step 7
Open your flowcongerframe
3
Copy and paste as new
layer.
Add your name and you're
finished. :))
I wrote this tutorial
with love.
Hugs
Ger
This lesson can be freely used.
All I asked is that you only link it and
not copy it,
since it takes a long time and a lot of effort
to write a tutorial.
Since I am under a lot of
pressure with other work, I cannot
respond to personal emails.
However,
you are welcome to ask any questions on my PSP
groep
" Ger's Psp Café"
.
Click
here
if
you're interested.
Back to Index
Design by Gerda©
Translated 7th September 2005
Visit Gerda's Dutch
website here


This website was created in March 2005 and is owned
by
©Magstags
Home |
Filter links |
Email | Terms Of Use
|