*~*My Butterfly*~*
Lisa's original Dutch tutorial can be viewed
here.
This tutorial was written for PSP X1
but can also be done in earlier versions of PSP.
You need some experience in PSP for this tutorial.
MATERIALS NEEDED:
Animation Shop.
***
5 tubes supplied by Lisa.
1 animation.
1 glass texture
Download the supplies
here.
METHOD:
It is an animation tutorial
but it can also be left out.
Open the 'mistedL-45'- image.
Choose two colors:
Light color: #ada29b
Dark color: #9e7e7e7.
Open all the other supplies and save it
in your folders.
Open a new transparent canvas size 600 x 450 pixels.
Fill with the dark color.
Add a new raster layer.
Selections - Select All.
Open the '0018S-L'- image.
Copy and paste it into the selection.
Deselect.
Open the 'lisa-lace10'- image.
Copy and paste it on the canvas.
Open the 'mistedL-45'- image.
Copy and paste it on the canvas.
Move it to the left
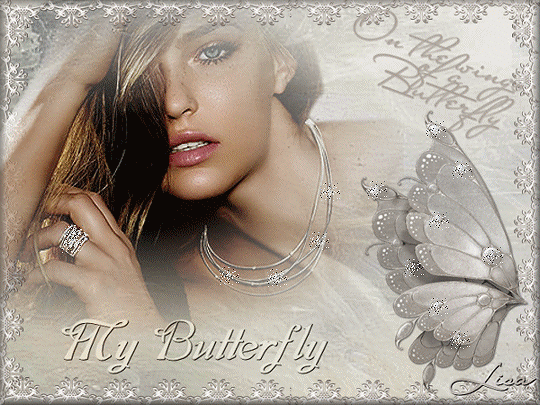
as seen in the example.
Open the butterfly image.
Copy and paste it on the canvas.
Move it to the right - see example.
Effects - 3D Effects - Drop Shadow:
1/ 1 / 90 / 3 / color black.
Reduce the layer opacity tp 80
in the Layers palette.
Add a new raster layer.
Open the butterfly brush and export it
to your brushes.
Activate the Brush tool, find the butterfly brush
and apply onto the canvas with the dark color.
You can rotate it or leave it as it is.
Open the text tube.
Copy and paste it on the canvas.
Reduce the layers opacity to 80.
Change the Blend mode to 'Luminance(Legacy)'
in the Layers palette.
Resize to 85%.
Arrange everything where you like it.
Layers - merge - Merge All.
Effects - 3D Effects - Buttonize:
10 / 10 / 50 / dark color.
Resize the image to 400 pixels in width.
You can animate it now as seen below.
ANIMATION.
Open Animation Shop- standard in PSP 9.
Click on the yellow file-icon
to open the files.
Find the 'leuke.gif ' image.
It contains 8 frames.
Open PSP again and copy the image that you have just made.
Paste it as a New Animation into AS.
You will need 8 frames to fit the 'leuke.gif' animation.
To do that:
go to Edit --> Duplicate Selected.
Duplicate it until you have enough
frames of your own image.
If you have more than 8
just click on the extra frames - one by one
and delete them.
Drag your image out to reveal all the frames.
Go back to frame 1 of the image.
Edit --> Select All.
Leave it for now selected.
Activate the 'leuke.gif'- animation again.
Go to Edit --> Select All.
Edit --> Copy.
Activate your PSP-image again.
Edit --> Paste into Selected Frames.
The 'leuke.gif' will cling to the mouse pointer now.
Position it where you want it and then just click on the spot in the 1st image frame
where you want it.
Click on the animation icon on the top toolbar
to view the animaton.
Click on the animation icon again when you want to close it.
This way you can add several animations to the image,
if you want to.
If you are finished you can optimize the animation:
Go to File --> Optimization Wizard.
Go through all the steps.
The second window that opens looks like this:
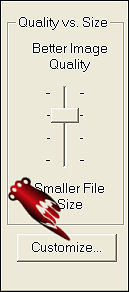
Click on 'Customize'
Choose these options below in the window that opens:

Click on 'OK' and just click on 'next'
in each window that opens and lastly 'finish'.
Now you can save it as a GIF.
You're finished ! :)
|