|

~*~ Unlock
~*~

Marian's original
Dutch tutorial can
be viewed
here.
This tutorial was
written for PSP 9
but can be done
in other versions
as well.
Download the
supplies
here
or
here
The tubes were made
by
Marif
and
*HJR Designs
(*no
link-information is
available on the
tube)
Please respect the
copyright and keep
the filenames
intact.
Note: some of
the layers have been
locked to save on
bandwidth.
Remember to
unlock them in PSP
:)
FILTERS NEEDED:
Jeux de Lignes
Filters Unlimited
2.0
Step 1
Open a new
transparent canvas,
size
680x520 pixels.
The Color Palette:
Foreground color:
#dcb6b0
Background color:
#a3806c
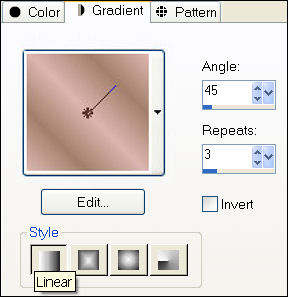
Make a gradient:
Style - Linear
Angle - 45
Repeats - 3
Invert - unchecked
Fill the canvas with
the gradient.
Adjust - Blur -
Gaussian Blur: 30.
Step 2
Layers - New Raster
layer.
Change the
foreground color to
#2a251f
Layers - Load/Save
Mask - Load Mask
From Disk:
Find the
"0.153-wicked"- mask
and apply with:
Souce luminance /
Fit to layer /
Invert Transparency
/ Hida All Mask
Layers - Merge -
Merge Group.
Step 3
Activate the
Selection Tool -
Custom Selection:
Top 50 /Left 50 /
Right 630 / Bottom
470.
Step 4
Layers - New Raster
layer.
Make a gradient with
your fore- and
background colors:
Style - Linear
Angle - 45
Repeats - 3
Invert - unchecked.
Fill the selection
with the gradient.
Adjust - Blur -
Gaussian Blur: 30.
Effects - Texture
Effects - Blinds:
Width 2
Opacity 40
Color #a79280
Horizontal and Light
from top - checked.
Step 5
Effects - 3D Effects
- Drop Shadow:
H 10 and V 10,
Opacity 60,
Blur 20.
Repeat with V & H
-10
Step 6
Layers - new Raster
layer.
Selections -
Load/Save Selection
- Load Selection
From Disk:
Find the
"sde_butterflies_3"-selection
and apply with these
settings:

Fill the selection
with the gradient.
Step 7
Effects - Texture
Effects - Blinds:

Selections - Select
None (Ctrl+D).
Step 8
Layers - New Raster
layer
Activate te
Selection Tool -
Custom selection:
Top 153
Left 50
Right 630
Bottom 375
Fill the selection
with your background
color.
Change the layer
opacity to 42
in the Layers
palette.
Selections - Modify
- Select Selection
Border: Inside /
Anti-Alias/ Width 2.
Step 9
Layers - New Raster
layer.
Fill this selection
with the pattern "Gold
Foil".
Selections - Select
None (Ctrl+D).
Step 10
Open the tube
"Marif_2006_octobre_misted_fleurs088".
Copy and paste as a
new layer onto the
canvas.
Image - Resize: 90%
/ Bicubic / Resize
All Layers -
unchecked.
Move it into
position as seen in
the example.
Change the Blend
Mode of the layer to
'Luminance(Legacy)'
in the Layers
palette.
Change the layer
opacity to 52
in the Layers
palette.
Step 11
Open the tube
"HJR_Woman6_24jun2007".
Copy and paste as a
new layer onto the
canvas.
Image - Resize 95% /
Bicubic /Resize All
Layers - unchecked.
Move it to the
right.
Effects - 3D Effects
- Drop Shadow:
H 5 and V 5,
Opacity 60,
Blur 15.
Step 12
Change the
background color to #2a251f.
Activate the Text
tool.
Use the font "BalletEngraved",
size 48
and apply your text.
Effects - 3D Effects
- Drop Shadow:
H 1 and V 1,
Opacity 70,
Blur 5.
Layer opacity on 82.
Step 13
Open the tube "Key".
Copy and paste as a
new layer onto the
canvas.
Image - Resize 85% /
Bicubic /Resize All
Layers - unchecked.
Move it to the left,
the top of the bow
agains the golden
border
as seen in the
example.
Effects - 3D Effects
- Drop Shadow:
H 1 and V 1,
Opacity 50,
Blur 5.
Step 14
Layers - Merge -
Merge All.
Add border: 11
pixels - color #a3806c.
Select the border
with your Magic
Wand:
Opacity 0 /
Anti-Alias / Inside.
Effects - Filter
Effects - Jeux de
Lignes -
Entracement.
Effects - 3D Effects
- Drop Shadow:
H 1 and V 1,
Opacity 80,
Blur 3.
Repeat with V & H
-1
Step 15
Add borders: 3
pixels -white.
Select with the
Magic Wand.
Fill the selection
with the 'Gold Foil'
pattern.
Effects - Filters
Unlimited 2.0 -
Screenworks - Close
Knit
Step 16
Add border: 30
pixels - color #4b4039.
Select this border
with the Magic wand.
Effects - Texture
Effects - Blinds:
Width 3
Opacity 35
Color #000000
(black)
Horizontal / Light
from top.
Repeat the blinds
effect but this time
'horizontal' should
be unchecked.
Step 17
Add a 2 pixel black
border.
Step 18
Don't forget to add
your name or
watermark.
Save as JPG and
you're finished!
:-))
©MarianJuly2007
You may not use this
tutorial in any way
without the
written permission
of Marian.
Email
Back to Index
Visit Marian's
Dutch website here:


Magstags
|
Email |
Filter Links |
Terms Of Use |