|

~*~ Satisfaction
~*~

Marian's original
Dutch tutorial can
be viewed
here.
This tutorial was
written for PSP 9
but can be done
in other versions as
well.
Download the
supplies
here
or
here
The tubes were made
by:
Brigitte M
MarieL
KaraT
and
Marcio C
Please respect
the copyright and
keep the filenames
intact.
Note: some of
the layers have been
locked to save on
bandwidth.
Remember to
unlock them in PSP
:)
FILTERS NEEDED:
FM Tile Tools
Step 1
Open a new
transparent canvas,
size 640x480 pixels.
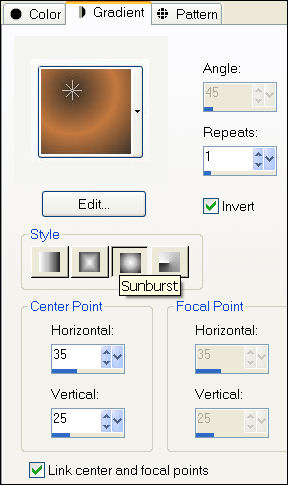
The Color Palette:
Foreground color:
#c47940
Background color:
#3b332b
Make a gradient:
Style - Sunburst
Step 2
Effects - Art Media
Effects - Brush
Strokes:

Step 3
Layers - New Raster
Layer.
Selections - Select
All.
Open the tube
"KaraT3327".
Copy and paste into
the selection on
your canvas.
Change the layer
opacity to 70
in the Layers
palette.
Step 4
Open the tube
"MarieL_2006_11Novembre_SNM01t".
Image - Mirror.
Copy and paste as a
new layer onto the
canvas.
Move it completely
to the right.
Change the layer
opacity to 86
in the Layers
palette.
Change the Blend
Mode of the layer to
'Overlay'
in the Layers
palette.
Layers - Duplicate.
Step 5
Open the tube
"mc621".
Image - Mirror.
Resize 103%.
Copy and paste as a
new layer onto the
canvas.
Move it to the left.
The top of the tube
should fit against
the edge of the
canvas.
Step 6
Open the tube
"prim_White
Lillies".
Copy and paste as a
new layer onto the
canvas.
Move it to the right
as seen in the
example.
Change the Blend
Mode of the layer to
'Luminance(Legacy)'
in the Layers
palette.
Step 7
Open the tube
"Mtm_Bloemen 133-
Sl_125-small -tube-9
Jan 2006".
Copy and paste as a
new layer onto the
canvas.
Move it below the
lilies-layer.
Adjust - Hue and
Saturation -
Colorize: Hue 7 /
Saturation 38.
Step 8
Arrange all the
images
as seen in the
example below:

Step 9
Layers - Merge -
Merge All.
Copy this image with
Shift+D.
Step 10
Add border:
1 pixel - color
#3b332b.
2 pixels - white
Select with the
Magic wand
and fill with a
goldbead pattern.
Effects - 3D Effects
- Drop Shadow:
H and V 1
Opacity 80
Blur 3
Repeat with V & H
-1.
Adjust - Sharpen -
Unsharp Mask:
1/64/4.
Step 11
Add borders:
37 pixels - white.
Select with the
Magic Wand.
Activate the first
image that you have
made.
Edit - Copy.
Edit - Paste into
the selection on the
second canvas.
Adjust - Blur -
Gaussian Blur: 30.
Step 12
Effects - Filters
Unlimited 2 - Lens
Effects - Vertical
Slices: slidebar on
37
Adjust - Sharpness -
Sharpen More.
Step 13
Selections - Promote
Selection to Layer.
Image - Resize:
82%('Resize all
layers = unchecked)
Selections - Select
None (Ctrl+D).
Step 14
Selections - Select
All.
Selections - Modify
- Contract by 2
pixels.
Selections - Invert.
Layers - New raster
layer.
Fill with the
goldbead pattern.
Step 15
Effects - 3D Effects
- Drop Shadow:
H and V 1
Opacity 80
Blur 3
Repeat with V & H
-1.
Adjust - Sharpen -
Unsharp Mask:
1/64/4.
Add a 1 pixel border
in the color
#3b332b.
Step 16
Open the tube
"mc-621" once more.
Resize 103%.
Copy and paste as a
new layer onto the
canvas.
Position it exactly
onto the prevous
woman tube.
Zoom in to make sure
the two images blend
in.
Step 17
Activate the Eraser
tool: size 22,
hardness 5, step 1,
opacity 100.
Erase the part of
the arm that is
sticking out over
the frame.
Step 18
We are going to add
some text now.
Change your
background color to
#ffecdc.
Use the font
'Licorice'- size 48
pixels
and add some text to
your artwork :)
Effects - 3D Effects
- Drop Shadow:
H and V 1
Opacity 80
Blur 3.
Add your name or
watermark
and you're done :-)
Have fun!
©MarianJanuary2007.
You may not use this
tutorial in any way
without the
written permission
of Marian.
Email
Back to Index
Visit Marian's
Dutch website here:


Magstags
|
Email |
Filter Links |
Terms Of Use |