-
Open a new
image 350 x 350 pixels
Open your tube,
duplicate ( Shift + D) and reduce the size if it's too big.
Close the original.
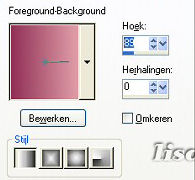
Choose two
colors from your image and make a gradient with it with
these settings below.
Angle - 89
Repeats - 0
Invert - not checked
Style - Linear.
-
Fill your new image with
the gradient
-
Effects --> Filters
Unlimited 2.0 -->
Tile &
Mirror--> XY
offset 50% Negative.
-
Effects -->
Again
Filters Unlimited 2.0 --> Buttons &
Frame --> Mirrored Frame with standard settings.
-
Effects -->
Again Filters Unlimited 2.0 -->
Convolution Filters --> Emboss (light) - Or
choose another setting if you want to. Standard settings.
-
Reduce your image to the
size you would like it to be.
My tube was
299 x 526 and I reduced it to
60%. Remember to uncheck the "reduce
all layers" - option before you reduce the
image.
-
Copy the reduced image
and paste as a new layer onto your canvas.
Position it where you want
it.
-
Effects - 3D effects - Drop shadow - with these
settings:
0 / 0 / 100 / 23.76 / color - black.

Change the the layer's opacity to 50%
in your layer palette.
-
Copy and paste as new
layer.
Place next to your other image,
or near to it.
-
Filter Eye Candy 4000 - Motion Trail -
with
these settings:
273 - 169.11 -
28 - 55

-
Arrange the images the
way you want it and merged all layers.
-
Add a new raster layer.
Tools --> Airbrush and look for the brush in the tag
example, which comes in PSP as a standard brush.
Choose the
light color from your tube.
You can decide on the size you
want to use.
Add the same drop shadow as above.
Add a new rastor layer.
-
Reverse (invert ) your
gradient.
The gradient angle should be
changed from 89 to 270
deg.
-
Use the
Selection tool (rectangle option) and draw a
vertical or horizontal rectangle in which you will write your
name.
-
New raster layer.
Fill
the retangle with the gradient
Go
to Effects -- 3D Effects -- Inner bevel with these
settings:

Again -- Effects -- 3D
Effects -- Drop Shadow with the same settings as
before.
-
Write your name in the
font of your choice. I used the font "Broken Glass" with the
size set on 36 with an innerbevel and drop shadow the same
as before.
-
Finally I buttonized the
text: Effects --> 3D Effects --> Buttonize, with
these settings:

-
And that's it!
:-)
Save as
jpg.