Materials needed:
*A tube with a prominent mouth 350
x 350 pixels
Make it the same size as the one in the tutorial.
* A tube that compliments the mouth-image.
* A font
*Selections.
Supplies: download here
Filter Unlimited 2.0
download here

Method:
Open your tube and choose two colors.
Foreground = dark color
Background = light color
Make a gradient with these settings:
|
Angle 220
Repeat 1
Invert - unchecked
Style - Linear |
Minimize your
tubes/images for now.
Open a new transparent canvas 400 x400 pixels.
Fill the canvas with the gradient.
Adjust-- Blur-- Gaussian Blur 40.
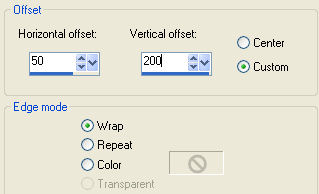
Effects -- Image Effects-- Offset,
with these settings:
Duplicate this layer.
Select All
Copy and Paste your tube into the
selection.
Change the opacity of this layer to 18%
or the opacity you like.
Deselect
Layers -- Merge -- Merge Visible
Effects -- Plugins -- I.C.Net Software's Filters Unlimited 2.0
--
Buttons & Frames--
Mirrored Frame - slide on 67.
Layers -- Merge -- Merge All
Add a new raster layer.
Selections -- Load / Save -- Load from
Disk
-- find the
"lisa0153"- selection.
Fill with your dark color.
Effects -- Texture Effects -- Blinds
2 -- 100 --Vertical --
the dark color of the blinds should be your light color,
and the light color
should be your dark color.
Copy your tubes and paste into selection.
Reduce the opacity of this layer
to 80% in your layers palette.
Effects -- 3D effects
Drop Shadow--1/1/100/1 /color - your
dark color
Repeat the Drop Shadow but this time with
H & V on -1.
Layers -- new raster layer.
Selections--Load/Save -- Load selections from disk--
find the
" lisa0253"-
selection.
Copy your tube and paste into the selection.
Change the opacity of this layer to 80%.
Effects -- 3D Effects
Drop Shadow:
1/1/100/1/ color white
(or any color you prefer).
Repeat the drop shadow but this time with H&V on -1.
Layers -- Merge -- Merge All.
Selections -- Select All--
Modify -- Contract by 10 pixels.
3D Effects -- Drop
Shadow
1/1/100/1.
Repeat but with H&V on -1.
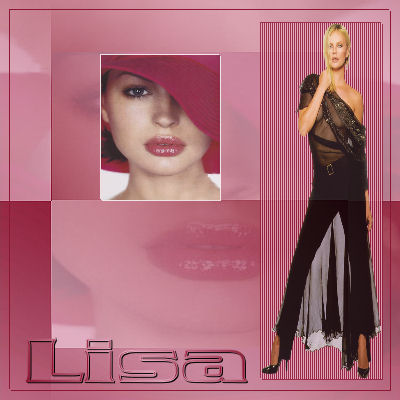
Add a new layer, type your text
with the
'Babylon5 Hallow'-
font, size 48.
Repeat the same drop shadows as before.
Your tag is finished.
Here is another example.