MATERIALS NEEDED:
Download the supplies
here.
FILTERS NEEDED:
Graphics plus.
Filter Eye candy 4000.
DSB Flux.
Download the filters
here
METHOD.
Open all the images in PSP
and choose 2 light colors (as light as
possible),
or use these:
Light color #FCF6F2
Dark color #FBDDC9.
Open a new transparent canvas, size 400x350
Flood fill with the dark color.
Go to Effects -- Filter Effects -- Graphic Plus -- Cross
Shadow
The two bottom slidebars should
be on 48,60.
The rest remain unchanged.
Go to Effects -- Filter Effects -- Dsb Flux--Linear Transmission--
slidebars on 50-5-50 horizontal.
Effects -- Texture Effects -- Blinds
2-70 light color.
Reduce the size of the woman image as you like it.
Copy and paste as a new layer.
Position it to the left.
Layer opacity must be 80%.
Effects -- 3D Effects -- Drop Shadow
Vertical = 3
Horizontal = 0
Opacity = 65
Blur = 8.00
Color = Black
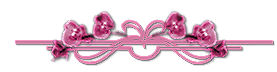
Activate the flower tube.
Image -- Mirror.
Copy and paste as a new layer onto the
canvas.
Image -- Rotate -- 45 degrees Left.
Change the opacity of this layer to
45% in your Layers palette.
Position it as shown in the example above.
Effects -- 3D Effects
-- Drop Shadow
Vertical = 3
Horizontal = 0
Opacity = 65
Blur = 8.00
Color = Black
Activate the 'lisatube'.
Copy and paste as a new layer onto the
canvas.
Position it where you like it.
Layers -- Merge -- Merge All.
Add a 1px black border.
Add a 20 pixel border in your dark color.
Effects -- Filter Effects -- Eye Candy 4000--Cutout
Apply with these settings:

Add your name to the image.
Not too big :)
Resize the image to 350px in height.
You're finished.
Here is another example.


