Ana Tag

This tutorial was done in PSP 9,
but can also
be done in
PSP 8

MATERIALS NEEDED:
Tube and font of your choice
Selections -- copy to your Selections folder
Masker 20-20--save in your mask folder
Brushes - copy them to your brush folder
Download the supplies
**
Filter: VM Extravaganza.
**
2 colors from your tube/image.
METHOD:
This is an easy tutorial.
1. Open your tube -- promote the background
layer.
Layers / Load/Save Mask / Load Mask from Disk -
find the 20-20 mask and apply.
In your Layers Palette - merge the mask group
Layers / Merge / Merge All
2. Minimize your image
3. Open a new image, size 400-400.
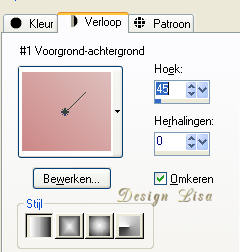
Make a gradient with the colors from your image
-
with these settings below:
5. Effects / Plugins/ VM Extravaganza-Ray
transmission:
with these settings:

6. Effects / Image Effects / Seamless Tiling -
with these settings:

7. Reopen your first canvas and reduce it if
needed.
Copy and Paste as a new layer onto the second
canvas. Position it in the top left corner.
8. Duplicate this layer / Image / Mirror and
reduce the size to 70 % if needed ( make sure
the "resize all layers option is unchecked).
Position it in the bottom right corner of the
canvas.
9. Selections / Load from Disk - find the 'lisana'-
selection
and apply.
10. Layers / New Raster Layer - fill with your
gradient and rotate your gradient.
11. Effecs / 3D Effects / Drop Shadow - with
these settings:
1 / 1 / 100 / 1 / black

Selections / Select None.
13. Duplicate this layer. Go to Image / Mirror.
14. Activate your Brush Tool -
find the poem and set the size to 190
Apply the brush in the top right corner -
use your dark color as foreground color.
15. Layers / Merge / Merge All.
16. Add your name.
The 'Andes'- font, size 72
was used in the tag example.
17. Add a 3 pixel border in a dark color
18. Select with your Magic Wand.
Go to Selections / Invert.
Effects / 3D Effects / Chisel and deselect
(Ctrl+D).
19. Reduce the size to a 350 or 400 pixel
height.
Your Ana Tag is finished !
Here is another example:

|


