Materials
needed:
Supplies Download
here
Save the *Knoppen 01.jsl* preset in
your Preset folder.
If you work in PSP7, save it in your "Shapes"
folder.
Save the*mqc Pinball.jgd* in your Gradient
folder
Filter: Filter Graphics Plus
Filter: Filter Factory
A
Download
here
Filter:Filter Lokal
Shadow
Download
here
Open a new transparent
image size 500 x 500 pixels
Choose 2 colors from your tube: one light and one
dark
I used #B58665 and #EEA677
Set your color on gradient
with these settings
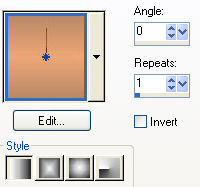
Fill your canvas with
it
Layers / New Raster Layer
Find a nice gradient.
I used "mqc
Pinball"
This gradient comes from Lenie (Wofinneke)
Use these
settings

Place this in your foreground
Lock
your background color
Activate your Preset Shape tool and find the
"Button24"
- with these settings

Draw shape. The Y-position should be
450
and the X-position
should be 450
You can view this on
the bottom toolbar
Go to your
Layers Palette and convert
this vector layer to
a raster layer
You can do that by right-clicking with
your mouse button on
the layer
Effects / Plugins /
Filter Factory A / Wood Grain -
with these
settings

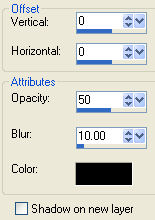
Effects / 3D Effects / Drop Shadow
-
with these settings
Layers / New Raster Layer
Unlock
your background color
Draw a smaller circle in your other circle with the same
Shape Tool
It should be approximately X 350 Y 350
Convert this
vector layer again to a raster layer -
in your layer palette
You will have
this ;)

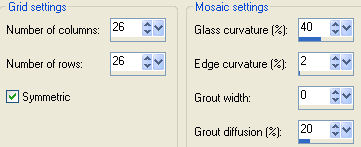
Effects / Texture Effects / Mosaic
Glass -
with these
settings
Activate your Eraser Tool - with these settings

Erase the edges of the glass effect
off.
It must only be in
your inner ring
Layers / Arrange / Move Down.
Your Layers Palette
should now look like this

Activate layer 4 ( highlight in
blue)
Open your
tube
Copy and Paste as
New Layer onto your canvas
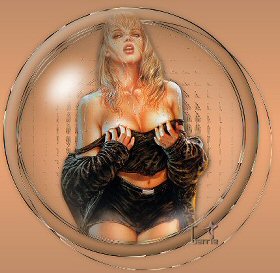
The rings will be over your tube -
as seen below

You can also reduce the size of your
tube if you prefer;)
I removed the parts outside the rings to
look as
though she is
standing behind the rings.
I used the Eraser
Tool again to do this -
with the same
settings
Make sure you are on
the right layer
when you do
this ;)
Activate your tube layer
Effects / 3D
Effects / Drop Shadow
with the Horizontal
and Vertical settings on 1.
Repeat
once.
The tube layers must
still be active
Open your globe-tube
Copy and Paste as
New Layer onto your canvas
Use your Deformation
Tool to fit it precisely over the ring.
See the example
below
Adjust / Hue and Saturation /
Colorize
Choose what compliments your tube the best and
apply

Effects / Plugins / Graphics Plus /
Cross Shadow - standard
Activate your Preset Shape Tool
again
Draw a new shape
X115 and Y100
Convert this layer again to a raster layer in your Layers
Palette
Apply the same drop
shadow as before
settings 1 / 1
/ 50 / 10
Layers / Duplicate
Image /
Flip
Layers / Duplicate
Position it in the center to the
right
Open the crown tube and colorize (Shift+L)
it
Position it on the small rings
Change the Opacity
of these crown layers as follows

Layers / Merge / Merge
All
ADDING THE TEXT
We're going to do the text now
Add a new layer
Lock your
background
Draw a circle
Activate your Preset Shape Tools
and choose the
Circle
Unlock your background again
Activate your Text
Tool and set it on "floating"
Click on the border
of the circle with your mouse
A small bow will appear below the text letter
"A"
Type your text.
It will move on the circle border as you
type
Effects / Plugins /
Lokal / Shadow - with these settings

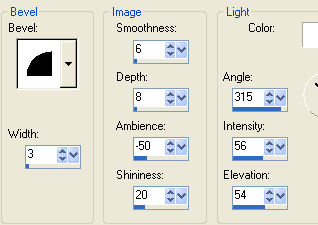
Effects / 3D Effects / Inner
Bevel - with these settings
Go to your Layers Palette and click on
the small
plus sign next to the Vector Layer
Click on the Ellipse layer when
it opens, and lock it ( X it )
Right-click on the vector layer
and convert it to a raster layer
Layers / Merge /
Merge Visible
Add a new raster layer
On your Color Palette: lock your
background
Draw another circle with the Preset Shapes Tool
Unlock your
background again
Click on the Pen Tool

Choose your Draw
Mode
Click inside your circle with your
right mouse button
Edit / Undo Vector
Selector
Activate your Text Tool again.
Place your cursor on the border of
the circle until the little bow
appears below the "A" again
Type your
text.
Repeat the Lokal
Shadow and the Inner Bevel effects.
Go to your Layer
Palette and click on the small plus
sign next to the vector layer.
Click on the Ellipse layer and
toggle the visibility off ( X it out)
Layers / Merge /
Merge All
Reduce the size of your image to 350 pixels
Add
a border of 20 pixels
Fill with your gradient
Effects / Texture
Effects / Mozaic Glass - with these settings

Reduce the image again, if you wish
and add your watermark;)
You have finished
another tag. I hope you enjoyed it again
Karen has tested
this lesson.

©Gerrie©
17-08-2004