|

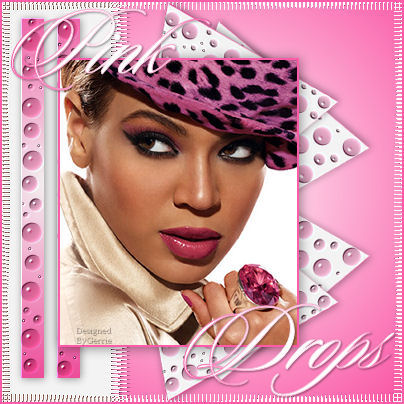
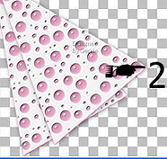
Pink Drops
Gerrie's
original Dutch tutorial can be found
here
MATERIALS NEEDED:
Supplies:
Download
here
Save the
selections in the Selection Folder of PSP.
The "GD Pinkdrops" must be
saved in the settings folder 'Waterdrops'
of
Eye Candy.
Filter:FM Tile
Tools
Filter:Eye Candy 4000
Download here
Open
a nice tube and resize it to 285 pixels in
height.
The
included tube's width will be 237 pixels
then.
It
was mirrored before use.
Choose the main
color as foreground.
The
color used in this tag is
#f94c9f
Change the background to white or any light
color you like.
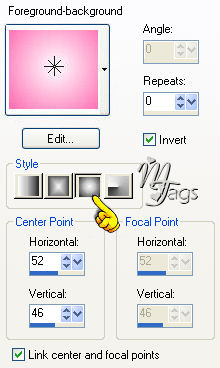
Make
a gradient with these settings:
Open a new transparent canvas, size 400 x
400 pixels.
Fill
with the gradient.
Layers / New Raster Layer.
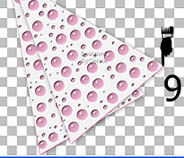
Selections / Load from Disk.
Find
the
'GD sel9'
Fill
with the gradient.
Selections
/ Modify / Contract by 1 pixel.
Fill
with the white, or your own ligth color.
Selections / Select None.
Layers / New Raster Layer.
Selections / Load from Disk.
Find
the 'GD sel9a'- selection.
Fill
with the gradient.
Repeat the 1 pixel - contraction and fill
with
the white or your light color again.
Selections / Select None.
Activate
( highlight in blue) Layer 2 in your Layers
Palette.
Effects / Filter Effects - Eye Candy 4000 /
Waterdrops.
Find
the 'GDPinkdrops'- option.
You
don't have to change anything, except the
color, as seen below.
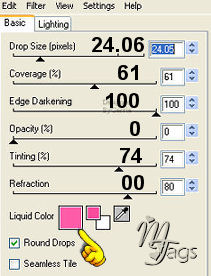
Click 'Ok'.
Effects /
Filter Effects / FM Tile Tools / Blend Emboss
- standard.
Effects / 3D Effects / Drop
Shadow,
with
these settings:
V
& H = 1
Opacity = 40
Blur
= 12.00
Color
= Black
Activate layer 3 in your
Layers Palette
and
repeat the entire step above from The FM
Tile Tools Effects to the drop shadow.
Layers
/ Arrange / Move Down
Layer
3 will be below layer 2 now.
Lock
the bottom layer in your Layers Palette.
Make
sure one of your other layers are active.
Layers/ Merge / Merge Visible.
Resize this merged layer to 92%
( 'all layers' should be unchecked)
Position it now where you want it as seen
below.
Layers / Duplicate.
Image
/ Mirror.
Layers / Arrange / Move Down
Unlock the bottom layer again and activate
it ( higjlight in blue)
Layers
/ New Raster Layer.
This layer will be just above
layer 1 now.
Selections / Load from Disk.
Find
the
"GDsel 8"-selection.
Fill
with white or your own light color.
Selections / Select None.
Effects /
3D Effects / Drop Shadow,
with
these settings:
V
& H = 2
Opacity = 58
Blur
= 5.00
Color
= Black
Effects / Distortion
Effects / Wave
with
these settings:

You can of course use a light color that
blends well with your tube.
Effects / Filter Effects /
FM Tile Tools/ Blend Emboss
- standard
Effects / Edge Effects /
Enhance.
Layers / New Raster Layer.
It
will be the third layer from the bottom.
Selections / Koad from Disk.
Find
the
"GDsel11"- selection.
Fill
with the gradient.
Selections / Select None.
Effects / Filter Effects / Eye Candy 4000 /
Waterdrops.
Apply
with the same settings as before.
Repeat
the same Blende Emboss effect on this layer
as well.
Effects / 3D Effects / Drop
Shadow, with these settings:
V
& H = 1
Opacity = 40
Blur
= 12
Color
= Black
Activate the top layer in
your Layers Palette.
Layers / New Raster Layer.
Selections / Load from Disk.
Find
the
"GDsel10"= selection.
This
selection is only an indication of the
tube's position
on
the canvas.
Alternatively you can just copy and paste
your
tube as a new layer.
Activate your tube again.
Add a
2 pixel border in a color of your choice.
Copy and paste it onto the
selection, but if it deforms
too
much, you can just copy and paste it as a
new layer
onto
the canvas.
Effects / 3D
Effects / Drop Shadow,
with
these settings:
V
& H = 1
Opacity = 45
Blur
= 45.00
Color
= Black
You are welcome to add some
text now.
The 'Sloopscript'- font, size
72, was used in this example tag.
The
following drop shadow can be applied:
V
& H = 1
Opacity = 40
Blur
= 3.00
Color
= Black
Layers' Merge / Merge All/
Add a
2 pixel border in a color of your choice.
Your
tag is finished ! :-)
©Gerrie© 02-10-2005
Back to Index
Translated by Maggie 15th January 2006

The
graphic design of this page is copyrighted to ©Magstags2005-2006
Home |
Filter Links |
PSP
Goodies |
|