|
Misty Dreams
Gerrie's
original Dutch tutorial can be
viewed
here
Download the supplies
here
The tubes and other images
were made by
Nadia and
Susan.
FILTERS NEEDED:
FM Tile Tools
Bordermania
Graphics Plus
Open the Kinza - image as
well as an image of your own
choice.
Choose a light and dark color
for the fore- and background.
Colors #e3bbcc (light) and
#66336a (dark)
were used in the tag example.
Change to gradient with these
settings: 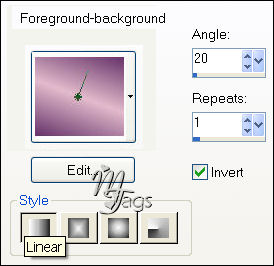
Open the dark color palette
and memorize the Hue and
Saturation values.
Go to Adjust - Hue and
Saturation - Colorise
and fill these values into the
pop-up screen.
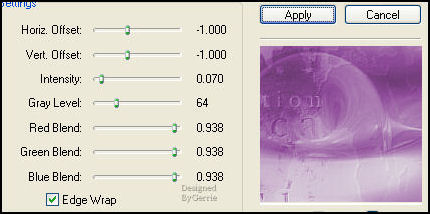
Effects --> Filter FM tile Tools
- Blend Emboss
with these settings:
Duplicate the image
and minimize for now.
Activate your tube again
If you use a jpg you can apply
the 20-20 Mask first.
Merge group in the Layers
palette.
Image - Resize: 230 pixels high.
Activate the Kinza image again.
Add a new raster layer.
Selections - Load/Save - Load
Selection from Disk.
Find the "GD sel60" -
selection and load.
Go to the image that you have
made.
Edit - Copy.
Edit - Paste into Selection.
Deselect.
Reduce the opacity of this layer
to 75%
in your Layers palette.
Layers - Merge - Merge All.
Activate the duplicated Kinza
image.
Edit - Copy.
Open a new transparent canvas,
size 400 x 400 pixels.
Fill with the dark color.
Effects - Filter Graphics Plus -
Cross Shadow: standard.
Edit - Paste as new layer.
This must be the Kinza image.
Reduce the opacity of the layer
to 26%
in the Layers palette.
Merge Layers.
Activate the image with your
tube on.
Use the Crop Tool to crop it to
400x400 pixels
as seen below.
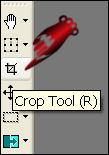 
You can see the measurement in
the bottom toolbar.
Edit - Copy.
Edit - Paste as new layer onto
the merged image.
Image - Resize: 80% / Bicubic /
'Resize All Layers' - unchecked!
Effects - 3D Effects - Drop
Shadow
with these settings: 1/ 1/ 35 /
1 / color black.
Repeat with -1 / -1 / 35 / 1
color black.
Layers - Duplicate.
Image - Resize 90%.
Duplicate the layer again.
Resize 90% again.
Layers - New Raster Layer.
Selections - Load/Save - Load
Selection From Disk.
Find the 'GD sel 63'-selection
and load.
Fill with the gradient.
Effects - Edge Effects -
Enhance.
Deselect.
Effects - Distortion Effects -
Wind: 100 to the left.
Click on the bottom layer in the
Layers palette
to activate it.
Add a new raster layer.
Load the selection 'susan24'.
Fill 3x with your gradient.
Effects - Edge Effects -
Enhance.
Deselect.
Image - Mirror.
Activate the top layer in the
Layers palette.
Add a new raster layer.
Activate the Brush Tool.
Find the "!!TBEEDREAM"- brush.
Set the foreground on the light
color.
Apply the brush 1x on the canvas
as seen below.
Set the layer opacity on 70% in
the Layers palette.
Merge all layers.
Effects - Filter Effects -
Bordermania - Frame 2
Top 2 slidebars on 4.
Deselect.
Selections - Select All.
Selections - Modify - Contract
by 1 pixel.
Selections - Invert.
Fill with the dark color.
And that's it! :-)
Have fun!
Back to
Index
Translated
20th May 2007

|