|
~*~ Glamour
~*~

Gerrie's
original Dutch tutorial can be
viewed
here
Download the supplies
here
This is a long tutorial :)
Save the 'Script LineGD'in your
PSP - Restricted Scripts folder.
Save the brushes in your PSP -
Brushes folder.
Save the Selections in your
PSP-Selections folder.
FILTERS NEEDED:
Alien Skin Splat Demo 1.0
FM Tile Tools
Find it
here
Open your image and resize it to
400 pixels - longest side.
Choose a dark en light color
from your image.
The colors #f1eee9 (light
foreground)
and
#040404 (dark background)
have been used in the tag
example.
Add a border: 2 pixels light
color.
Add a border: 2 pixels dark
color.
Add a border: 2 pixels light
color.
Reduce the image to 75%.
Open a new transparent canvas,
size 500 x 500 pixels.
Fill with the light color.
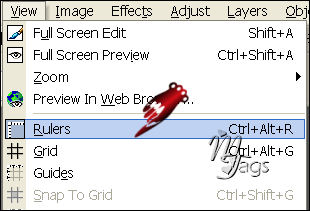
Activate the Rulers:
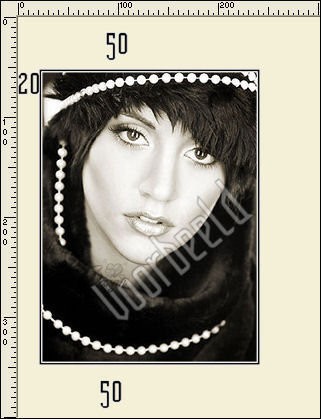
Edit - Copy your image.
Edit - Paste as a new layer onto
the canvas, BUT
position it as follows:
20 pixels from the left;
50 pixels from the top
50 pixels from the bottom
as seen below:
Add a new raster layer.
Selections - Load/Save - Load
Selection from Disk.
Find the 'GD-Cirkel14'-
selection and load.
Change the colors in the Color
palette around so that
the dark color is in the
foreground,
light color is background.
Make a gradient with these
settings:
Note: The Center - and Focal
points of the
sunburst gradient should all be
on 50.

Fill the cirkel with the color.
Deselect.
Effects -Filter Alien Skin Splat
Demo - Edges:
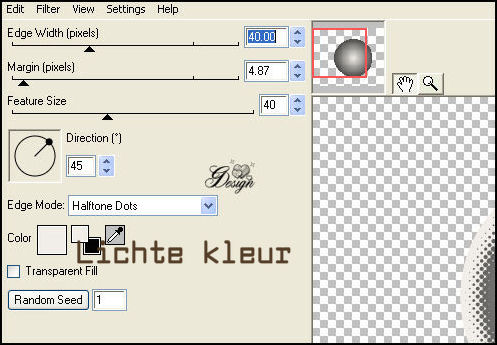
Effects - Filter FM Tile Tools -
Blend Emboss: standard.
Duplicate this layer twice.
Load the circel selection 'GD
Cirkel14ab'.
This is to position the circles
nicely.
Now move the two duplicated
layers
in the selection.

You can use the arrows on your
keyboard to do that.
Just click on the circle you
wish to move.
Deselect.
Set the layer opacity of all
three circles layers on 50%
in the Layers palette.
Click on each layer to activate
it first.
Drag both the circle layers
below your image layer
in the Layers palette.
Activate layer 3 in the Layers
palette.
That is the first circle.
Add a new raster layer.
Load the 'GD-Cirkel14a'-
selection.
Activate your first image with
the borders again.
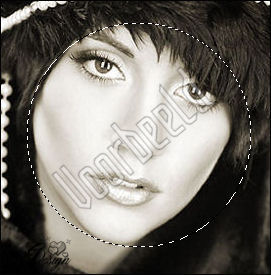
Use your Selection Tool (circle
preset) to select a
part of the image to copy.
The face was selected in the tag
example.
Edit - Copy.
Edit - Paste into the selection
on the canvas.
Set the layer opacity on 22% in
the Layers palette.
Deselect.
Effects - Texture Effects -
Blinds
with these settings:

Drag your image layer to the top
in the Layers palette.
Add a new raster layer.
Go to File - Script - Run.
Find the script 'Line'sGD' that
was provided
in the zip file and click on
'play'.

Duplicate this layer.
Image - Rotate - 90 degrees to
the left.
Move it to the left.

Apply a drop shadow: 1-1-25-1
color black
to both these layers.
Activate the image layer again.
Duplicate this layer and resize
2x to 75%, make sure
'Resize all layers' is not
checked.
Move it to the bottom right.
Duplicate this layer 1x.
Resize to 75% and drag it to the
top
as seen in the example below:

Use Layers - Arrange - Move Down
to
move these 2 layers to the
bottom.
The smallest image should be
moved 4x
and the other 3x.
This way they are below the
circle in the Layers palette.
Activate each of these 3 images
in the Layers palette
when your apply the following
drop shadow:
2 / 2 / 40 / 18 / color black to
each layer.
Activate the image layer again
in the Layer palette: it should
be raster 2.
Add a new layer.
Load the selection 'Joyce52a'.
Fill with your gradient with
these settings:
Note: set the opacity of the
gradient
by clicking on the 'edit' button
in the gradient window
as seen below:

Change the gradient opacity in
the window
that opens up - as seen below:

Click on 'close' and 'save'.
Apply the gradient 2 or 3x.
Deselect.
Duplicate this layer.
Image - Mirror.
Apply a drop shadow to both
layers:
1-1-25-1 color black.
Activate the top layer in the
Layers palette.
Add a new raster layer.
Activate the Brush Tool.
Find the '
"aRavenBrush!poem!childofdarkerskies"
- brush
Change the brush rotation to 90
degrees.
Apply it in your dark color 1x
next to the
smallest image on the canvas.
Find the ' "lyndiebrush304 007"-
brush.
Keep the settings unchanged
and apply it in your light color
in the circle.
Apply a drop shadow: 1-1-40-2
color black.
Merge all layers.
Effects - Bordermania Frame 2
- top 2 slidebars on 3.
Add your watermark and resize
it.
I hope you enjoyed the long
tutorial :)
Have fun!
Back to
Index
Translated
20th May 2007

|