Materials
needed:
Materials: Download
here
Font: Vlinder Download
here
Filter:Graphics Plus
Download
here
Open a new transparent
image 500 x 500
Open a tube of your choice,
or use mine, which I got from
Nadia's PSP Here
Choose two nice colors, not
too dark, from your image.
I used #E2EBC4
and #C9BBBA
Make a gradient with your colors
with these
settings
Style:
Radial
Horizontal and
Vertical: 65
Repeats:
7

Fill the canvas with the
gradient
Add a new Raster layer
Activate your Selection Tool and choose
the Rectangle.
Draw a long narrow
shape
Change the settings of your gradient as follows
Angle 90 Repeat 0 Style
Linear

Fill the bar with the
gradient
Effecs / 3D Effects / Drop Shadow with these
settings
0 / -10 / 50 / 5
Effects / 3D Effects /
Inner Bevel / Pillow- preset
Effects / 3D Effects / Buttonize with these
settings
4 / 55 / 95 transparency checked
Duplicate this
layer and drag it next to the original
Repeat it another 2x so that you have
4 bars
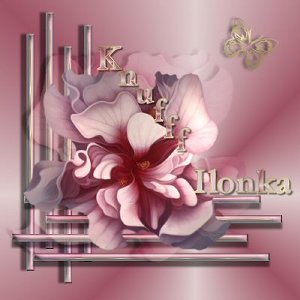
Don't place them all
in a row. See my example tag
Toggle the visibility of the
bottom layer off on your
Layers Palette and merge all
the other layers.
Duplicate this
layer
Image / Rotate 90 degrees
Position it where you want
it
Keep the bottom layer on Invisible
Merge the visible
layers
If you look carefully, you will notice fine stripes
in the center
of each bar
Hold your Shift key down and click
with your Magic Wand
on them

Set your foreground on the Gold
pattern and
fill these stripes
with it.
Deselect and
Sharpen
Open
your tube
Edit / Copy
and
Edit / Paste as New
Layer onto the canvas
Image /
Mirror
Place it in the corner on the bars
In your Layers
Palette: change the Blend Mode to "Soft Light"
Effects / Drop
Shadow with the same settings as before
Copy and paste your tube a
second time onto the canvas,
reduce the size bicubic to
85%,
repeat the drop shadow
and position it in
the corner
Effects /
Plugins / Graphics Plus / Cross Shadow
with the two bottom
slide bars on 55/85
Merge All Layers
Use your Crop Tool to
resize your image if you want to
I resized mine to
424x406
Effects / Buttonize with the same settings as
before
4/55/95 transparency checked
Add a new Raster layer
for your text
Choose a nice font. I used "Garamond"
Here is an example of my
Color Palette for my text

Add a 1 pixel border and fill it with
gold
I added a few butterflies with the Butterfly font and reduced the
Opacity of the butterflies a bit. You can do as you prefer
;)
Thanks, Ilonka, for testing this tutorial for me;)
©Gerrie© 15-02-2004