|

Grappa

I want to thank Noëlla
for allowing
me to translate this tutorial.
***
This tutorial was done inPSP8.
***
Materials needed:
Mask
Preset Shape
An image or
tube of your choice,
Download supplies
here
***
Ok, let's begin:
Open
a new canvas,
size
1024
x 400.
Choose a
light color for your
foreground,
and a dark color for
the background from
your image.
Fill the
canvas with the dark
color.
Go to Layers --> New
Raster Layer.
Fill this layer with
the light color.
Go to Layers -->
Load/Save Mask -->
Load Mask From Disk.
Find the
"speciaalno2" mask,
apply with these
settings:
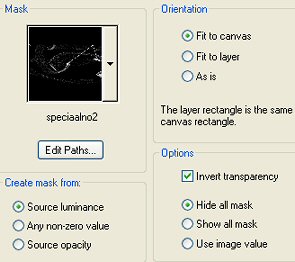
Delete the mask layer in in your Layer Palette
and reply "yes" to the question.
Go to Layers --> Merge --> Merge All
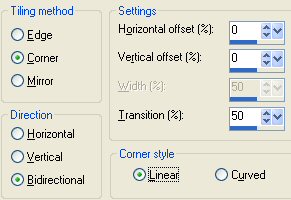
Go to Effects --> Image Effects --> Seamless Tiles
with these settings:
Go to your Preset Shape Tools and find the
"Angels valentine 2" shape.
Your foreground color should be light
and the background dark.
Draw the shape from the top left to
the bottom right of the canvas.
Deselect by activating the Mover Tool again.
Go to Layers --> Merge --> Merge All.
Activate your image again, duplicate it (Shift D)
and close the original.
Reduce the size to 300 pixels high.
Go to the Preset Shapes Tools, find the Hexagon Shape
and apply these settings:
( The Line Style is Solid)

Change the colors around in the Color Palette
so that the dark color is the foreground color
and the light color is now the background color.
Draw a shape from the top left to the
bottom right corners over the image.
Make sure you are on the vector layer in the Layers Palette!
Hold the Shift key on the keyboard down
and select the four corners
of the image (NOT the hexagon)with your Magic Wand.
You will have marching ants now around the hexagon.
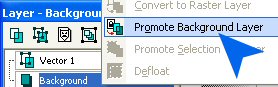
Go to your Layers Palette and promote
your background layer to
a raster layer.
Press the Delete key
and Deselect ( Shift +D)
In your Layers Palette:
Right-click on the Vector layer
and Convert to Raster layer.
Choose your Magic Wand and click inside
the image.
Hit the Delete Key while you're still on
the vector layer!!!
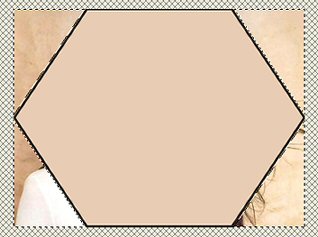
Merge all layers
Your image should now look like this:
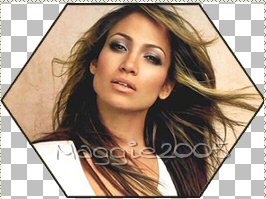
Copy your image and paste it as a
new layer onto your canvas
Position the image where you want it.
Go to your Layers Palette and change the
Blende Mode of this layer to " Multiply"
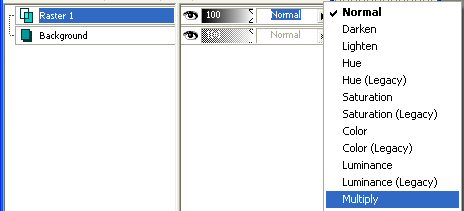
Merge All layers
Add a new raster layer.
Add your watermark or name.
Merge all layers, and you're done!
Enjoy!
©No2005

Translation was done 15
June 2005

©Magstags2005
Home |
Filter Links |
PSP Goodies
|