|

Demonia
A Translated tutorial from No

This
is a PSP9 tut and cannot be done in earlier versions
***
Materials
needed:
One tube ( from Yoka) size 400 pixels in height
Selections
Background
Download supplies here
***
Open a new canvas size 500x500 pixels.
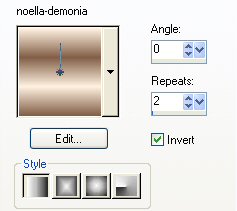
Choose a dark foreground color and a
light background color from your image.
Change the foreground color to Gradient,
with these settings:
Fill the canvas with the gradient.
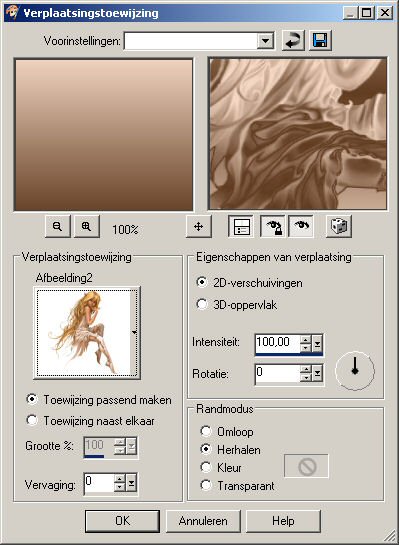
Go to Effects--> Distortion Effects-->
Displacement Map, with these settings:
(First find the image of your tube in the
Effects Window - see below)
English settings:
Stretch map to fit image - checked;
2D Offset - checked;
Blur = 0
Intensity: 100
Rotation = 0
Edge Mode=Repeat
Copy and Paste your tube onto the canvas.
Position it where you like it.
Go to your Layers Palette and change the
Blende Mode of this layer to
Luminance(O).
Go to Effects--> 3D Effects--> Drop
Shadow,
with these settings:

Go to Layers-->New Raster Layer.
Go to Selections--> Load/Save--> Load
Selection from Disk,
and apply sel no1.
Fill the selection with the gradient.
Apply a Drop Shadow with these settings:
Vertical and Horizontal: 2
Opacity: 50
Blur: 5
Color: Black.
Deselect.
Go to Selections-->Load/Save-->Load
Selection from Disk
Apply sel no2.
Apply the same drop shadow as before.
Apply sel3.
Fill with the gradient.
Repeat the same dorp shadow.
Go to Layers--> Merge--> Merge
Visible.
Reduce the size of the image to 400
pixels high.
Go to Adjust--> Sharpness--> Sharpen.
Go to Layers--> New Raster Layer
Apply your text in a nice font.
Merge All.
Go to Image-->Add Border
Add a 2 pixel border in your dark
color.
You're finished :-)
Enjoy!
©No2005


©Magstags2005
|