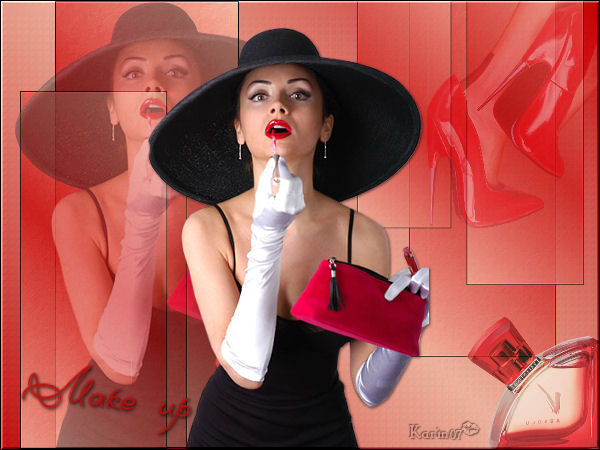
~*~ Make Up ~*~
Karins's original Dutch
tutorial can be viewed here
MATERIALS NEEDED:
Download the supplies here.
Save the selections in your PSP-selection
map.
Open the tubes in PSP.
FILTERS NEEDED:
L&K Landksiteofwonders :
Dijn
FM Tile Tools
Mehdi.
The Color Palette:
Foreground: dark red color
Background: a light color.
Make a gradient of the foreground color:
Style - Linear
Angle - 45
Repeats - 1
Invert - unchecked.
1. Open a new transparent canvas, size 600 x 450
pixels.
Fill the canvas with the gradient.
Effects - Filter Effects - L & K - Djin:
Slidebars on 40 / 30.
Effects - Filter Effects - FM Tile Tools - Blend
Emboss:
standard.
Layers - new raster layer.
Selections - Load/Save - Load Selection From Disk:
Find the selection 'makeup1' and apply.
Fill the selection with the gradient (with
'Invert' checked).
Effects - Filter Effects - Mehdi - Fur:
30 / 15.
Effects - Filter Effects - Border Mania: Instant
Button 2:
borderwidth - 2
Highlight Intensity - 79
Shadow Intensity - 192
Outline - checked.
Deselect (Ctrl+D).
Layers - Duplicate.
Image - Resize: 80.
Move the duplicate to the left, covering
a little of the bigger block.
Change the layer opacity to 80%
in the Layers palette.
Duplicate the layer again.
Change the layer opacity to 80%
in the Layers palette.
Move it to the right, covering
the bigger block again.
In the Layers palette:
Lock the bottom layer.
Activate one of the other layers
and merge layers visible.
Unlock the bottom layer.
Activate the merged layer.
Layers - Duplicate.
Image - Mirror.
Image - Flip.
Resize - 80%.
Change the layer opacity to 70%
in the Layers palette.
Open the tube 'Bighat'.
Copy and paste as a new layer onto the canvas.
Resize this layer 90%.
Position it precisely on the center block.
Change the layer opacity to 40%
in the Layers palette.
Paste the tube again onto the canvas.
Resize the layer 85%.
Erase the line next to the tube away.
Drag the lady to the center of the canvas -
against
the edge of the smaller block.
Effects - 3D Effects - Drop shadow:
1 / 1 / 60 / 4 / color black.
Open the tube 'Nik_mike small Metallic'.
Copy and paste as a new layer onto the canvas.
Image - Resize 40%.
Move it to the top right.
Change the Blend mode to 'Soft Light'
in the Layers palette.
Open the tube 'rw val. perfume'.
Copy and paste as a new layer onto the canvas.
Image - Mirror.
Image - Resize: 40%.
Place the flask in the bottom right corner.
Change the layer opacity to 80%
in the Layers palette.
Layers - Merge - Merge All.
Effects - Filter Effects - Border Mania: Instand
button2,
with the same settings as before.
Add your text or name.
Apply a drop shadow:
1 / 1 / 60 / 5 / color black.
Add your watermark
and you're done :)
Back to Index


Magstags |
Filter Links |
Email |