|
Screenworks
Sarah's original Dutch tutorial can be viewed
here.
MATERIALS NEEDED:
Download the supplies here
***
FILTERS NEEDED:
Screenworks
Xero
IC
Net Software's Filters Unlimited -
Sandflower
here (remember to import
it into Filters Unlimited)
Download the filters here
***
This tutorial cannot
be copied, linked, or translated
without Sarah's
permission.
Failure to comply
with this request will
result in the
contacting of the quilty person's
service provider.
So please respect
the copyright of the tutorial writers.
Also keep the
filenames intact of the images
should you wish to
share them elsehwere.
Elles wrote a beautiful script for this tutorial.
Example here.
Download the
supplies for Elle's script here.
***
Included in the zip
file is a small program which
enable the resizing
of images without distorting the images.
You will need this
registration
code to activate it:
emO1Lrtut-SkVrlrxmp
***
Safe the brush in
your Brushes Folder
or import it into
PSP.
Open all the images
in PSP.
Okay. let's begin
now ;-)
1. Open a new
transparent canvas, size
600 x 450px.
Flood fill with #808080.
2. Add a new raster
layer and floodfill with white.
3. Layers --
Load/Save Mask -- Load Mask from Disk.
Find ' sarahmasker3'.
Make sure these
options are checked:
'Source Luminance'
'Fit to canvas'
'Hide all mask'
4. Layers -- Merge
-- Merge Group.
5. Go to Effects --
3D Effects -- Drop Shadow
and apply with these settings:
1, 1, 100, 2.00,
color black
6. Go to Effects --
Filter Effects -- Screenworks -- Light Gause.
Apply.
Change the opacity
of this layer to 75%.
7.Open the face
tube.
Copy and paste as a
new layer onto the canvas.
Position it to the
right.
8.Repeat step 5.
9. Repeat step 6.
10. Merge all
layers.
12. Add a black
border.
13. Reduce the image
size to 85%
with 'Resize All
Layers' checked.
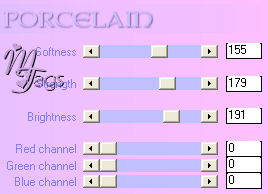
14. Go to Effects --
Filter Effects -- Xero Porcelain
and apply with these settings:
15. Go to Image --
Canvas size
and change the size
to 600 x 500px.
15. Select the white
part with your Magic Wand.
Flood fill with #acada8 .
16. Repeat the
Screenworks Ligh Gauze filter effect.
Selections -- Select
None.
17. Add a 2 px black
border.
Add a new raster
layer.
18. Activate your
Brush Tool.
Find the 'Rtekst
11'- brush.
Apply it in the top
corner with
white.
See the example.
19. Find the 'rtekst3'
- brush now.
Apply it to the
bottom of the canvas.
.
20. Apply Effects --
3D Effects -- Drop Shadow.
with these settings:
1,1,100,2.00, color
black
21. Merge all layer.
22. Duplicate this
layer.
23. Go to Effects --
Filter Effects -- Filters Unlimited --
-Sandflower- Color Atmospherizer
- default.
24. Reduce the
opacity of this layer to 30%.
25. Merge all
layers.
26.Resize your image
to 85%
with 'Resize all Layers' checked.
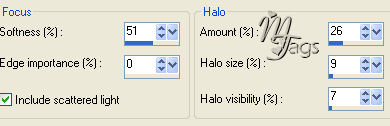
27. Adjust -- Soften
-- Soft Focus, apply twice (2x)
with these settings:
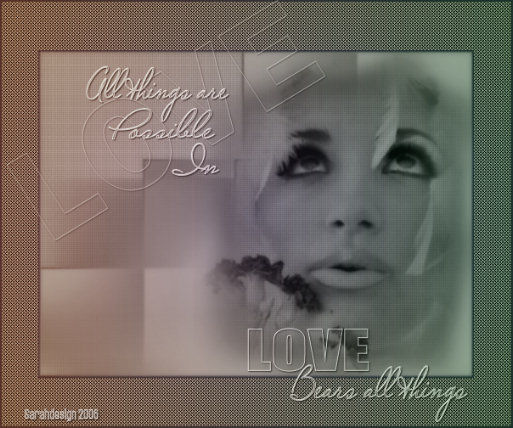
You're finished !!
:)
©Sarahdesign Januari 2006
Back to Index
Translated
6th March 2006.
The graphic design of this page is
copyrighted to ©Magstags2005-2008
Home | Filter Links |
Email |Terms
Of Use |
|