~*~ Jet ~*~
273

Jeannette's original Dutch tutorial can be found
here
***
Click on the example above to view the
working script
***
The images and tubes was made by Jet.
Save the brush 'Dromen2' in your brushes folder.
|
Here is the English translation of Jeannette's quote in the
brush 'dromen2.PspBrush' if you want to make your own
English
brush with it:
'All our dreams can come true
if we have the courage to believe in ourselves"
~Jeannette~
|
Download the supplies
here
***
FILTERS NEEDED:
Vizros4: here
Greg's Factory Output II
***
The Color palette:
Foreground color: #C39586
Background color: #75493B
Background on gradient:
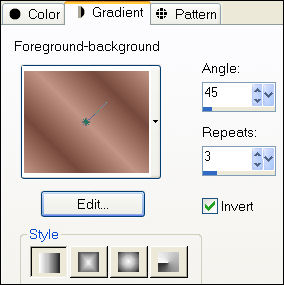
1. Open a new transparent canvas, size 700x500
and fill with the gradient.
2. Effects - Edge Effects - Enhance More.
Repeat 1x.
3. Selections - Select All.
Selections - Modify - Contract by 100.
Selections - Invert.
4. Image - Mirror.
5. Adjust - Blur - Radial Blur:

6. Effects - Edge Effects - Enhance more.
Repeat 1x.
7. Selections - Select None (Ctrl+D).
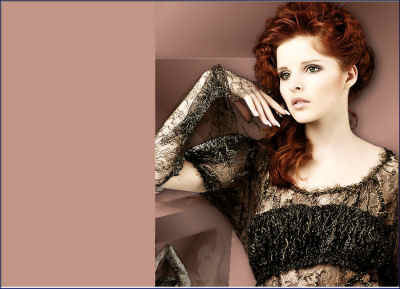
8. Open the lady tube.
Copy and paste as a new layer onto the canvas.
Position it against the right edge.
9. Effects - 3D Effects - Drop Shadow:
5 / 5 / 70 / 25.00.
Sharpen 1x.
10. Duplicate this layer in the Layers palette.
Image - Mirror.
Move the lady to the left - as seen in the example.
Drag this layer one position down in the Layers palette.
Change the layer opacity to 14%.
in the Layers palette.
11. Duplicate this canvas with Shift D.
Move the original canvas aside.
Don't merge the layers!!
12. We will work on the copy now.
Layers - Merge - Merge Visible.
13. Effects - Filter Effects - Vizros - Box:

14. Click with the Magic Wand in the
white area.
Selections - Invert.
15. Copy and paste onto your canvas.
Image - Mirror.
Move the box so that it is situated below
the lady's arm.
16. Activate your Selection Tool and
draw a rectangled selection at the right on the left side - as in
step 17.
17. Add a new layer and fill with the foreground color
as seen below:
18. Effects - Texture Effects - Blinds:

19. Effects - Distortion Effects - Warp:

20. Image - Mirror.
Move the blinds more to the left.
Selections - Select None.
21. Effects - Edge Effects - Enhance More.
22. Use the Eraser tool to remove the 3 bars
as seen below:

23. Change the Layer opacity to 30
in the Layers palette.
24. Layers - Duplicate.
Image - Mirror.
Move this layer down in the Layers palette.
25. Dulpicate the top layer.
Image - Rotate - Free Rotate: Right / 90.00:

26. Duplicate this layer.
Image - Mirror.
Move this layer a little bit to the bottom.
27. In the Layers palette: Move the blinds layer
to behind the girl.
28. If everything is arranged to your taste,
you can merge all the layers.
29. Add borders:
1 pixel - foreground color
3 pixels - background color
1 pixel - foreground color.
30. Add a new raster layer.
Activate the Brush tool
and find the 'Dromen2'- brush.
31. The brush size should be 350.
Apply 1x with the left mouse button.
32. Effects - 3D Effects - Drop Shadow: 1 1 70 1,00.
33. Effects - Filter Effects - Greg's Factory II - Poolshadow:
Standard.
34. Change the layer opcity to 88% in the Layers palette.
Layers - Merge - Merge Visible.
You're done! :)
You need 2 additional background tiles
if you want to use the script.
***
Have fun !!
Download the empty script here.
Back to Index

Home |
Filter Links |
Email| Terms Of Use |