You can buy blowgun darts from wherever you bought your blowgun. Trouble is, even the best ones aren't a very good choice for hunting.
Experienced blow gunners like Blowgunhunter and WindRush provide very good information on making your own darts. I used information from both of them and a little of my own experimenting to developing the method described here.
I make my darts with the assistance of a couple of homemade jigs. I developed these jigs in order to be able to "mass produce" my darts with consistent results. It reduces dart making time, thereby increasing your blow gun shooting time.
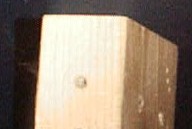
The first jig is used when I slot the end of the dart shaft for the blade. It is a simple 2x4 block, about 8-1/2" long. I drill a 3/16 hole as deeply as I can into the 4" width. My drill bit isn't long enough to go all the way through, but go as far as you can with your 3/16" bit.
Measure carefully, and drill from the other end with a larger diameter bit. I use 1/2". Drill only until you meet the 3/16" hole.
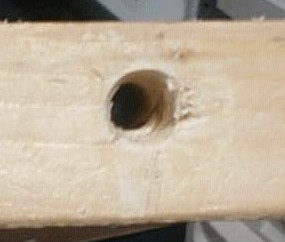
Being very careful to be at the exact center if the 3/16" hole, saw down the middle with your hobby saw blade, the full depth of the blade. Make sure to take your time, keeping the saw blade upright. I taped 2 pieces of a popsicle stick to keep my saw blade centered. This will be the guide for slotting the shaft, so take your time here.
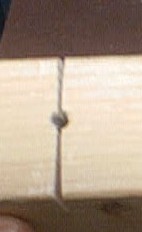
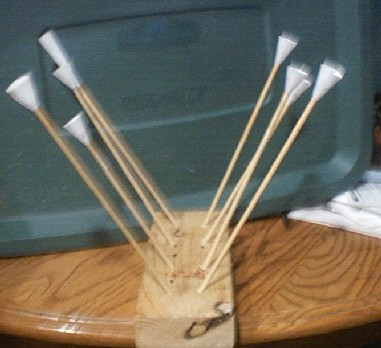
I also drilled angled 7/32" holes on one side that I use as a drying stand.
Another jig is simply the plastic dispensing cap for caulk, or silicone adhesive, with the wide, threaded end that goes on the tube removed. I use this for cone rolling.
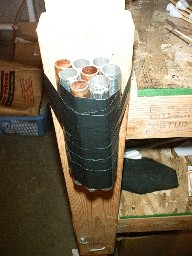
The last jig is my favorite. It is made from the 3 foot long section I had left over from my tube when I cut a 7 foot blowgun. I cut the 3 foot long section into six 6" long tubes. I then used epoxy to fix a washer with a 3/16" diameter hole to one end.
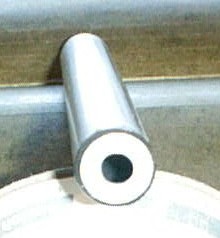
On one "Master tube", I finished the cut end just like I was making a blowgun, removing the lip created by the tubing cutter. I use this tube to measure and mark dart cones. The others, along with similar tubes from past projects, were then bundled together and taped to my workbench. This allows me to make 10 darts at once. The jigs also help make sure that the cones are trimmed and centered consistently. You have to try this!
OK... now you have your jigs... let's make some darts.
Start by taking a piece of regular paper about 2-1/4" x 4". I use some old hotel notepad paper cut in half. Roll it into a cone, using the plastic cap jig as a guide. Tape the cone to hold this shape. I usually roll a couple dozen at a time so I have them ready when I need them.
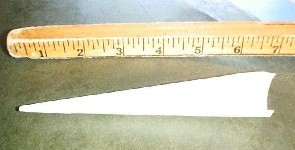
Note: This photo is of a cone made from a larger piece of paper.
Purchase some wooden dowel from your local hardware store. Others recommend 1/8" dowel, but I find that 3/16" works better for me. One reason is that 3/16" flexes less at impact, so I believe I get better penetration with it. Another reason is that the increased diameter allows more flexibility in broadhead design if you are interested in hunting.
Purchase a hobby type saw blade. I tried using a regular hacksaw blade but even the smallest I could find will not allow precision cuts required for these darts. I also tried a serrated knife, but it had a tendency to split the shaft no matter how lightly I sawed. The saw I bought is about 5" long and 3/4" deep and has 42 teeth per inch. It's made by Excel, model No. EXL 30440. It's supposed to be used with one of those "hobby knife" handles, but I don't have one and it works just fine. See my links page for some resources for blades.
Anyway, use your saw to cut your 3/16" dowel into five 9" pieces (assuming you got a 4 foot long dowel like I get). Once I have my dowel cut, I push a section down into each cone and twist it lightly. This will make an impression on the cone. Cut the tip of the cone off just below this impression (towards the tip).
Next, if I'm making hunting broadheads, I put the dart shafts in the slotting jig, going from the 1/2" hole into the 3/16" hole. It will be a tight fit, but that's what you want, to hold the shaft secure during sawing. Saw down the entire depth of the saw blade. Then rotate the shaft 90 degrees and make another slot, again the full depth of the saw blade. These cuts become very easy with a little practice. Once I've cut all the shafts I'm working with, I gently run the slotted ends in a pencil sharpener until they look aerodynamic.
Pass the slotted end of the shaft into the cone. You should still have to force it through the cone a bit. Once you've passed about 7 inches of the dart through the cone, place the piece in to the Master dart jig. Slowly pull the shaft through the jig until you barely have the end inside the cone. At this point, the jig should have the cone centered on the shaft perfectly. I drop a couple drops of super glue into the cone, onto the exposed shaft to fix them together. I wait a second or so, then remove the dart from the jig and verify that the cone is on straight ,then the dart goes into one of the secondary jigs while I do the other shafts.
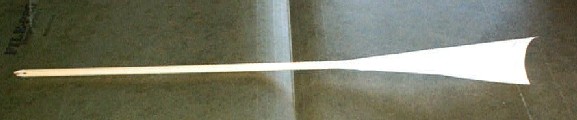
Note the slotted tip.
Next, it's back to the Master jig one at a time. With the shaft through the washer, I trace the cone using the jig for a guide.
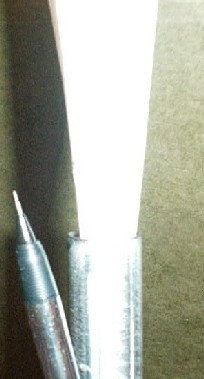
Then I remove the dart from the jig and trim the cone along the traced line. This is not my final trimming, so I'm a little generous with the cut.
Once the cone is trimmed, I saturate it with super glue and return it to a secondary jig to dry. I have done some testing of spray painting the cone with clear enamel instead of super gluing it, and it has worked well.
Once the super glued cone has dried, I remove it from the jig, sometimes using a light blow from a hammer on the shaft tip if it's stuck, and proceed to the final trim. I take each cone and test fit it in the Master jig. I trim off very small increments until the dart slides easily in the tube while still making a seal. When I'm confident that the cone is trimmed, it gets a ceremonial first fire from the jig.
OK, so now I have about ten or so darts with trimmed cones and "cross slotted" shafts. Incidentally, If you're making target darts, skip the slotting procedure, and just coat the tip with epoxy at this point. The epoxy will strengthen the shaft tip, and add weight to more accurately reflect broadhead flight.
I make my broadhead using 3 hobby knife blades, a single #2 and two #11's. I trim the #2 blade in a similar fashion described by WindRush, into a standard arrowhead. The two #11's get cut as shown in the photo with a high speed rotary tool. A tip here is to cut a number of blades at once because there will be minor variations between the cut blades. If you cut a lot of them, you can select matching pairs from your stock.
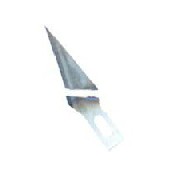
A cut #11 blade
First, I center the #2 blade in a slot on the shaft. Once I'm convinced that the blade is centered, I tack it in place with a drop of super glue.
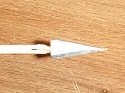
Then I take one of the #11 pieces, and place it in an available slot, razor side out.
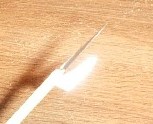
#11 blade being attached
I work it into the slot until the factor straight side is flush with the #2 blade already in place. It's really not very hard. Tack it in with super glue too.

#11 blade in place
Do the same thing with the other #11 blade on the other side. Now take a close look at the broadhead... are the #11's similarly spaced from the tip? Are the #11's straight? Are the #11's flush with the #2? If you are satisfied, use epoxy to bond the assembly in place. I use a trimmed popsicle stick to work the epoxy into the slots, and along the portion of the #11's that meet with the #2. I also go up the shaft about an inch. Now let it dry.

Both #11 blades in place
When the epoxy is half cured, I'll remove any excess from the blade area, especially from the sharp edges.
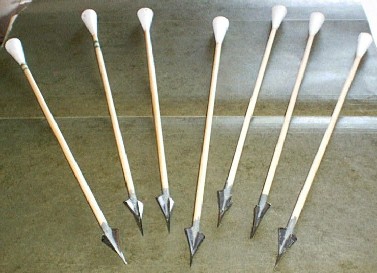
Now we're ready to go!
I'll also take the time to paint my hunting darts a bright color (currently fluorescent pink) and I now put a couple of 1/8" x 1/2" piece of reflective tape INSIDE the dart cone. This will help you find your darts in day and night time conditions.
Back to main page Go to Blowgun Page
 page hits.