
Shrines | Character stats | Codes | Quests(single player)
Shrines | Character stats | Codes | Quests(single player)
| Mysterious | +5 to one random stat -1 to others |
| Hidden | +10 durability to all items -10 to one |
| Gloomy | +2 AC to shield,armour & helm -1 to all weapons damage |
| Weird | +1 to all weapons max damage |
| Magical | Gives mana shield |
| Stone | Recharges all staves |
| Religious | repairs all weapon durability |
| Enchanted | One spell -1 lvl all others +1 lvl |
| Thaumaturgic | All chests regenerate with new items |
| Fascinating | Firebolt +2 but -1/10 mana |
| Cryptic | Full mana & casts Nova |
| Eldritch | Life and Mana potions become Rejuvination |
| Eerie | +2 to magic |
| Divine | full life & mana +2 rejuv or 1 life & 1 mana |
| Holy | Teleports to another place on lvl |
| Sacred | Charged Bolt +2 but -1/10 mana |
| Spiritual | Fills inventory with gold |
| Spooky | Full Rejuvination & potions for other players |
| Abandoned | +2 to Dexterity |
| Creepy | +2 to strength |
| Quiet | +2 to vitality |
| Secluded | Completes map |
| Ornate | Holy Bolt +2 but -1/10 mana |
| Glimmering | All items indentified |
| Tainted | All other players +1-3 random stats -1 to others |
| Group 1 | Group 2 | Group 3 | Group 4 | Group 5 | Always Included |
| Level 2 | Level 2 | Level 5(a) | Level 8 | Level 13 | Chamber of Bone |
| Level 3 | Level 4(a) | Level 5(b) | Level 9 | Level 14 | Archbishop Lazarus |
| Level 4(b) | Level 7 | Level 10 | Diablo |
The Curse
of King Leoric - level 3
The Butcher
- level 2
Ogden's Sign - level 4
Gharbad the
Weak - level 4
The Magic Rock - level 5
Armour of
Valor - level 5
The Halls
of the Blind - level 7
Zhar the Mad
The Black Mushroom
- level 9
The Anvil of Fury - level 10
The Warlord of Blood - level 13
Lachdanan -
level 14
The Chamber
of Bone
Archbishop
Lazarus
Diablo
Trigger character:Ogden
the Taver Owner
Ogden tells you the story of King Leoric who, years ago, lost his son to kidnappers.His
grief drove him insane and his armies and priest were forced to destroy him. He
has now risen from the dead and rules an army of undead minions within the labryrinth.
'Please good master, put his soul at ease by destroying his now cursed form.'
Ogden pleads.
You will need plenty of life and mana to finish off Leoric and a club or an axe
to quickly destroy his skeletons. Goto lvl3 and locate the passage to Leoric's
Tomb. Enter and find yourself on a small level packed with skeletons. Leoric creates
them as you kill them. Kill Leoric and the remaining skeletons and you will receive
the Skeleton Crown.
Destroy each of the crucified skeletons in the corners of the big room and a door
opens in the middle of the long wall. Inside are more monsters and treasures.
Trigger character:Dying
Townsman at church entrance
You wil find the butcher in a large room on level 2. Make sure you clear the level
before you open the butcher's room. He will rush outside when you open his door
and the simplest trick to killing him is to locate a room with a trellis wall.
Run into the room (shutting the door behind you) and shoot at him through the
trellis (a bow is necessary for this lvl). Depending on the character you are
playing this may take a while but eventually he will fall, dropping the Butchers
Cleaver as your reward.
Trigger character:Ogden
the Taver Owner
The demons ahave stolen the sign to Ogden's Tavern and it's up to you to get it
back.
You have to claim the sign before Snotspill will let you advance to the 5th lvl.
Snotspill waits in a set piece on lvl 4, between you and the staircase to lvl
5. The sign is in the large chest in the same small area as snotspill. Several
monsters stand between you and the prize. When you have killed the monsters and
claimed the sign you have two choices. You can either hand it over to snotspill,
or you can return it to Ogden.
Return the sign to Ogden and he will give you the Harlequin Crest. Return to lvl
4 and destroy the fallen ones who are waiting for you. Finally kill Snotspill
and he will drop a magical item (usually a weapon of some sort).
Trigger character:Gharbad
- A Flesh Clan Demon
The first time you come across Gharbad he pleads for his life.
The second time he promises he is making something for you and gives you a token
of good faith.
The third time still more promises and he tells you he is almost done.
On your fourth encounter he decides his prize is too good for you and attacks.
Killing Gharbad shouldn't be too difficult, when he falls he will drop a mace
for you to add to your inventory.
Trigger character:Griswold
the Blacksmith
Griswold tells you of a sky rock that a caravan brought into the town. Cloaked
riders attacked the caravan and stole the rock hiding it beneath the town.
Down on lvl 5 in no particular place you will find the rock sitting on a small
table, take it to Griswold and he will break the rock into small stones and set
them into the Empyrean Band. This is your reward.
Trigger character:The
Book of Blood
When you find the book of blood ,pass through the book's room and into the next
to locate the Altar of Blood. The first of the Blood stones should be on the ground
nearby. Plug it into the altar and look at the map. A door should have appeared
in a wall very near to were you stand. In the room horned demons and another blood
stone await you. The stone when set into the pedestal opens a similar room on
the opposite side. When all three stones are set into the Altar of Blood a final
chamber opens. Here you will battle more horned demons for the prize - Arkaine's
Valor.
Trigger character:The
Book of the Blind
You will probably come across the halls of the blind before you can open them
(a large figure 8 shaped hall with two small rooms.) Once you have read the book
two doorways open on either side allowing you to peek into what looks like an
empty area. The area is in fact crawling with Illusion Weavers, if you stand in
the doorway they won't be able to pass you and get in the hall to surround you.
Pick the weavers off until all are dead and progress to the small central rooms.
More Weavers wait in these rooms, kill them and in one of the rooms you will find
the Optic Amulet.
Trigger character:Zhar
The first time you meet Zhar he will be in a library, he will give you a spellbook
and tell you to get lost. If you don't take the hint and leave then Zhar attacks,
he doesn't give chase but prefers to wait for you to peek into his room then throws
fireballs at you. If you are playing the warrior, whenever you rush to attack
him he will teleport away from you. Watch the floor for the tell tale signs of
were he is going. If you have a decent ranged attack then use it. You will need
plenty of healing potions to go up against Zhar.
Trigger character:The
Fungal Tome
Down on lvl 9 encountering the Fungal Tomb signals the beginning of the quest.
Take it to Adria, who will tell you she now needs a large Black Mushroom to complete
a potion she is brewing.
The mushroom patch can be located on lvl 9. Take the mushroom back to Adria who
mentions that Pepin needs a demon brain to complete an elixir. If you go and talk
to Pepin about the Black Mushroom he confirms this. When you return to the dungeon
the next monster you kill drops a brain. Take this to Pepin who will give you
a small sample of elixir which he asks you to take to Adria. The witch complains
that you have arrived to late with the sample and that she no longer needs it
and tells you to keep it.
The Special Elixir adds two points to all attributes.
Trigger character:Griswold
the Blacksmith
While on lvl 9 visit Griswold and he will tell you of a mystical Anvil that contains
'the essence of the demon underworld'. He tells you he can make you a powerful
weapon if you could find him this anvil.
You will find the anvil on lvl 10 sitting on a small island in the lava. To claim
the anvil clear the dungeon first (this can take a while and eat quite a bit of
life). Proceed with caution when you finally make your way to the prize.
Take the Anvil back to Griswold and he will use it to make the Griswold's Edge
blade.
Trigger character:The
Steel Tome
Once you have come across the Steel Tome pay a visit to Cain who tells you of
a legendary warrior 'The Warlord of Blood'.
After you ahve read the book the stairway between lvl 13 and 14 becomes accessible
and the Warlord prepares to slaughter you.
Try to clear the level before you draw him out especially the immediate area around
his room.
If you lead the Warlord away from his room you can escape him and go back to his
room, here you will find his treasures. Head back to town, buy and sell and stock
up on life, then come back down to face the Warlord. If you have stone curse now
is a good time to use it. Cast the spell then run in for a couple of hits, make
sure you are well clear before the spell wears off. Carry on doing this until
he finally falls, dropping another decent piece of weaponry.
Trigger character:Lachdanan
You will find Lachdanan trapped on lvl 14 he tells you he was once captain of
King Leoric's knights, but later succumbed to the mad king's curse. He hasn't
yet submitted to the darkness but is fading fast. He tells you of a 'Golden Elixir
that could lift the curse and allow his soul to rest.'
The Golden Elixir lies a level lower in the dungeon in the same room with the
pentagram on the floor. Return to Lachdanan with the elixir and he rewards you
with his helm The Veil of Steel and another random magical item when he dies.
Trigger character:A
Book
A mysterious book you find on lvl 6 opens the way to a secret staircase, leading
to the Chamber of Bone . The Chamber is a small seperate level with two hallways
either side of a central chamber, at the end of each hallway are two large switches.
These are protected by Horned Demons, Unseen and the occasional skeleton. The
switches open two other rooms with more skeletons and two chests filled with treasure.
When you open the central chamber, be warned the room is filled with skeletons,
try not to let them escape and pick them off one by one at the doorway. When you
have finished off the skeletons enter the room were you will find more Horned
Demons and Unseen. Finally read the nearby book to gain the Guardian Spell.
Trigger character:The
Staff of Lazarus
On lvl 15 in the room with the penatagram on the floor you will come across the
Vile Stand, on this rests The Staff of Lazarus. Take the staff back to town and
show it to Cain, he then fills you in on the rest of the Diablo story, and sends
you back to the depths to confront the Vile Betrayer.
Back in the pentagram room a red prtal appears, when you go through the portal
you end up in a small U-shaped dungeon. There are two large cages of snow witches
and a couple of advocates. To enter the witches cages stand on the circular areas
near the the books in the nearby rooms, when you read a book you automatically
teleport to the nearest cage.
Before reading a book make sure all the doors are closed again so the witches
can't escape.
When you have finished off all the monsters stand on the ornate circle and you
will teleport to Lazarus's chamber.
While Lazarus talks you can't attack or be attacked, but you can run away!
Run away and hide around a corner, when he finishes return and the monsters while
follow you down a hallway, this makes the battle much easier for you.
When you have killed his followers you have to return to the large room to confront
Lazarus. (hopefully you will have stone curse to aid your fight). If you are the
rogue rush at him forcing him to teleport then target the area were he will rematerialize
(watch the floor for the tell tale signs.)
If you are the warrior do the same and follow him as he teleports, give him a
good hit when he materialises and be ready to heal yourself. Lazarus and his minions
drop some serious treasure giving you a good load of stuff before meeting Diablo!
Trigger character:End
of Game
When you have killed Lazarus another red portal appears taking you back to lvl
15. The pentagram will now be glowing move to the centre of it to go to lvl 16.
Level 16 is made up of four quadrants, the first is guarded by Advocates and Blood
Knights, it is an open area with plenty of monsters so don't rush in, a switch
on the floor opens the second quadrant. A switch in there opens the third and
two switches in the third open the final section of the dungeon.
It is easiest to circle the three sealed quadrants first clearing the hallways
of Blood Knights and Advocates, try using Flame wave or Wall of Fire against the
Blood Knights. The first and third quadrants are the most difficult with everyone
noticing you at once, a scroll of apocalypse or two will come in very useful at
this point. The advocates prefer to stay in their quadrants, but if you move in
and out of the doorways they will eventually begin teleporting out of the rooms
a couple at a time. Try and kill as many as possible this way to reduce the numbers
for when you have to enter the rooms. Plenty of Healing potions are going to be
needed to complete this level.
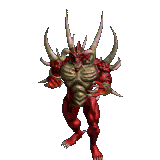
When you have cleared the third quadrant throw the switches to open Diablo's lair.
Diablo is immune to some spells and he throws fireballs that affect your armour
durability, if you are a sorceror it is a matter of trial and error to find what
hurts him and what doesn't, if you are a rogue keep your distance and shoot arrows
at him from a distance healing when necessary. If you are a Warrior and you've
done a good enough job of collecting armour, you will be able to stand toe-to-toe
with Diablo, keep hacking and healing and he is Toast!
|
|
|
|