|
Images
If you take a look around the web, there is one thing that exists on virtually every site. Pictures. One of the best things about pictures is that they are really easy to put on a page.
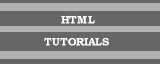
First of all, right click the mouse, and save this picture to your internet filespace:

Now that you have the picture saved, you will need to use this tag: <img>. This is an image tag. The image requires a source, which is the name of the file the picture is stored in. For this picture, the tag to put the picture on screen would be:
<img src="tutorial.gif">
There are many extra attributes that can be added into the <img> tag. Borders can be put round the picture, the width and height can be specified, and you can use the "alt" attribute to cause text to appear over the picture when the mouse is kept still on the picture, for example:
By putting <img src="tutorial.gif" border=4 width=100 height=70 alt="text description here"> you can generate the following:
- Try altering the height and width to see what happens.
- Change the words "text description here" to a suitable alternative.
- The border width is the number of pixels. border=1 is small, border=10 is big
- If you have more pictures, try changing the source so that your own picture appears
In a previous tutorial, the tag to change the background colour of a page was discussed. There is a variation of that to make the background into a picture. It is often avoided as loading times are increased, but small tiled backgrounds are sometimes used (loading 10 versions of an identical picture takes the same amount of time as loading only 1). To achieve this, choose an image, similar to the one above, and then alter the body tag as follows:
<body background="tutorial.gif">
This would make the page have a background formed from the picture already shown above. It would be tiled to fill the whole page.
Now that you are able to make some nice pages, how about linking them together? Move onto the next tutorial.
|