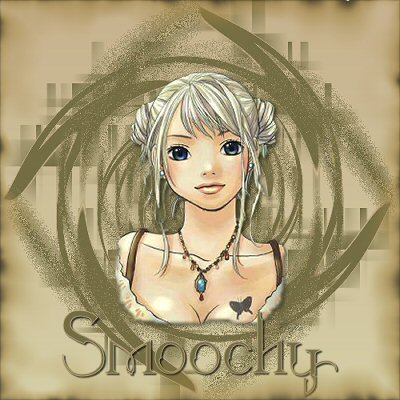
Open a new image 500x500
and name this layer #1, open
your tube and use your
dropper to select two
colors, one light for your
foreground and a dark for
your background. For this I
used #D5CEA5 and #C6B18D.
Select your foreground and
background gradient, angle 0
and repeats 0 Invert
unchecked and flood layer
#1. Use your dropper tool
and select two colors again
from your image, again a
lighter for your foreground
and a darker for your
background. I used #B8A57F
and #746D43. Copy your tube
and paste as a new layer and
resize 80%, all layers
unchecked. Rename this layer
Tube.
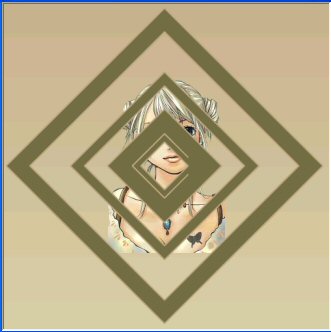
Find your diamond
preset shape, and make it
large enough to fill the
canvas, see image below:
Rename your diamond layer
to #2. Go to Effects/
Distortion Effects/ Twirl.
Set to 720 degrees and hit
ok. Duplicate this layer and
rename it #3. Duplicate
layer #3 and rename it #4.
On Layer #2, go to
Effects/ Plug ins/ Toadies/
Weaver And apply these
settings, Cell Width: 23,
Cell Height: 27 Cell Edges
on/off: 222.
Go to layer #4, Image,
Mirror, and Effects/ Plug
ins/ Toadies/ Blast ‘n
Blur and apply these
settings: x-Effect 0,
y-Effect 23.
Move your tube
layer to the top of your
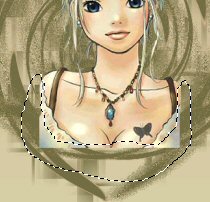
layer palette. Take your
free hand selection tooland draw around the
square edges of her body, we
will need to soften this a
bit. See image below:
Go to Selections/ Modify/
Feather/ 5 pixels. Hit
delete on your keyboard, if
you think it is not enough,
hit delete again.
Go to effects/ 3D
effects/ Drop shadow and
apply these settings:
Vertical and Horizontal:
2
Opacity 70
Blur: 6.62
Color: Black
Choose your
RaptureHeavenly Font,
Depending on the size of
your name, size 72. Keep the
same colors as before.
Convert to Raster or Promote
selection to layer/
Selections/ Select none.
Move your text near the
bottom, apply the same drop
shadow as before, but change
the Blur to 2.00. Add your
water mark.
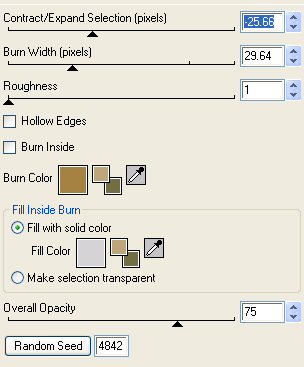
Go to Layers/ Merge/
Merge Visible. Go to
Effects/ Plug ins/ Xenofex
2/ Burnt Edges and apply
these settings:
Resize your image
to about 80% or smaller,
depending on how large you
want it and save as a JPG.
Hope you enjoyed this
tutorial. If you have any
questions or comments,
please ask and I will be
happy to answer.
No
direct linking to this
tutorial without permission
from the owner/writer.
No copying this tutorial
without permission from the
owner/writer. This
tutorial was written by
Smoochy October 2004.
Tutorial is all from her
own imagination and psp
experience. Any
resemblance to this tutorial
with other tutorials is purely
coincidental.