|

Tube and
pre-set shape here.
Plug-ins
Needed:
Graphics
Plus / V.M.
Toolbox
Open a new raster layer
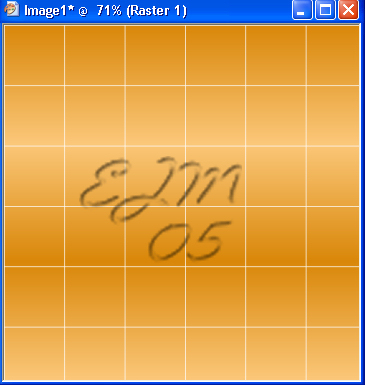
500x500, open your tube and choose two colors
from your tube one light and one dark. Select
your foreground/background gradient (angle 0,
repeats 2) and flood fill your canvas. Go to
Effects/Plug ins/VM Toolbox/Grid and apply these
settings: Grid settings 87 all other settings
factory default or a setting that you are happy
with. Your image should look a bit like this:
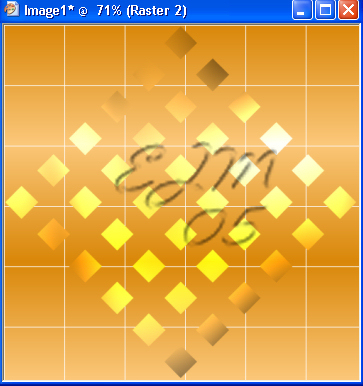
Select your gerruitvorm
pre-set shape and make sure that your foreground
and background fill are on foreground/background
gradient. Start at the top left hand corner and
drag it to the bottom right had corner. You may
need to adjust if the pattern goes off the
canvas. Convert your pre-set shape to raster
layer, go to effects/plug ins/ Graphics Plus/
Cross Shadow, hit ok. Your image should look
something like this:
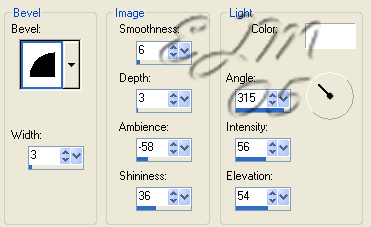
Apply a drop shadow to your
grid pattern, you can either use your favorite
drop shadow or use PSP’s drop shadow which is
the one I used with these settings: Vertical 2,
Horizontal –2, Opacity 100, Blur 20.00, Color
black. Hit ok.
Layers/Merge/Visible.
Image/Add borders, you want a border width of
20, symmetric and color white. Select your magic
wand, tolerance 10 and click on the white
border. It will bring the marching ants into
your grid but that’s ok, you want that to
happen. Select your gradient, but invert it this
time (Either check or uncheck the box) flood
fill the border. Apply the Graphics Plus/Cross
Shadow effect again. Then apply a bevel setting:
Selections/Select None.
Promote background to layer, resize image 80%,
all layers unchecked.
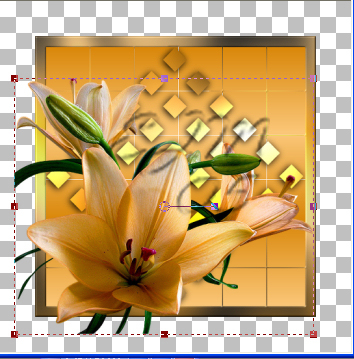
Copy your tube and paste it
on our canvas, you will need to resize it to fit
your image, 80% will do, and you want some of
the petals to hang over the edge. It should look
like this:
Take your eraser tool and
erase the extra leaves but not the petals that
hang over the edge. Apply a drop shadow to the
flower, use the same settings as before.
Next you will need to apply your text. I used Dr.
Carbfred but you can use any kind of font you
like. Keep your foreground and background on the
gradient and apply your text. Apply the Graphic
Plus/Cross Shadow effect again. Apply drop
shadow, this time change the blur to 2.00. Add
your water mark, resize and crop and your
finished! If you have any questions on this
tutorial please email me at [email protected]
Web Set ©
SmoochyGraphics 2005.
© April
2005 by SmoochyGraphics
No
direct linking to this tutorial
without permission from the
owner/writer. No copying
this tutorial without permission
from the owner/writer.
This tutorial was written by
Smoochy April 2005.
Tutorial is all from her
own imagination and psp
experience. Any
resemblance to this tutorial
with other tutorials is purely
coincidental.
|